
DigitalGenius MCP Server
Manage DigitalGenius directly from Claude, Gemini, or any MCP compatible client
Overview
The MCP Server connects your AI assistant directly to DigitalGenius via the Model Context Protocol (MCP) - an open standard for connecting AI assistants to external data and tools.
Instead of jumping between dashboards and browser tabs, you can now inspect executions, debug flows and query analytics using plain English from the likes of Claude and ChatGPT.
What You Can Do
| Capability | Description |
|---|---|
| Analyse performance | Pull flow-level analytics to understand performance, identify bottlenecks, and track improvement over time. |
| Debugging Flows | Read full flow schemas, trace sub-flow hierarchies, and check execution logs - all without leaving your AI assistant. |
| Conversations & Tickets | View and analyse conversation transcripts and messages, and search tickets to understand what customers experienced end-to-end. |
| Configuration Audit | Inspect global variables, connections, chat widgets, and full account config in one place. Quickly answer “How is this set up?” without opening the dashboard |
Example Prompts
Quality & improvement analysis
- Do a breakdown of CSAT per intent. Follow-up: Sample some tickets with bad CSAT for "Where is my order". what are the issues the customers are facing?
- Analyse conversations where "faq = true" and "chat is passed to agent = true". I am trying to understand what questions are being asked that the faqs can't answer.
Ticket & execution debugging
- Ticket 12345 got a wrong response. What happened?
- Give me the conversation transcript and flow trail for ticket 90412. The customer says the bot gave a wrong answer.
- Pull the full nested flow tree for execution abc-123 - I need to see where it branched.
Flow health & failures
- Show me all failed executions for flow X in the last 24 hours.
- What is wrong with this flow?
Analytics & trends
- What were the top 10 predicted intents last month?
- Compare ticket volume week-over-week for the last 8 weeks, broken down by brand.
How It Works
- You send a natural-language message to your AI assistant (e.g. Claude).
- The AI identifies the appropriate MCP tool(s) to call based on your intent.
- The MCP server authenticates the request and queries DigitalGenius APIs on your behalf.
- Results are returned to the AI, which synthesises a clear, human-readable answer for you.
Getting Started
Installing the MCP is straightforward and should only take a few minutes.
Prerequisites
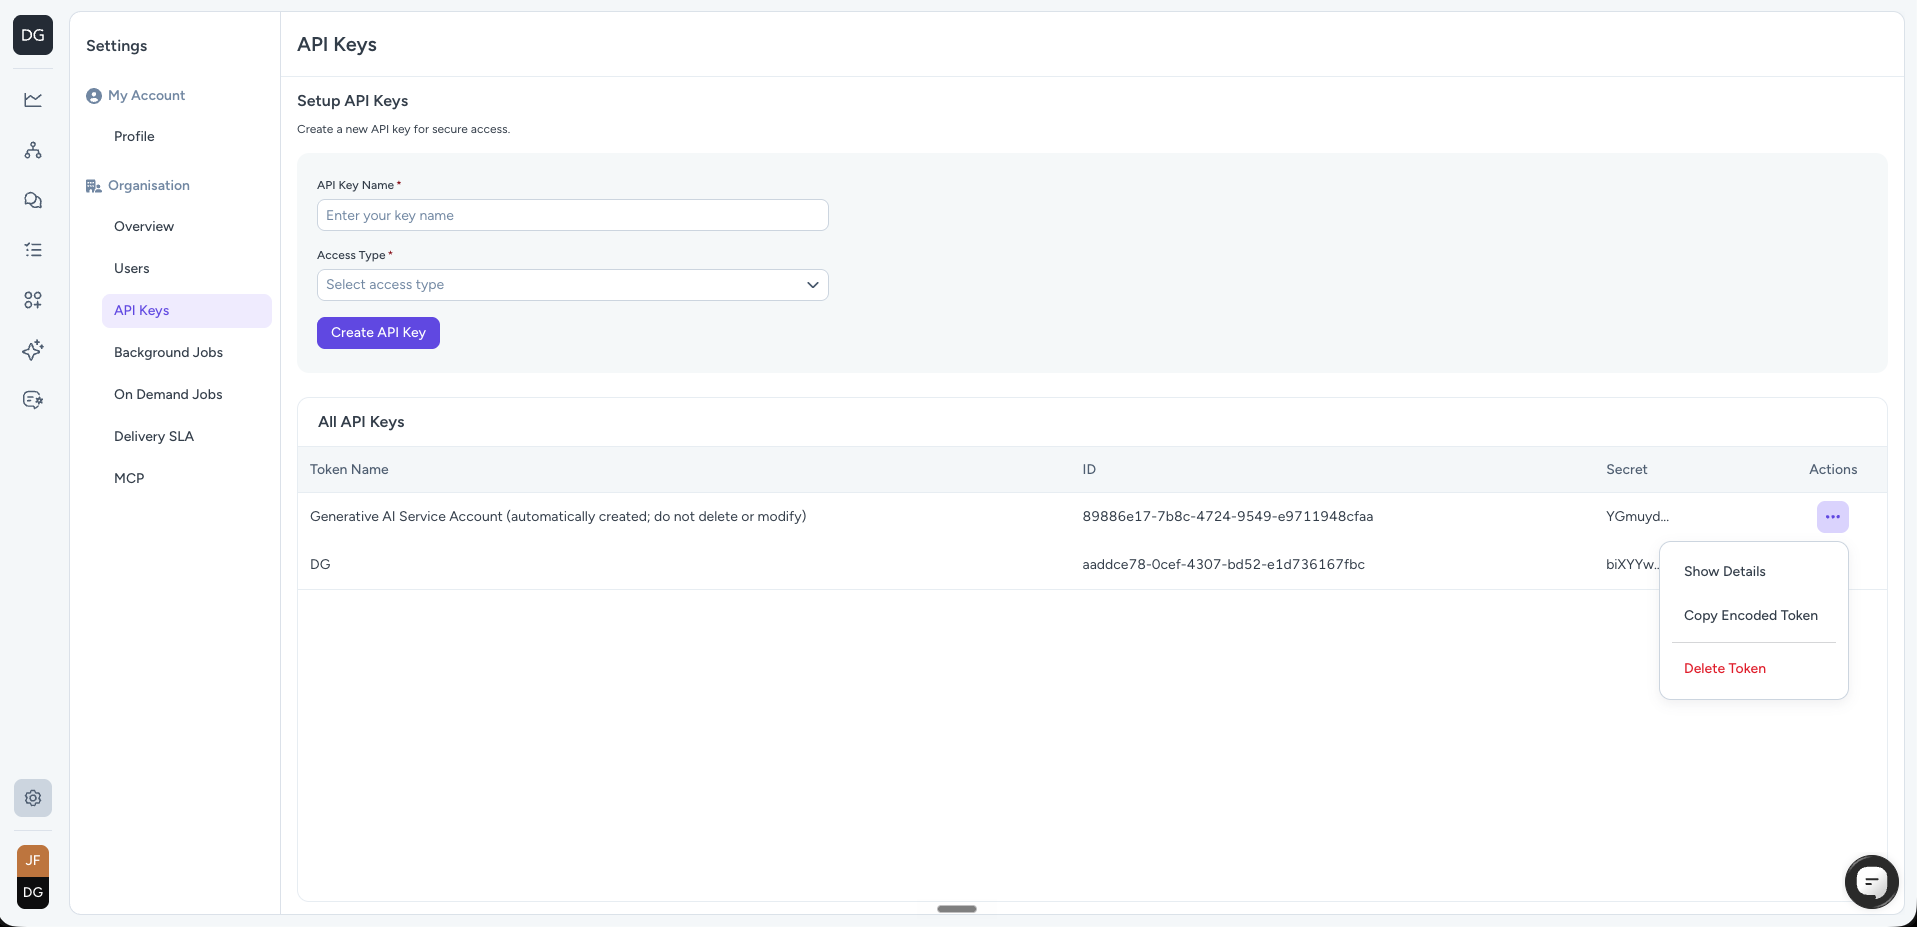
- Login to your DigitalGenius Dashboard and browse to the
Settingsarea by clicking on the cog icon in the lower left hand corner of the page. - Select
API Keysin the left hand menu. - Give your API key a name and select
Allin theAccess Typedropdown. Click on theCreate API Keybutton. - Click on the 3 dots menu for the API Key you just created and click on the
Copy Encoded Tokenoption. This will copy an authentication token to your clipboard. Store this somewhere safe.
Installing the MCP into your AI Assistant
See below for details on how to install the DigitalGenius MCP Server into your chosen AI Assistant.
Claude Desktop
-
Ensure that you have Claude Desktop and Node.js LTS installed.
-
Open the Claude Desktop app and go to
Settings -> Developer -> Edit Config -
Open
claude_desktop_config.jsonwith a text editor and add the following to the existingmcpServerssection (or create one if it does not exist).Replace
{{AUTH_TOKEN}}with the authorization token you copied from the dashboard in step 2 of the Prerequisites section above. Also replace{{ENV}}with eithereuorus, depending on where your DigitalGenius tenant is hosted.
{
  "mcpServers": {
   "digitalgenius": {
      "command": "npx",
      "args": [
        "-y",
        "mcp-remote",
        "https://flow-server.{{ENV}}.dgdeepai.com/mcp",
        "--header",
        "Authorization: Basic {{AUTH_TOKEN}}"
      ]
    }
  }
}
- Restart Claude Desktop.
- Verify the connection by asking
List the first ten flows from my DigitalGenius org.Need help?If the server fails to connect or Claude shows "Server disconnected", see the
Troubleshooting guide.
Claude Code
- Ensure that you have Claude Code installed.
- Run the following command in your terminal and ensure you replace
{{AUTH_TOKEN}}with the authorization token you copied from the dashboard in step 2 of the Prerequisites section above. Also replace{{ENV}}with eithereuorus, depending on where your DigitalGenius tenant is hosted. -
claude mcp add --scope project \
  --transport http digitalgenius "https://flow-server.{{ENV}}.dgdeepai.com/mcp" \
  --header "Authorization: Basic {{AUTH_TOKEN}}"
Gemini CLI
-
Ensure that you have Gemini CLI installed and configured and Node.js LTS installed.
-
Open your Gemini CLI settings file at
~/.gemini/settings.json. -
Add the following to the existing
mcpServerssection (or create one if it does not exist).Ensure you replace
{{AUTH_TOKEN}}with the authorization token you copied from the dashboard in step 2 of the Prerequisites section above. Also replace{{ENV}}with eithereuorus, depending on where your DigitalGenius tenant is hosted.{ "mcpServers": { "digitalgenius": { "command": "npx", "args": [ "mcp-remote", "https://flow-server.{{ENV}}.dgdeepai.com/mcp", "--header", "Authorization: Basic {{AUTH_TOKEN}}" ] } } } -
Restart Gemini CLI.
-
Verify the connection by asking
List the first ten flows from my DigitalGenius org.
Other Compatible MCP clients
The DigtialGenius MCP server is compatible with any AI assistant that supports the Model Context Protocol. The guides above cover some common clients, but the same connection will work with other MCP-compatible tools if you use the following MCP server URL and auth:
Url
Ensure that you replace {{ENV}} with either eu or us depending on where your DigitalGenius tenant is hosted.
https://flow-server.{{ENV}}.dgdeepai.com/mcpAuthentication
Ensure that you pass the auth token using basic auth. Replace{{AUTH_TOKEN}} part with the authorization token you copied from the dashboard in step 2 of the Prerequisites section above.
"Authorization: Basic {{AUTH_TOKEN}}"Troubleshooting
"Server disconnected"
Claude shows this generic message whenever the MCP server process fails tostart — the underlying error is hidden. To see the real cause, run the same
command Claude runs directly in your terminal.
Open Terminal and run (replace {{ENV}} and {{AUTH_TOKEN}} exactly as in step 3):
npx -y mcp-remote https://flow-server.{{ENV}}.dgdeepai.com/mcp --header "Authorization: Basic {{AUTH_TOKEN}}"If the command starts and stays running without errors, the server itself is fine —
press Ctrl+C, then fully restart Claude Desktop (Cmd+Q, not just closing the
window) and try again. Otherwise, the error printed is the actual cause. The most
common one:
npm error code EACCES — "Your cache folder contains root-owned files"
npm error code EACCES — "Your cache folder contains root-owned files"This happens if npm or npx was ever run with sudo on this machine. Reclaim
ownership of the npm cache (you'll be asked for your computer password):
sudo chown -R $(id -u):$(id -g) "$HOME/.npm"If the error persists, clear the cache and let npm rebuild it:
npm cache clean --forceThen fully restart Claude Desktop and the DigitalGenius server should connect.
Still stuck?
- Check that
node --versionprints v18 or later — if not, reinstall Node.js LTS. - Claude Desktop writes the full MCP server output to its logs:
~/Library/Logs/Claude/mcp-server-digitalgenius.log(macOS) or
%APPDATA%\Claude\logs(Windows). Include this file when contacting support.
Updated about 1 month ago