Add DigitalGenius Webhook
Open Dixa Webhooks
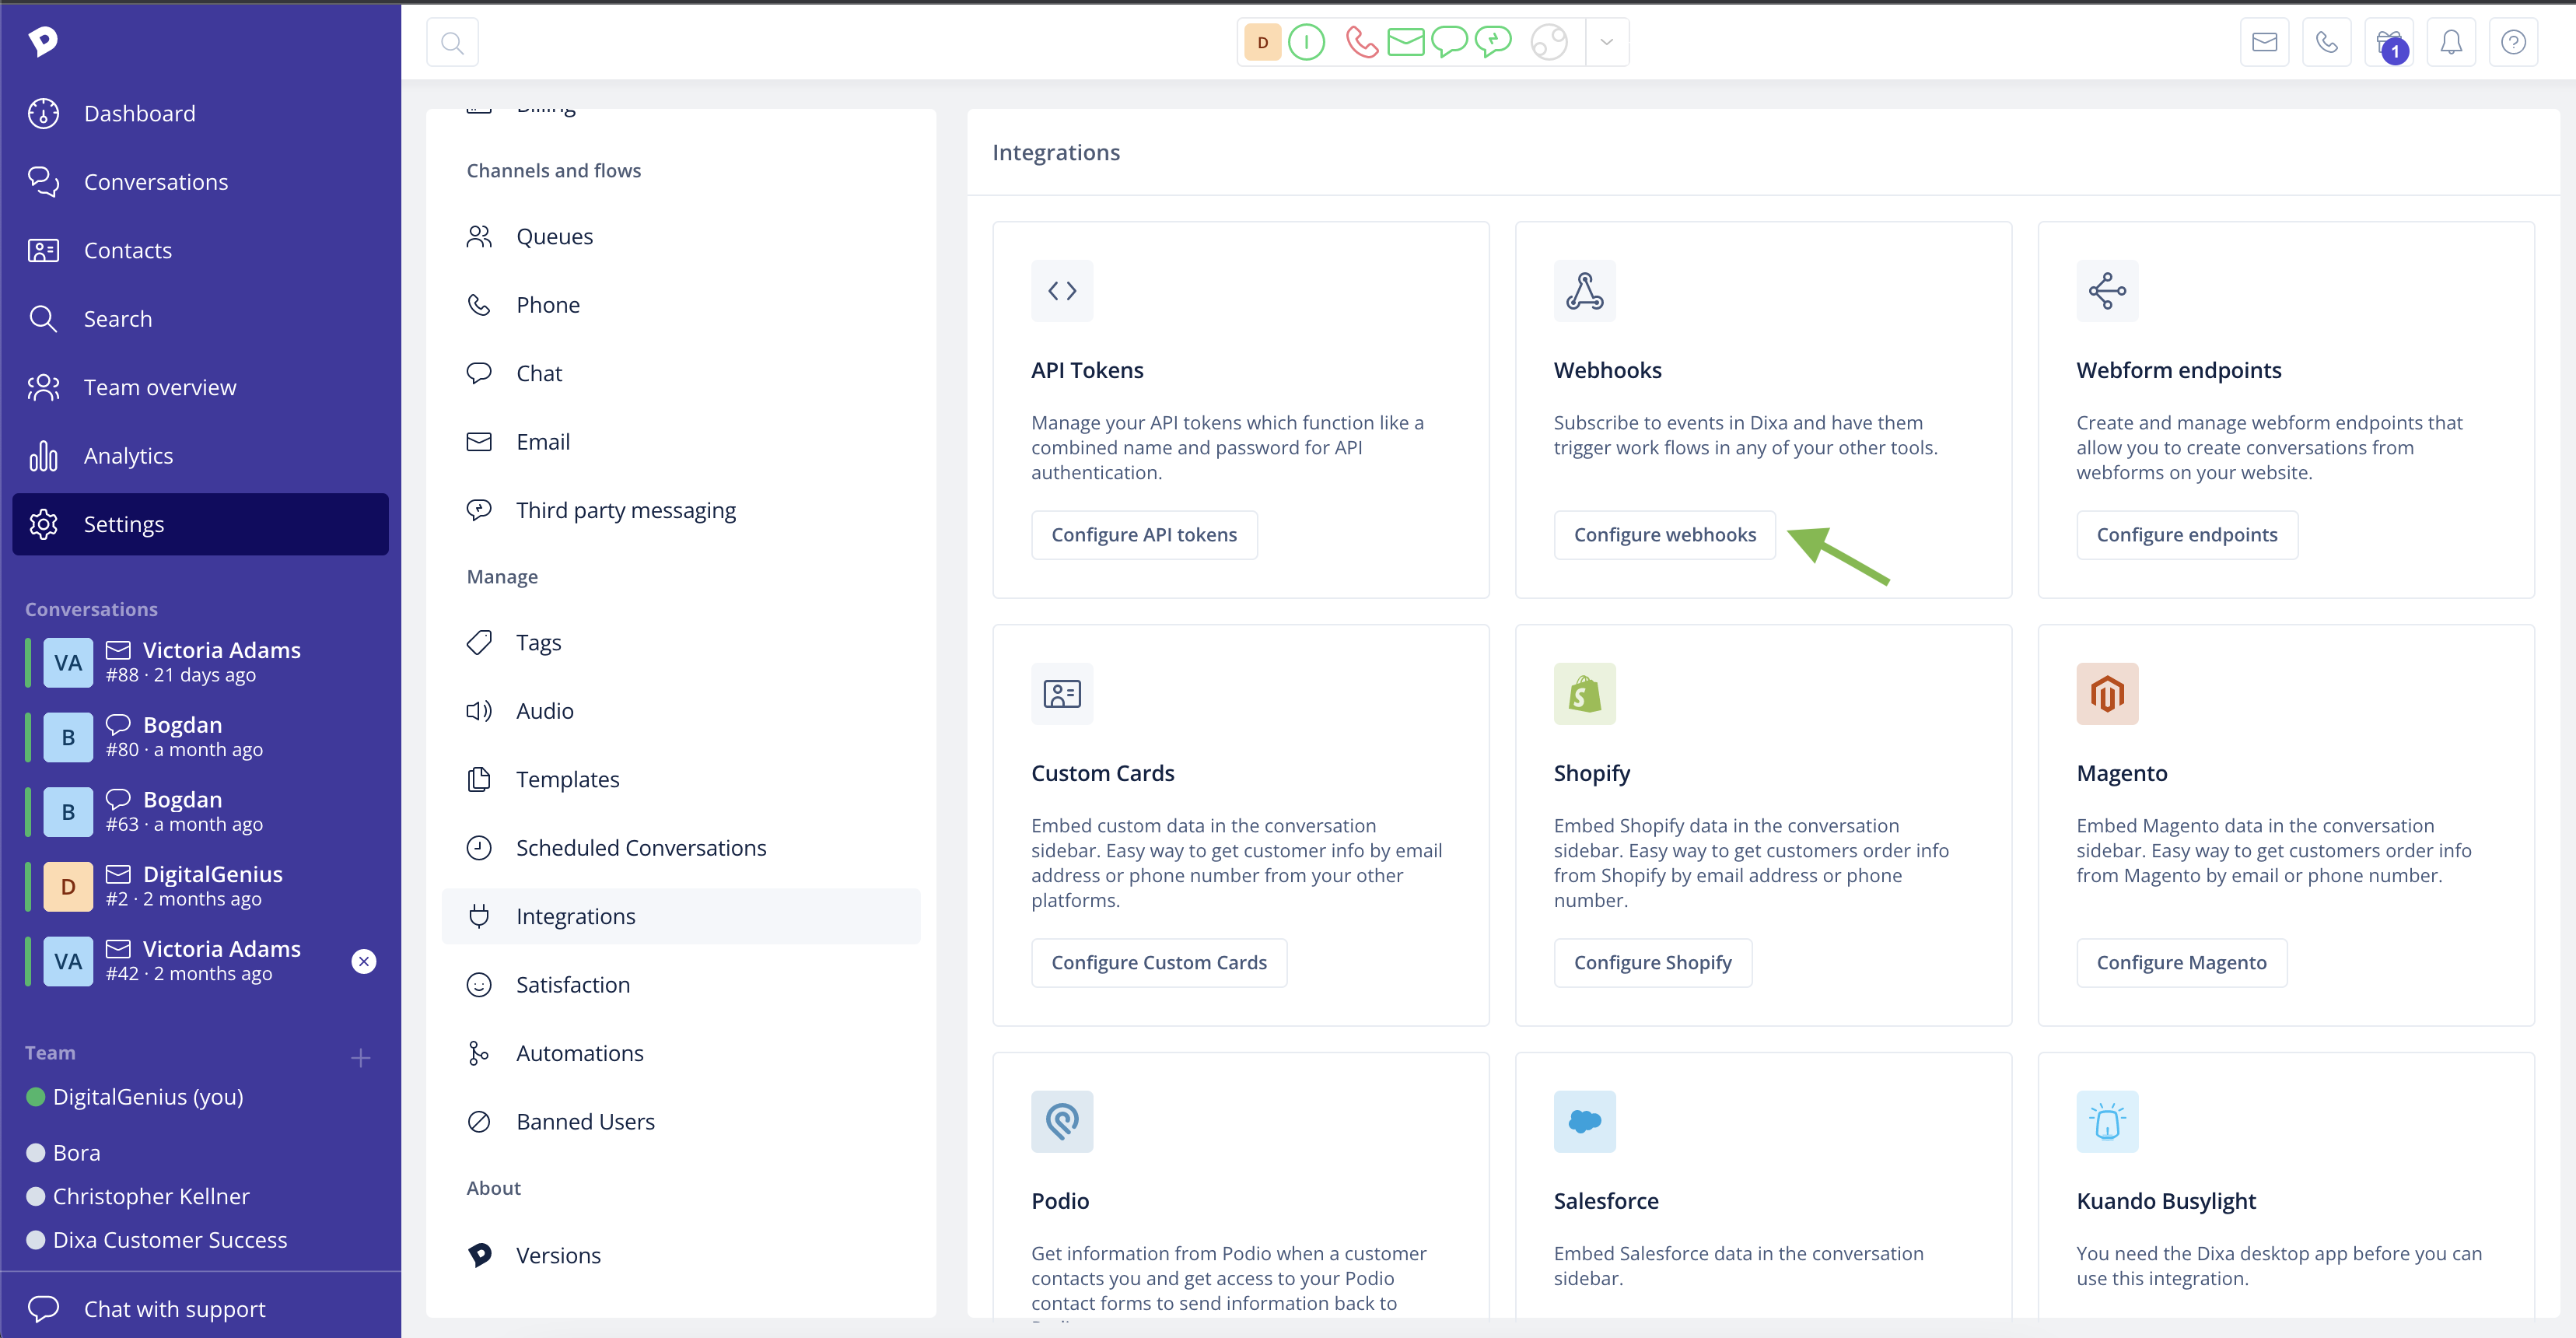
In your Dixa account open Settings -> Integrations and click on Configure webhooks. If you don't see webhooks as part of your integrations options you probably need to ask your Dixa account manager to enable this feature for you.
Create DigitalGenius Webhook
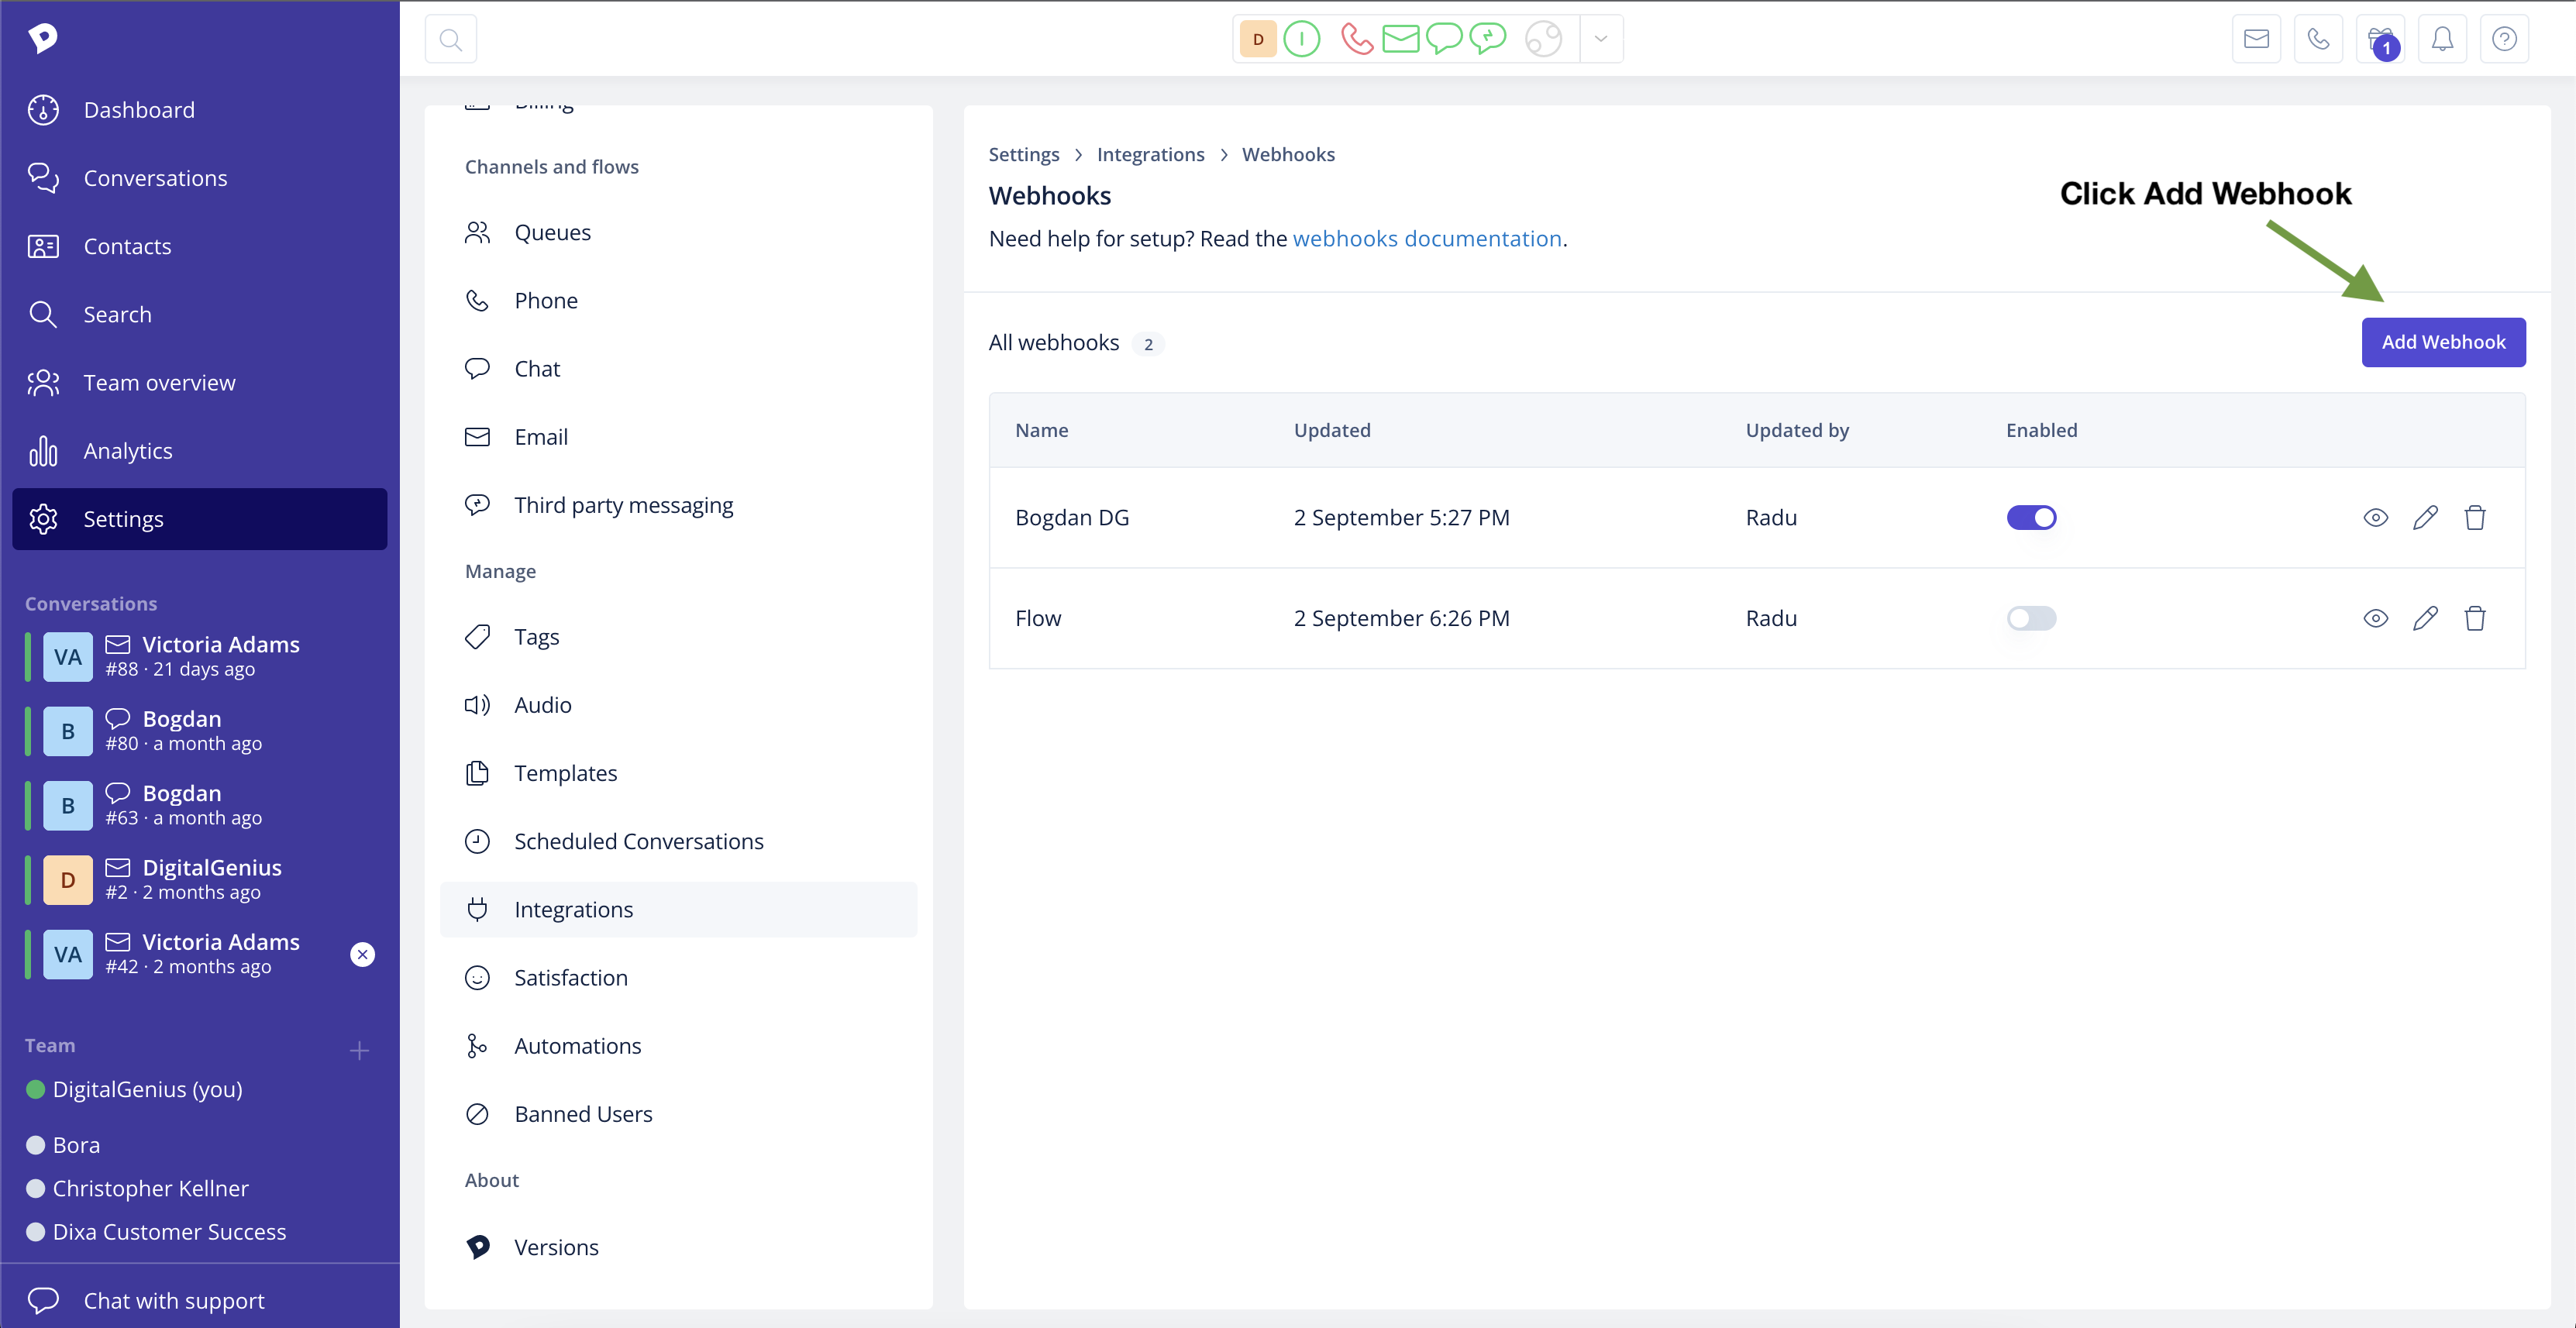
Click Add Webhook to add one for DigitalGenius integration.
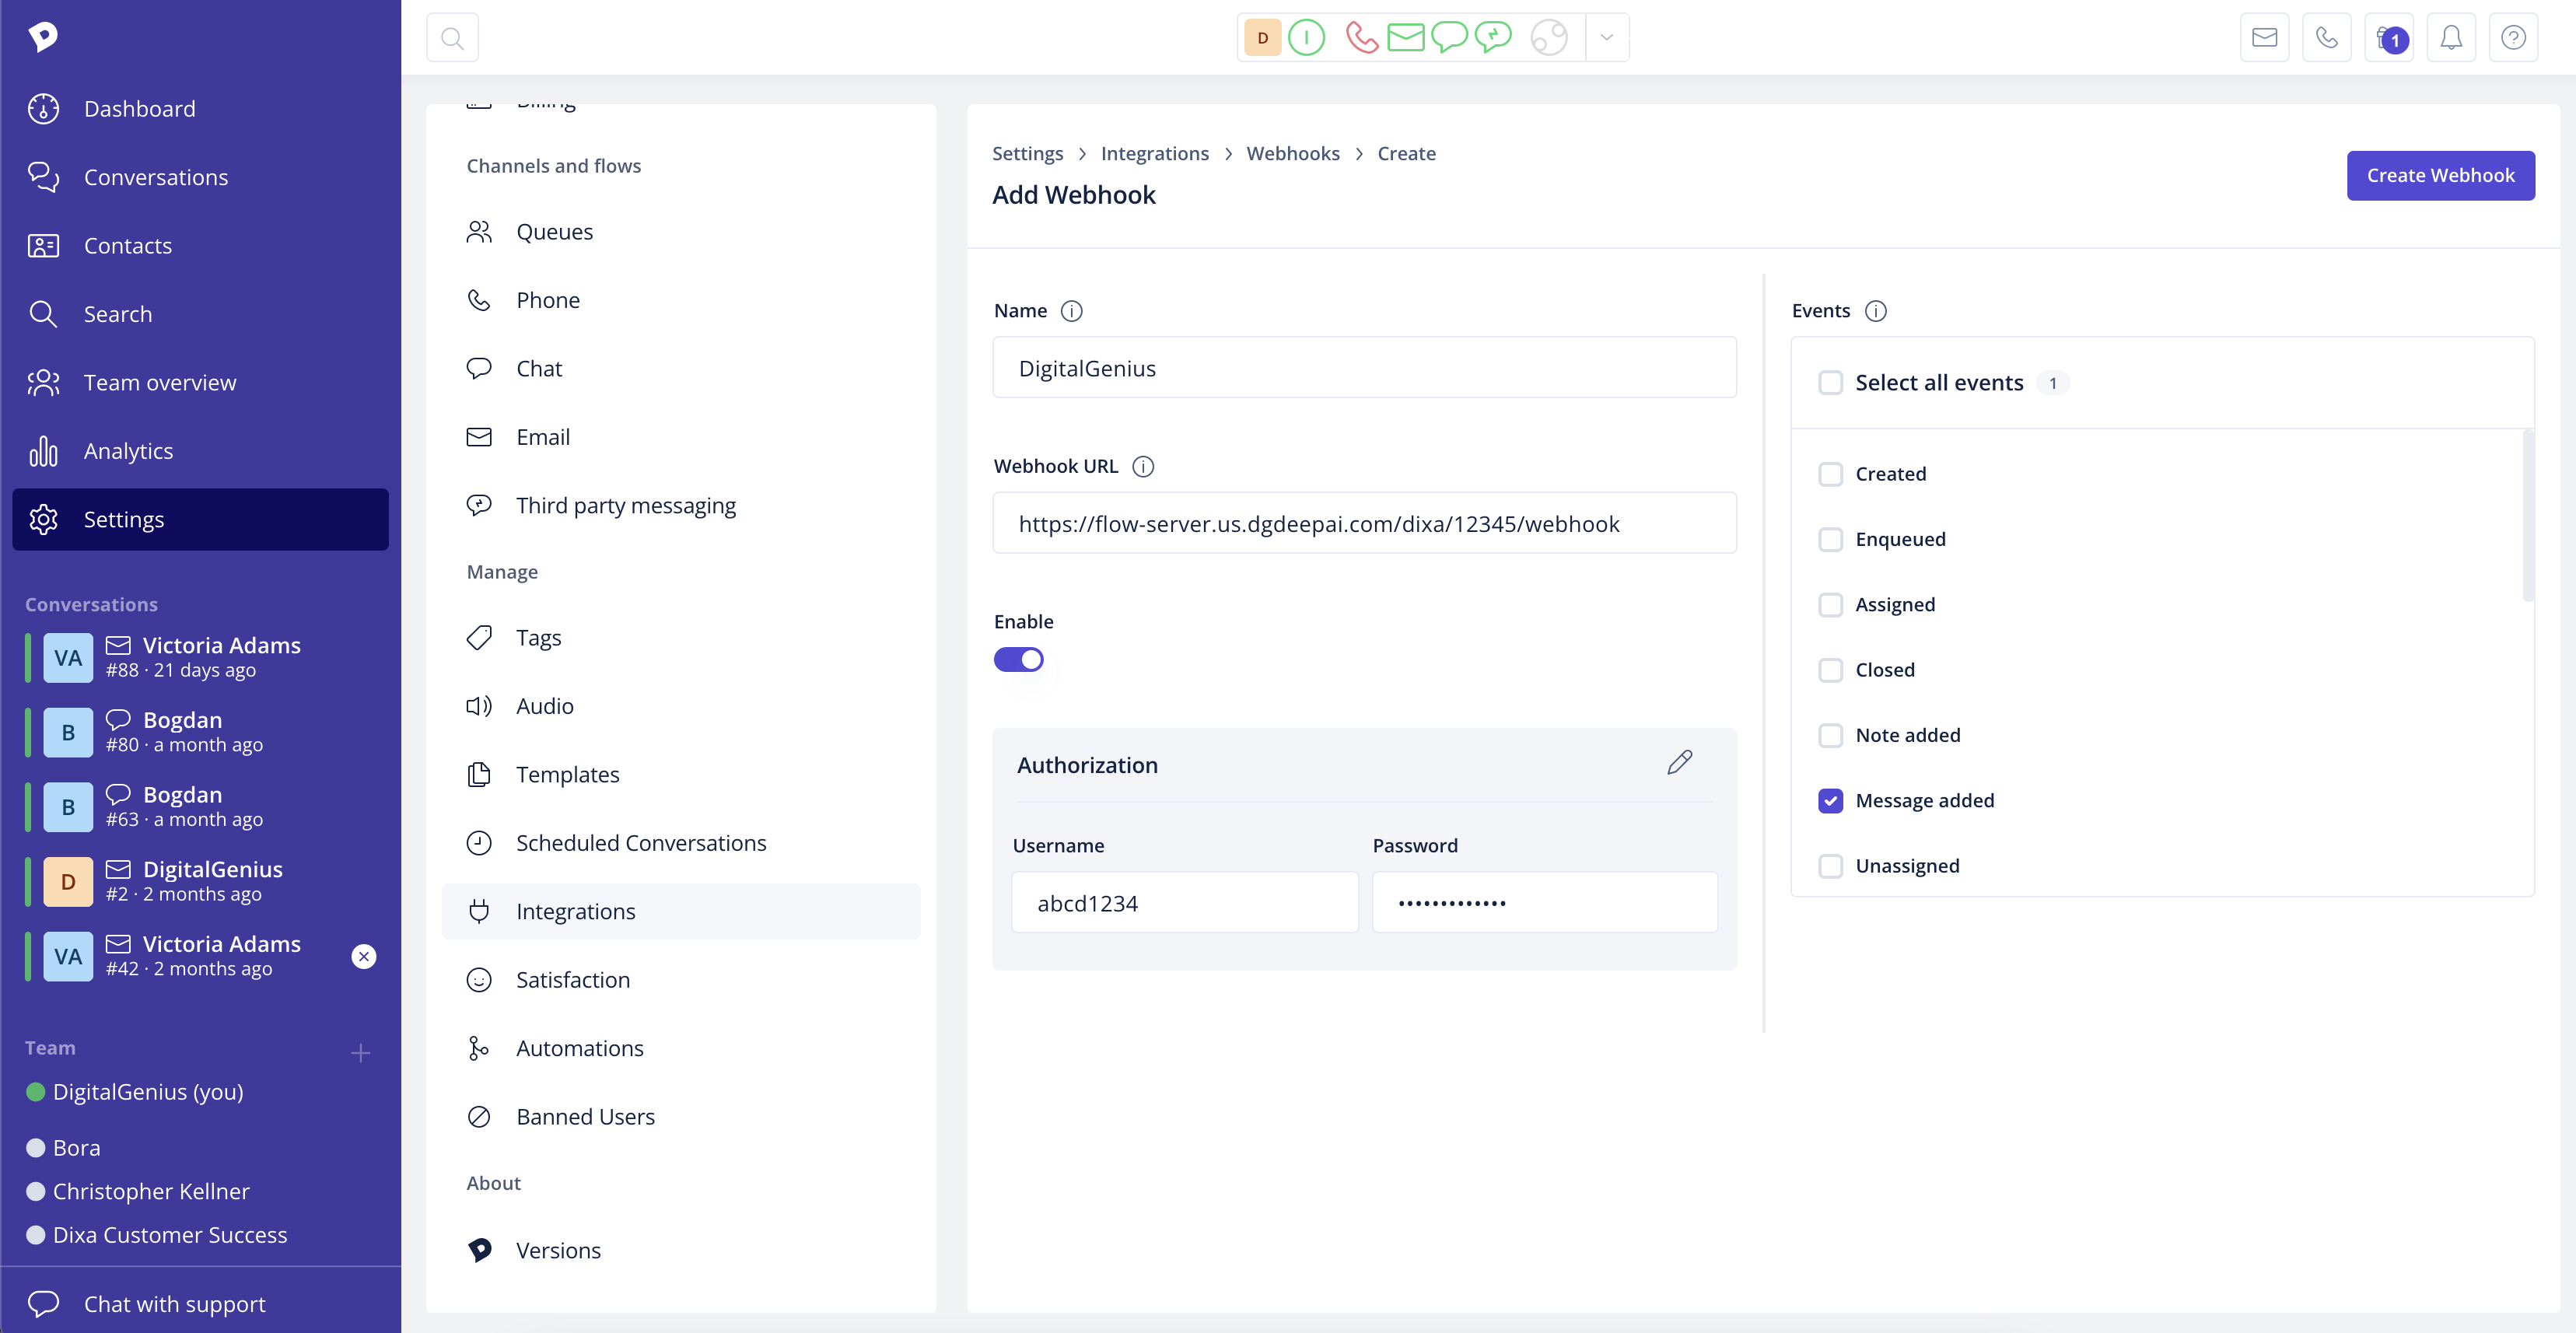
Configure your webhook in the following way:
Name: DigitalGenius
Webhook URL: https://flow-server.{{REGION}}.dgdeepai.com/dixa/{{FLOW_ID}}/webhook replacing {{REGION}} with either us or eu depending on the location of your DigitalGenius account and replacing {{FLOW_ID}} with the ID of DigitalGenius flow that will be the main flow for Dixa conversations. So full URL would look like this:
https://flow-server.eu.dgdeepai.com/dixa/12345/webhook
Events: Message added
Authentication: Enable and Select Basic Auth
Username & Password: use DigitalGenius API Key/Secret for username and password respectively.
After you complete the above configurations your webhook should look like this:
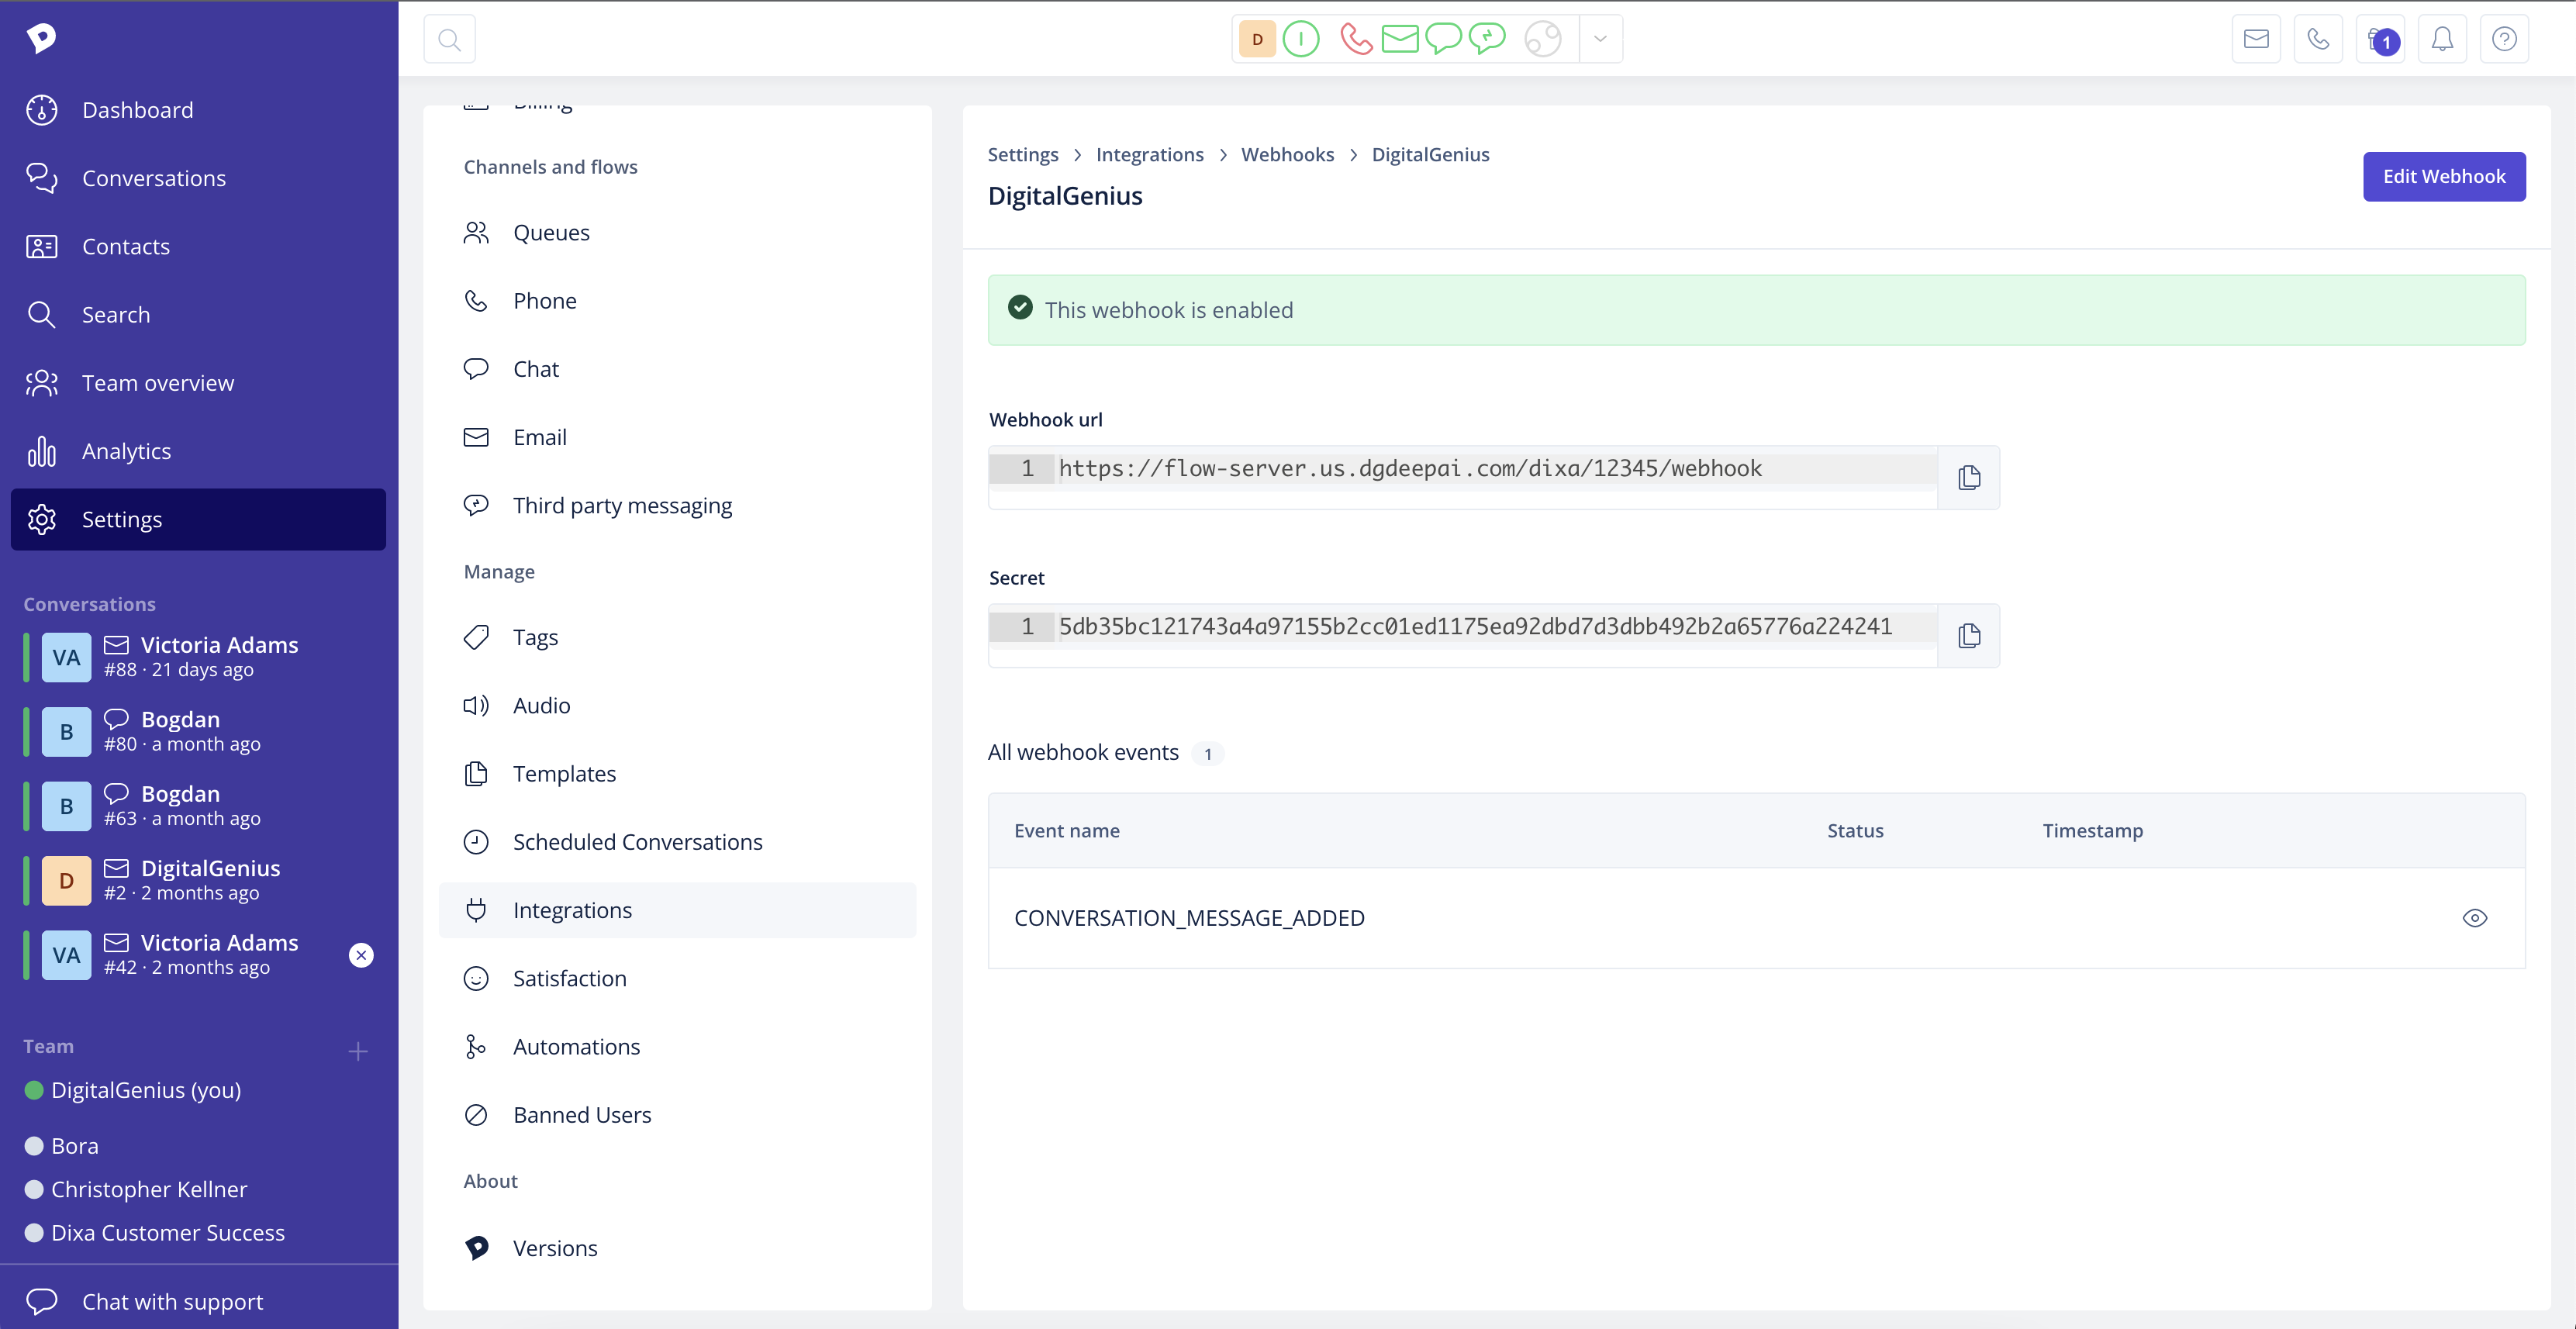
Click Create Webhook and you should see the successful confirmation message like below.
Validate Webhook
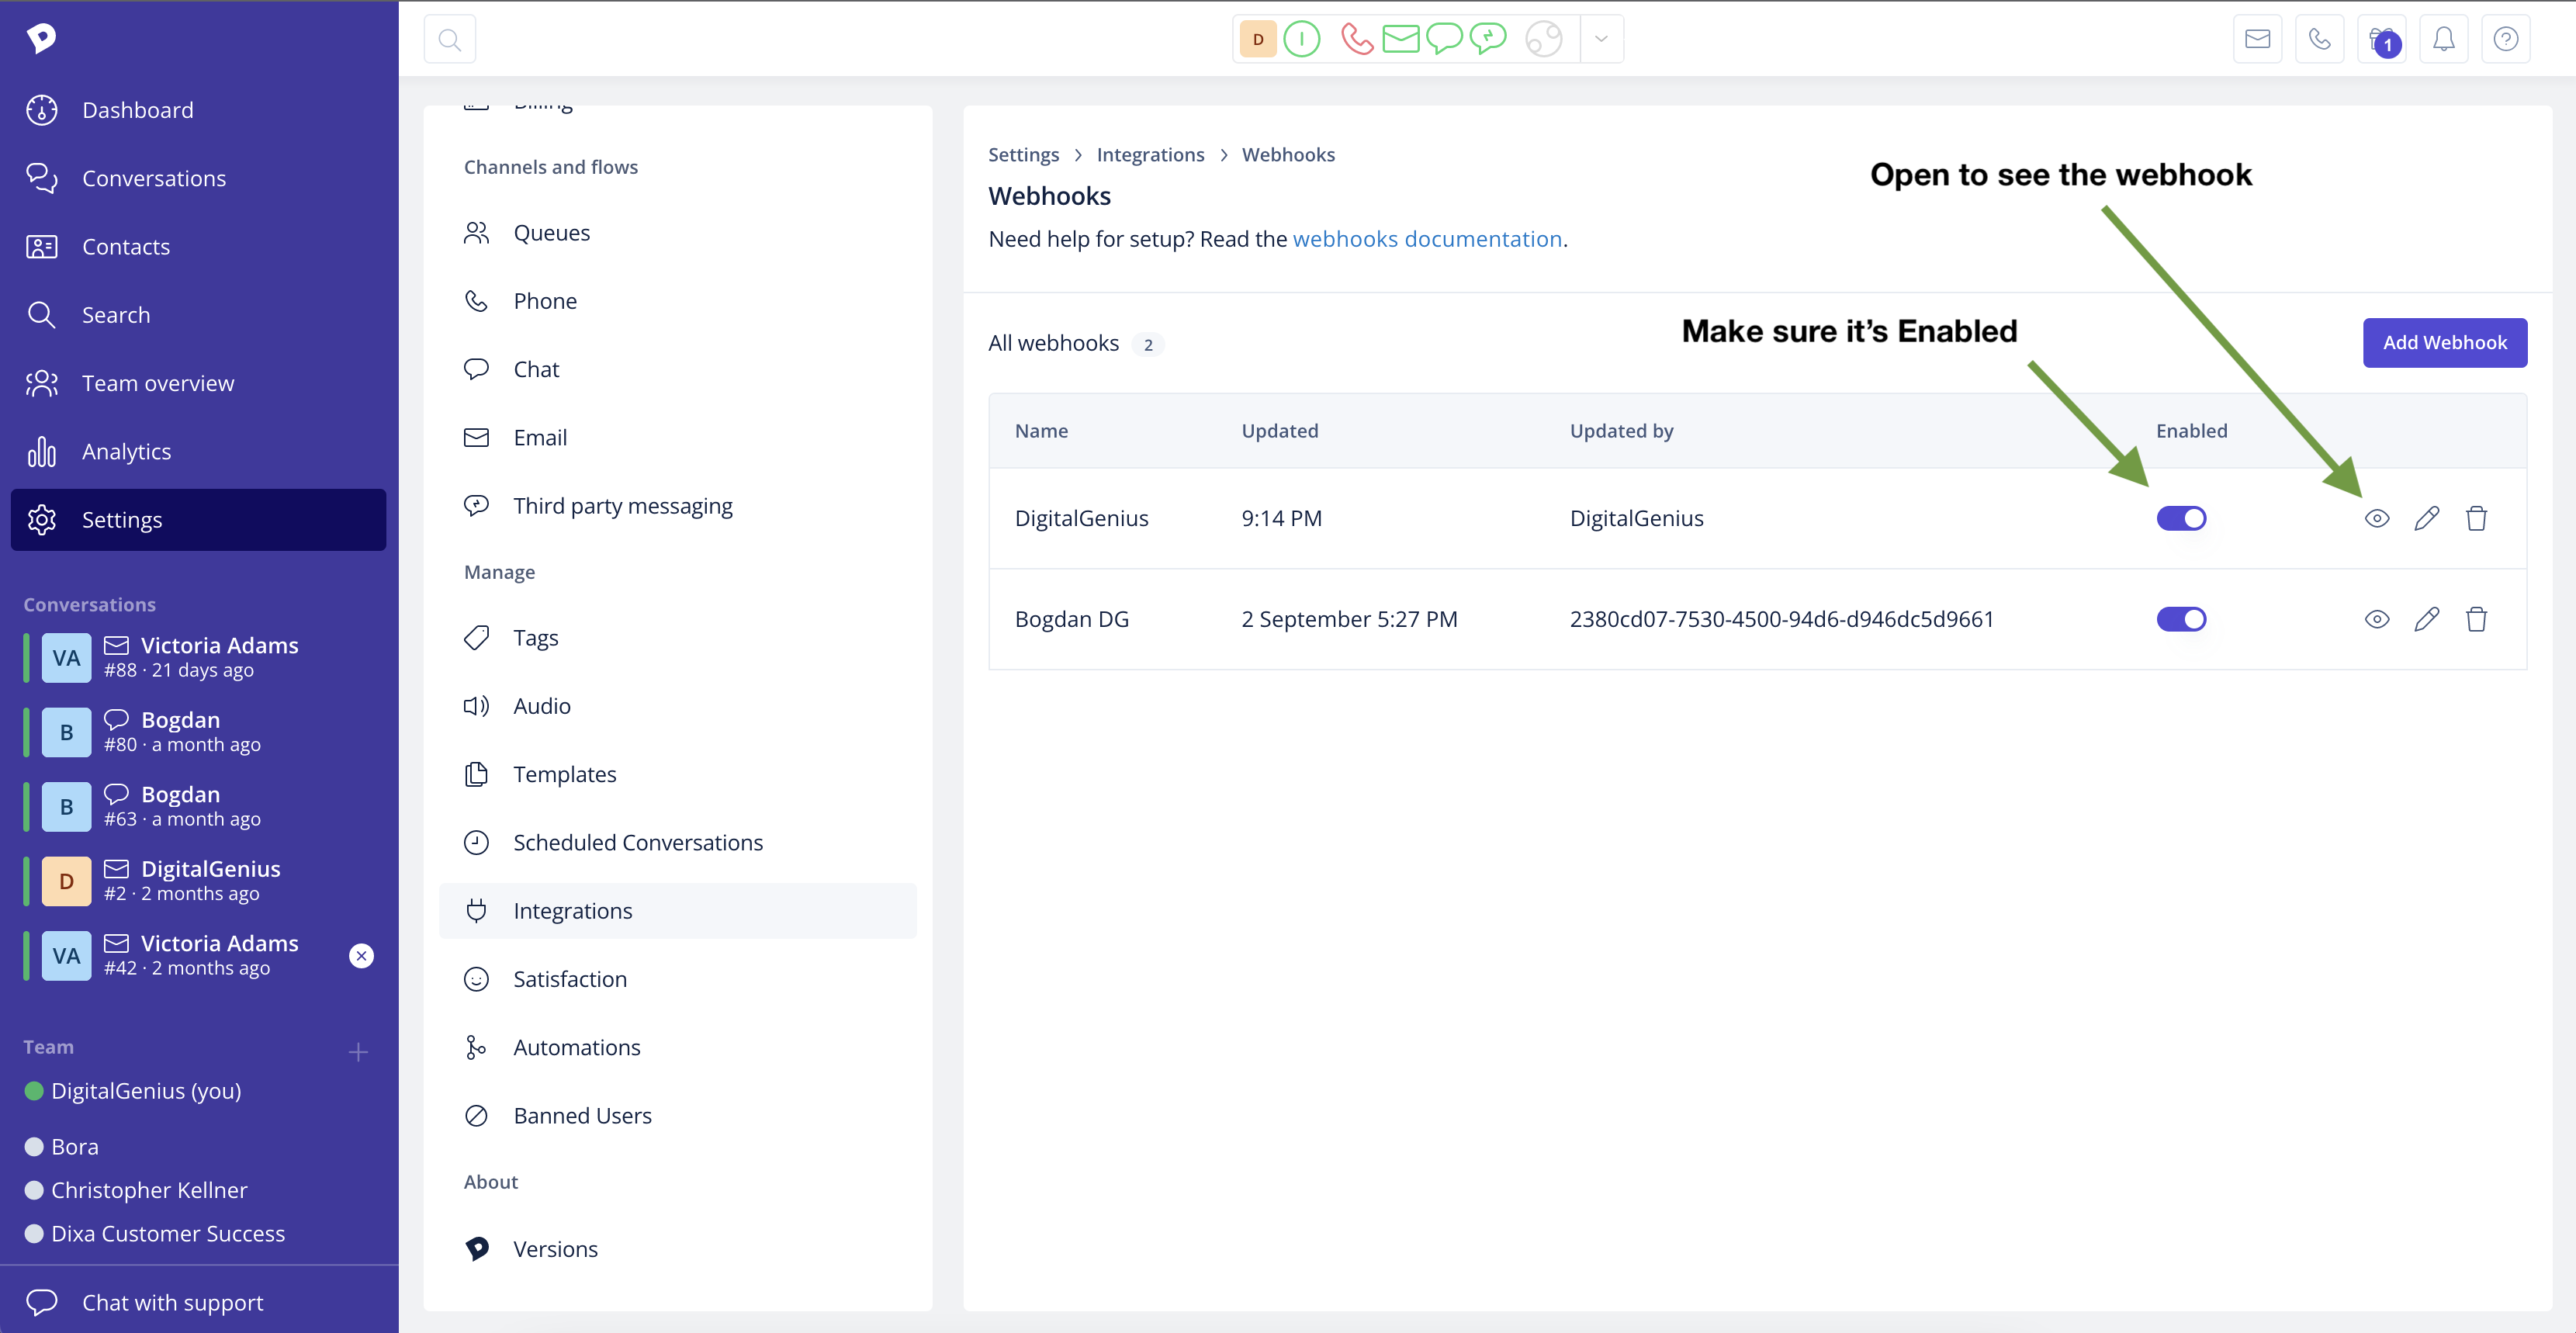
Go back to the list of webhooks and check that the newly created webhook appears in the list. Make sure that it is enabled. Then click on the eye icon to see the webhook details.
When you open the webhook check the status of any recent events. If you don't see any events this is ok, it means no new messages were created in your Dixa account since you have added the webhook. Give it some time or if you are impatient send an email to your Dixa account yourself. Once you see some events then make sure the status of the events is Success (200).
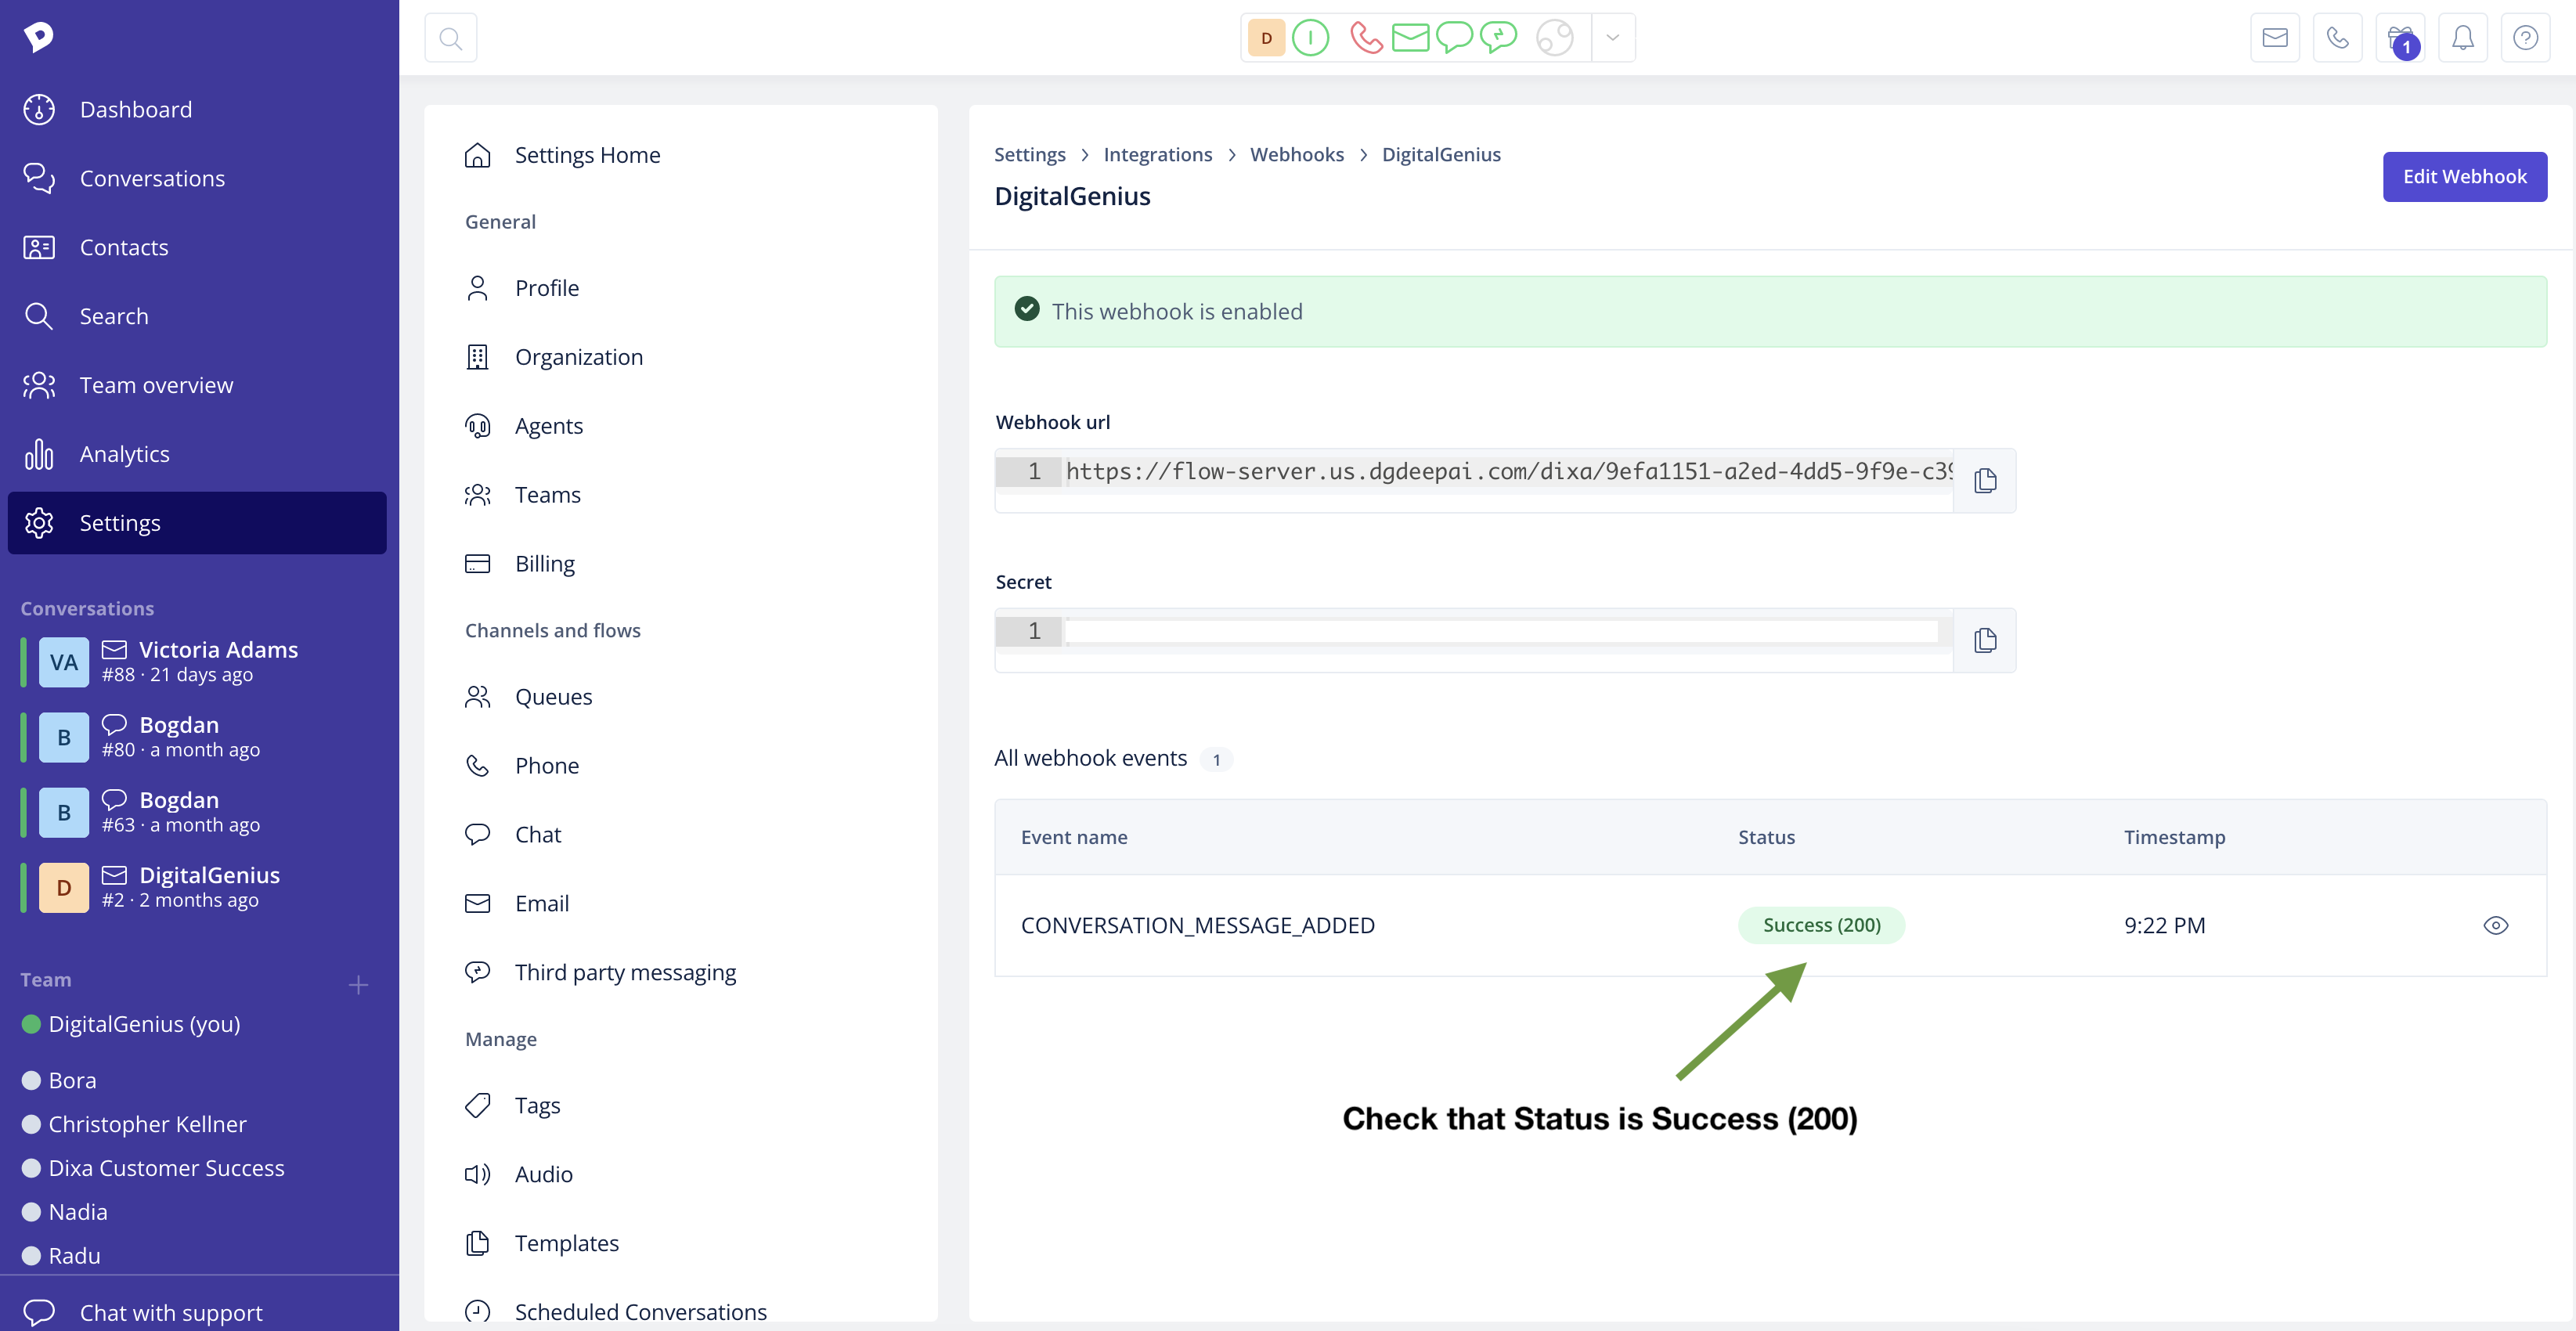
Congrats!If you see Success status for events in the webhook you created then well done! You have successfully connected Dixa conversations to DigitalGenius flows.
Updated 3 months ago