Step 2: Template and Run
Once you have created a New Flow, it does not do anything because it doesn't have any actions yet. In this step we will make our flow use a name and generate a greeting using that name by adding a template action.
Click the Edit button to enter edit mode.
Add the Name Input
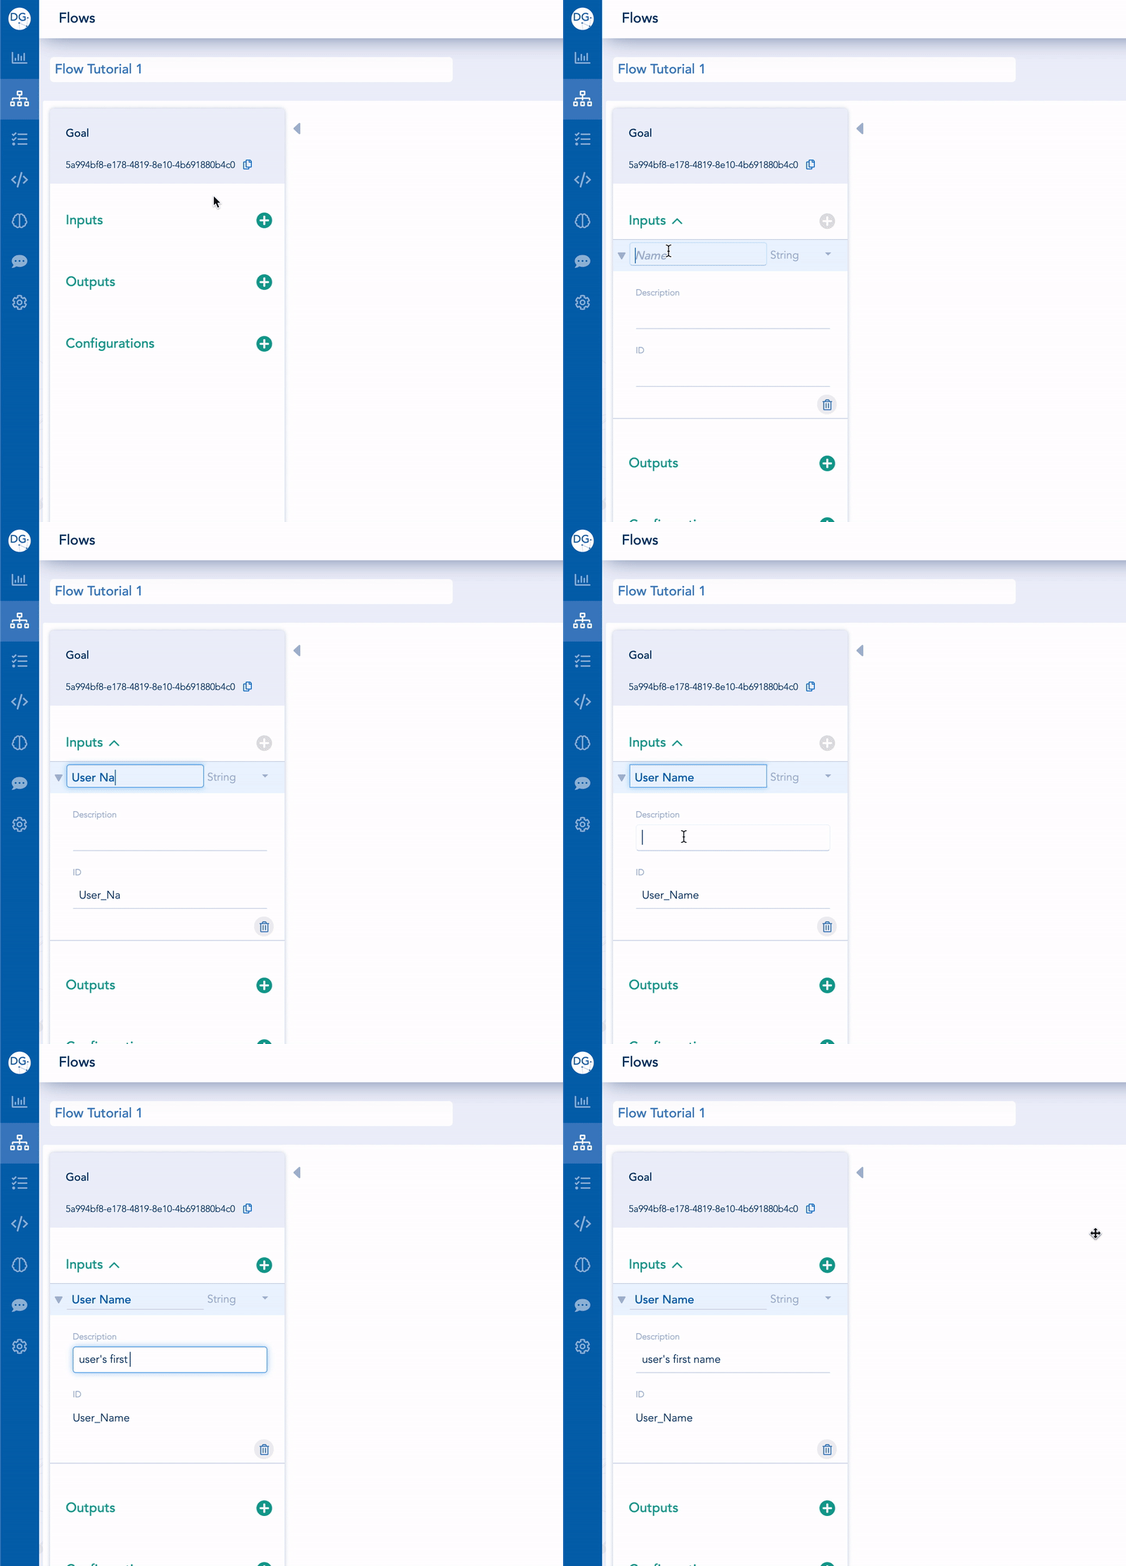
First we want to add a name input to the flow. Flow Inputs are part of the Flow Panel.
On the left side panel, click the plus button next to Inputs to add a User Name input. Keep the type as String and then add a description if you like.
Add a Template
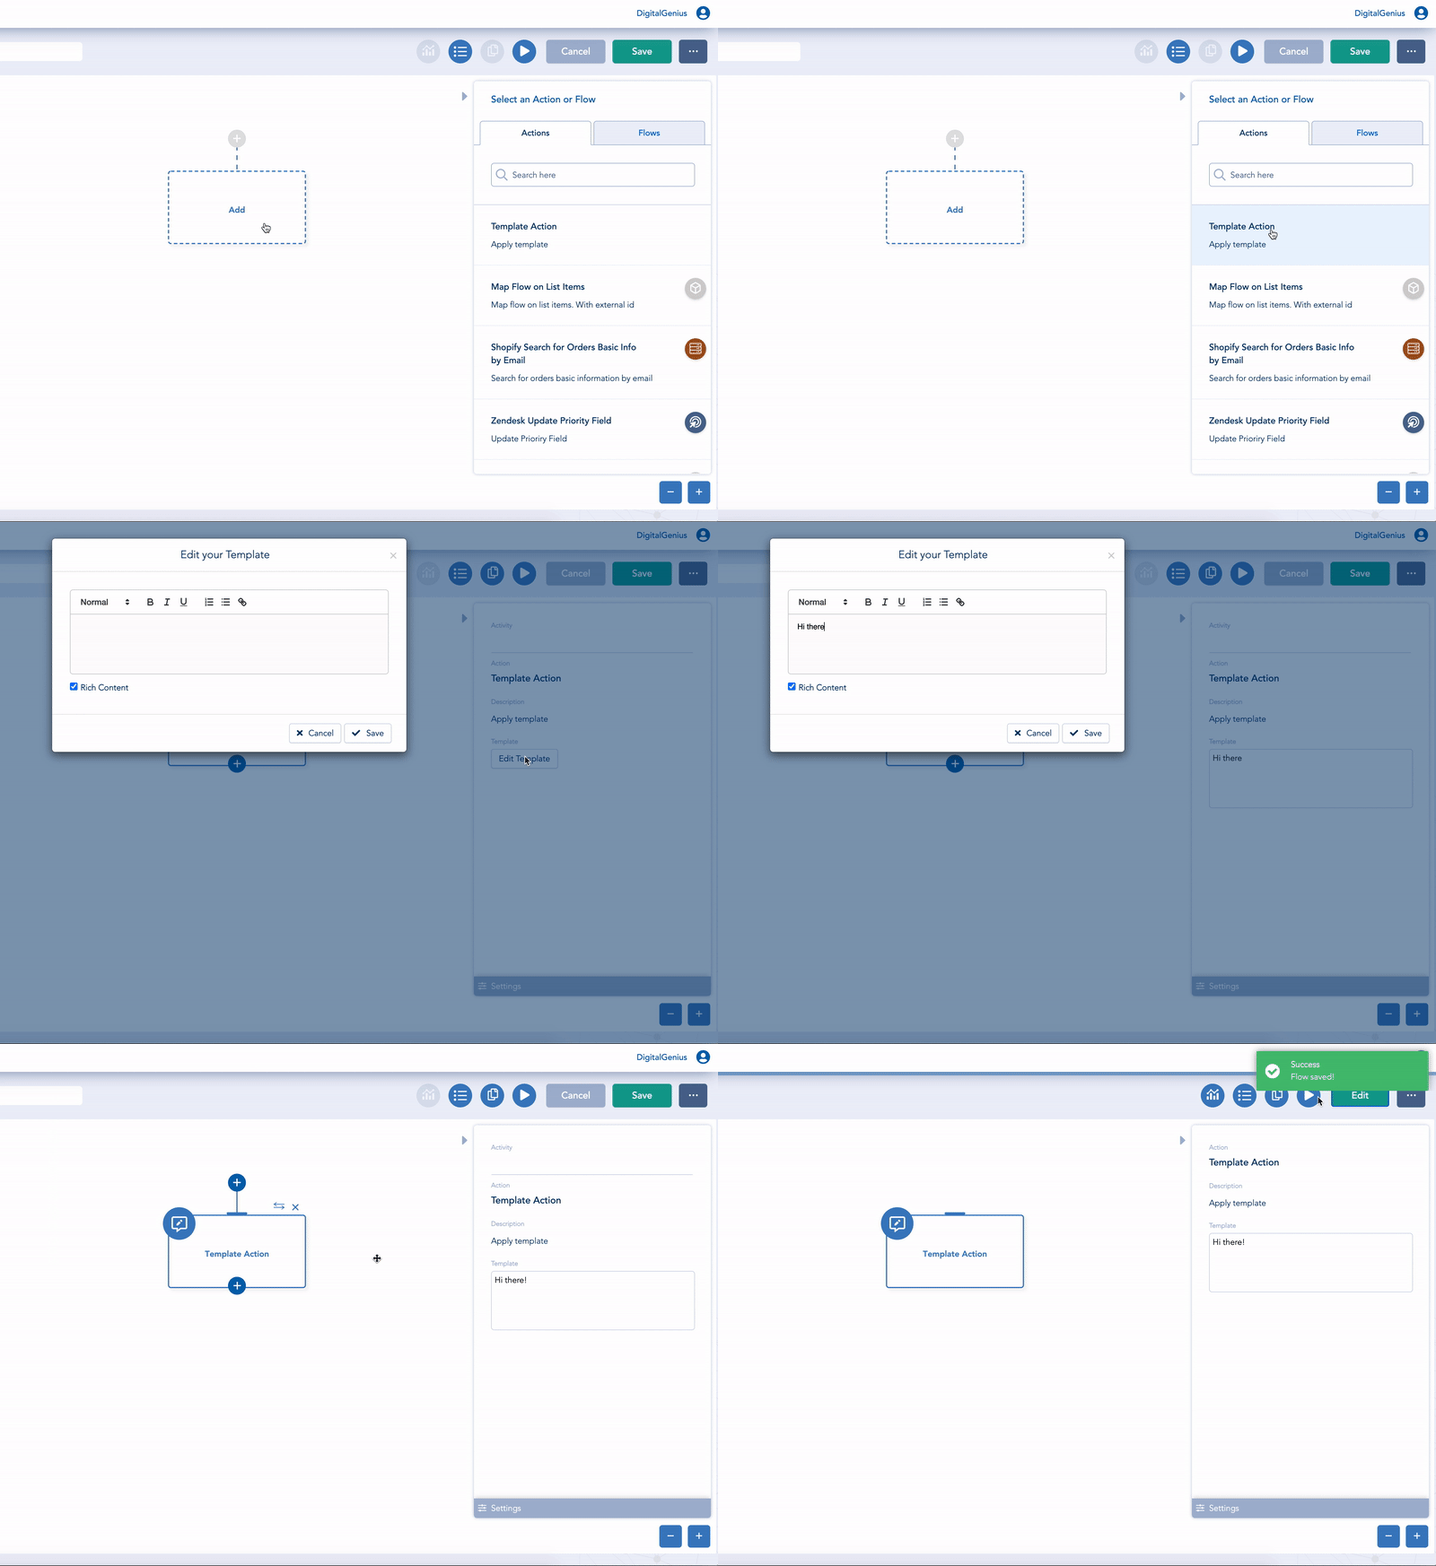
Next we are going to add a template action. Enter edit mode and then click on the placeholder block where it says Add on the canvas.
On the Activity Panel (right side panel) select the Template Action. Then click Edit Template and enter your greeting text.
Run Flow
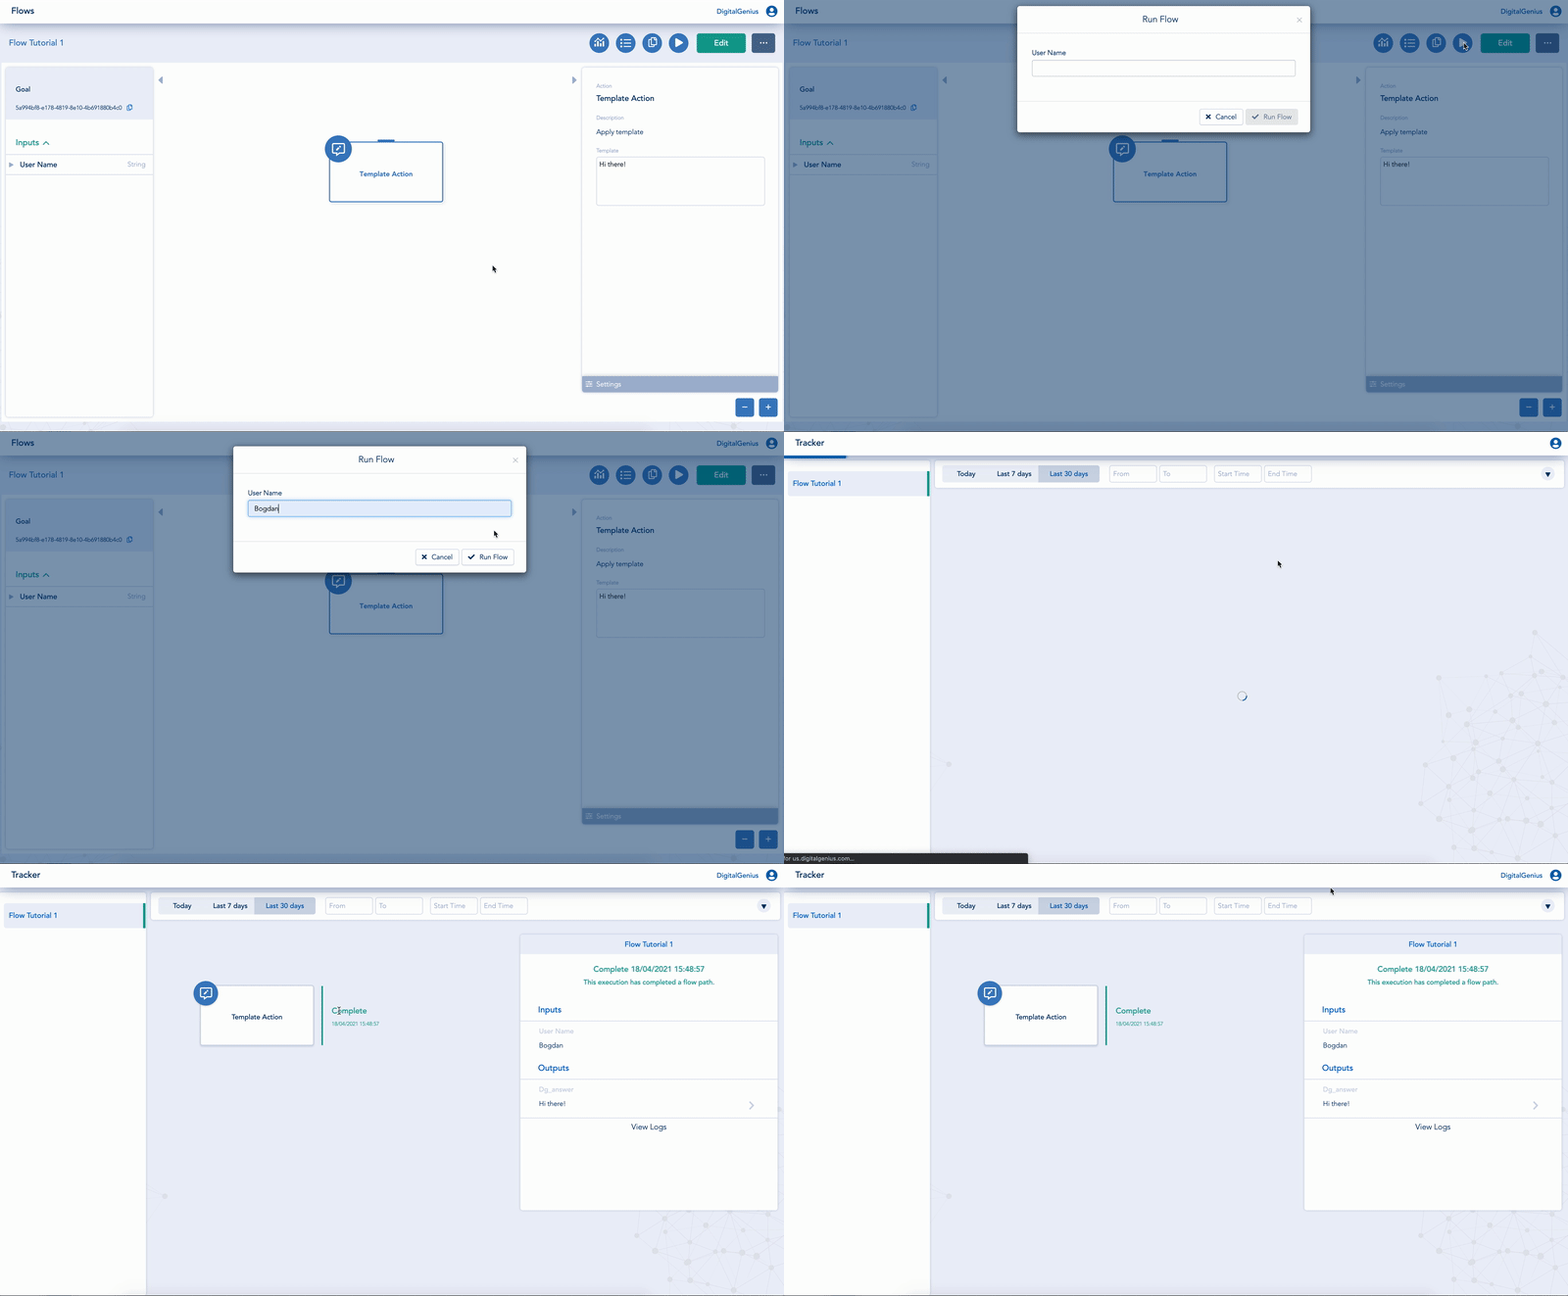
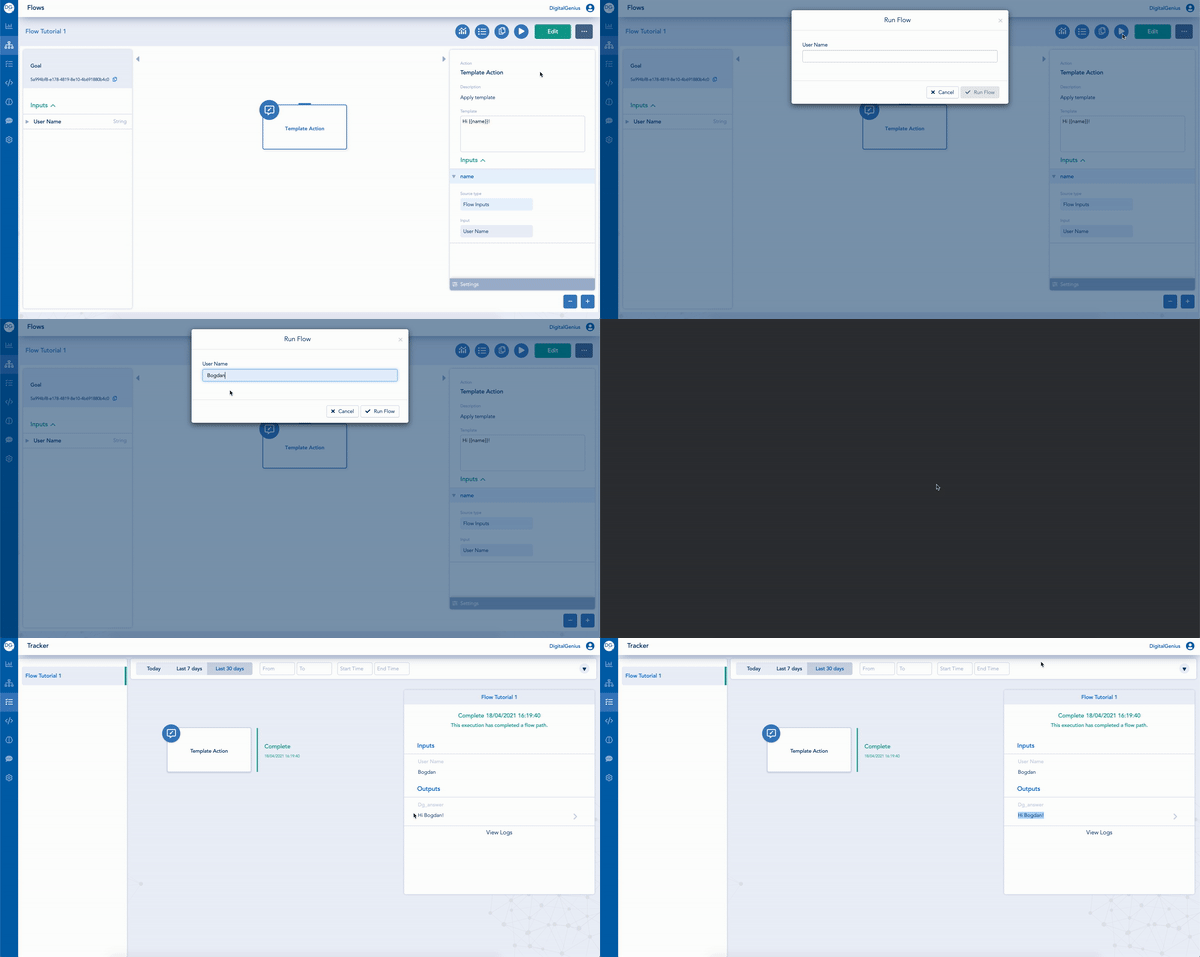
Now that we have the greeting message we are going to run the Flow. Click on the Play button on the top right corner and a pop-up will appear for you to enter the values for your Flow Inputs. In this case, we have just one input - User Name, so give it a Name and click the Run button. You should then be redirected to the Tracker page to see the results of your flow running. Here, you will be ablee to see that the Flow and template were complete and in the output section of the flow you should see your greeting message.
Add a Template Placeholder
In the above example we get our greeting generated but it's a generic greeting that does not mention the user name we provided. To personalize your greeting message let's add the name to the template text.
In edit mode, click on the template text and add a placeholder using double curly braces, for instance add {{name}} to use a placeholder called name. When you add a placeholder to your template it does not matter how you name it as long as it does not match one of the existing placeholders in the same template. After adding the placeholder, click Save.
Now we just need to link the User Name Flow Input we created earlier to the name template placeholder. You will see that the template action now has an input called name. Open the name input, select Flow Inputs in the Source type dropdown and the second dropdown will come up where you can select User Name. Now you have linked the User Name Flow input to the name placeholder in the template.
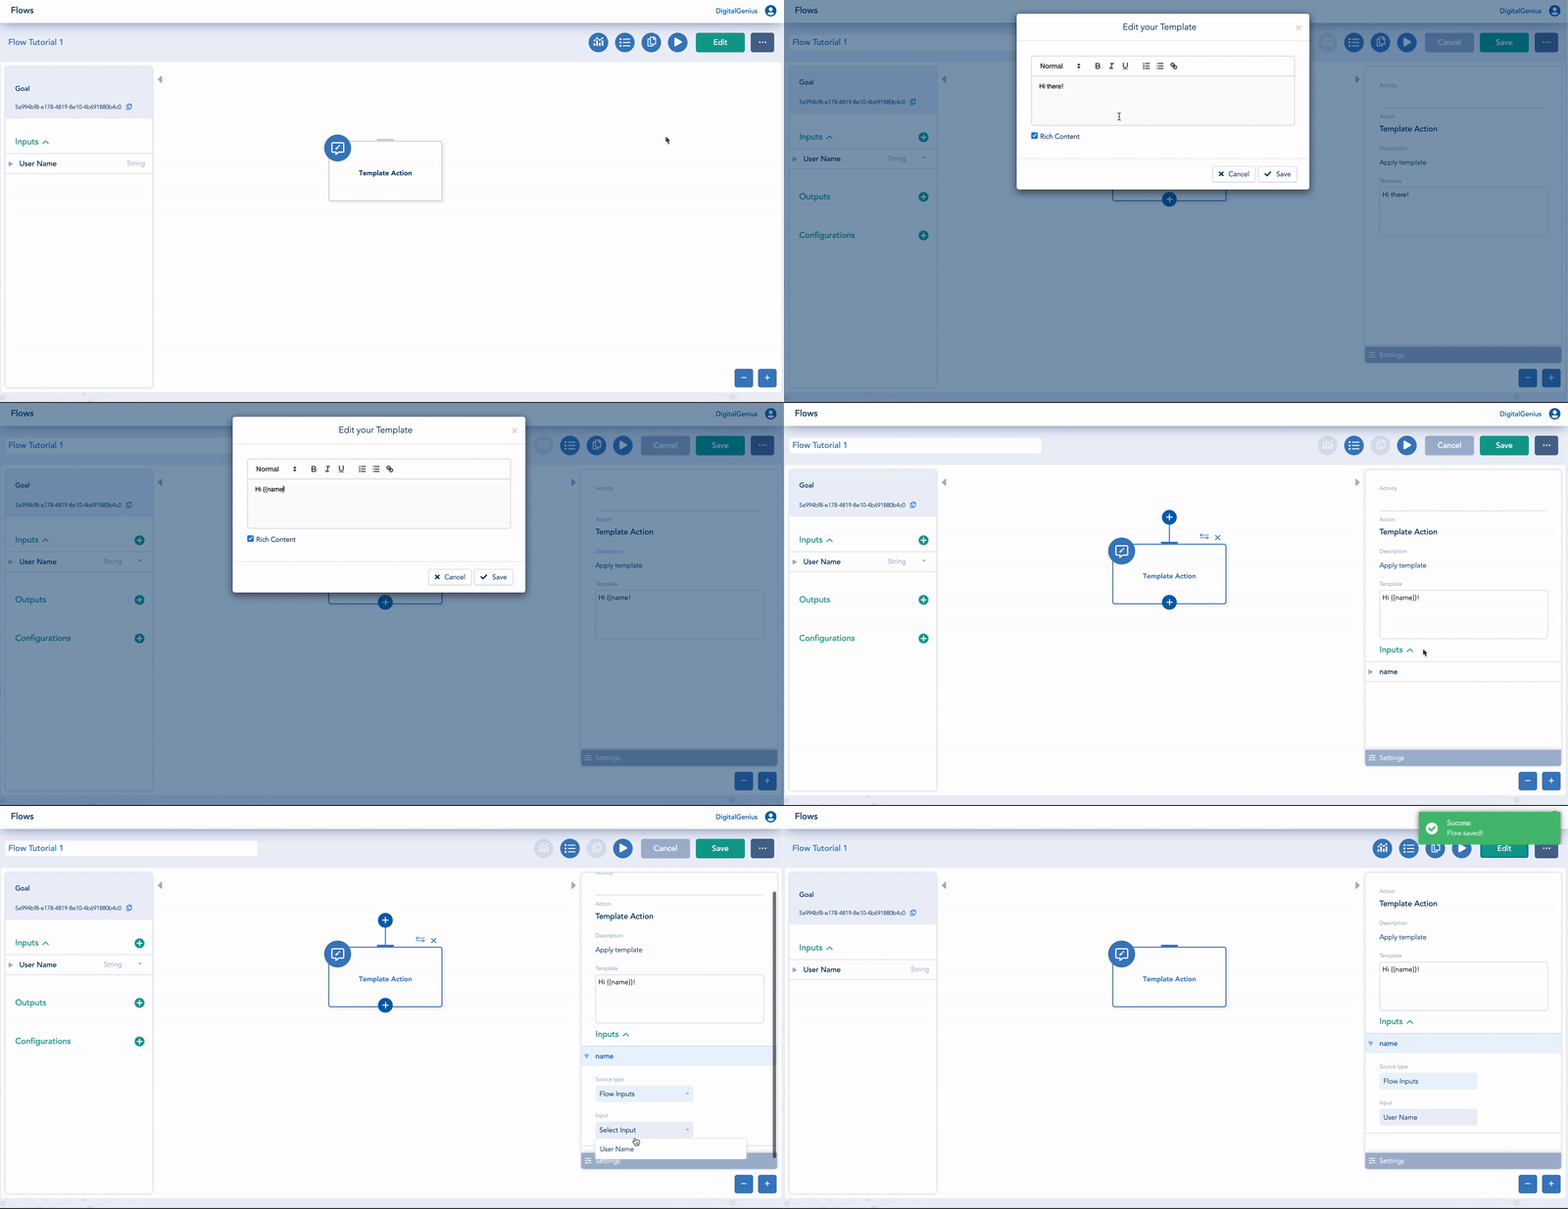
Save and run the flow again. You should now see your personalised greeting with the name you provide on Tracker when you run the flow.
Rename the Template
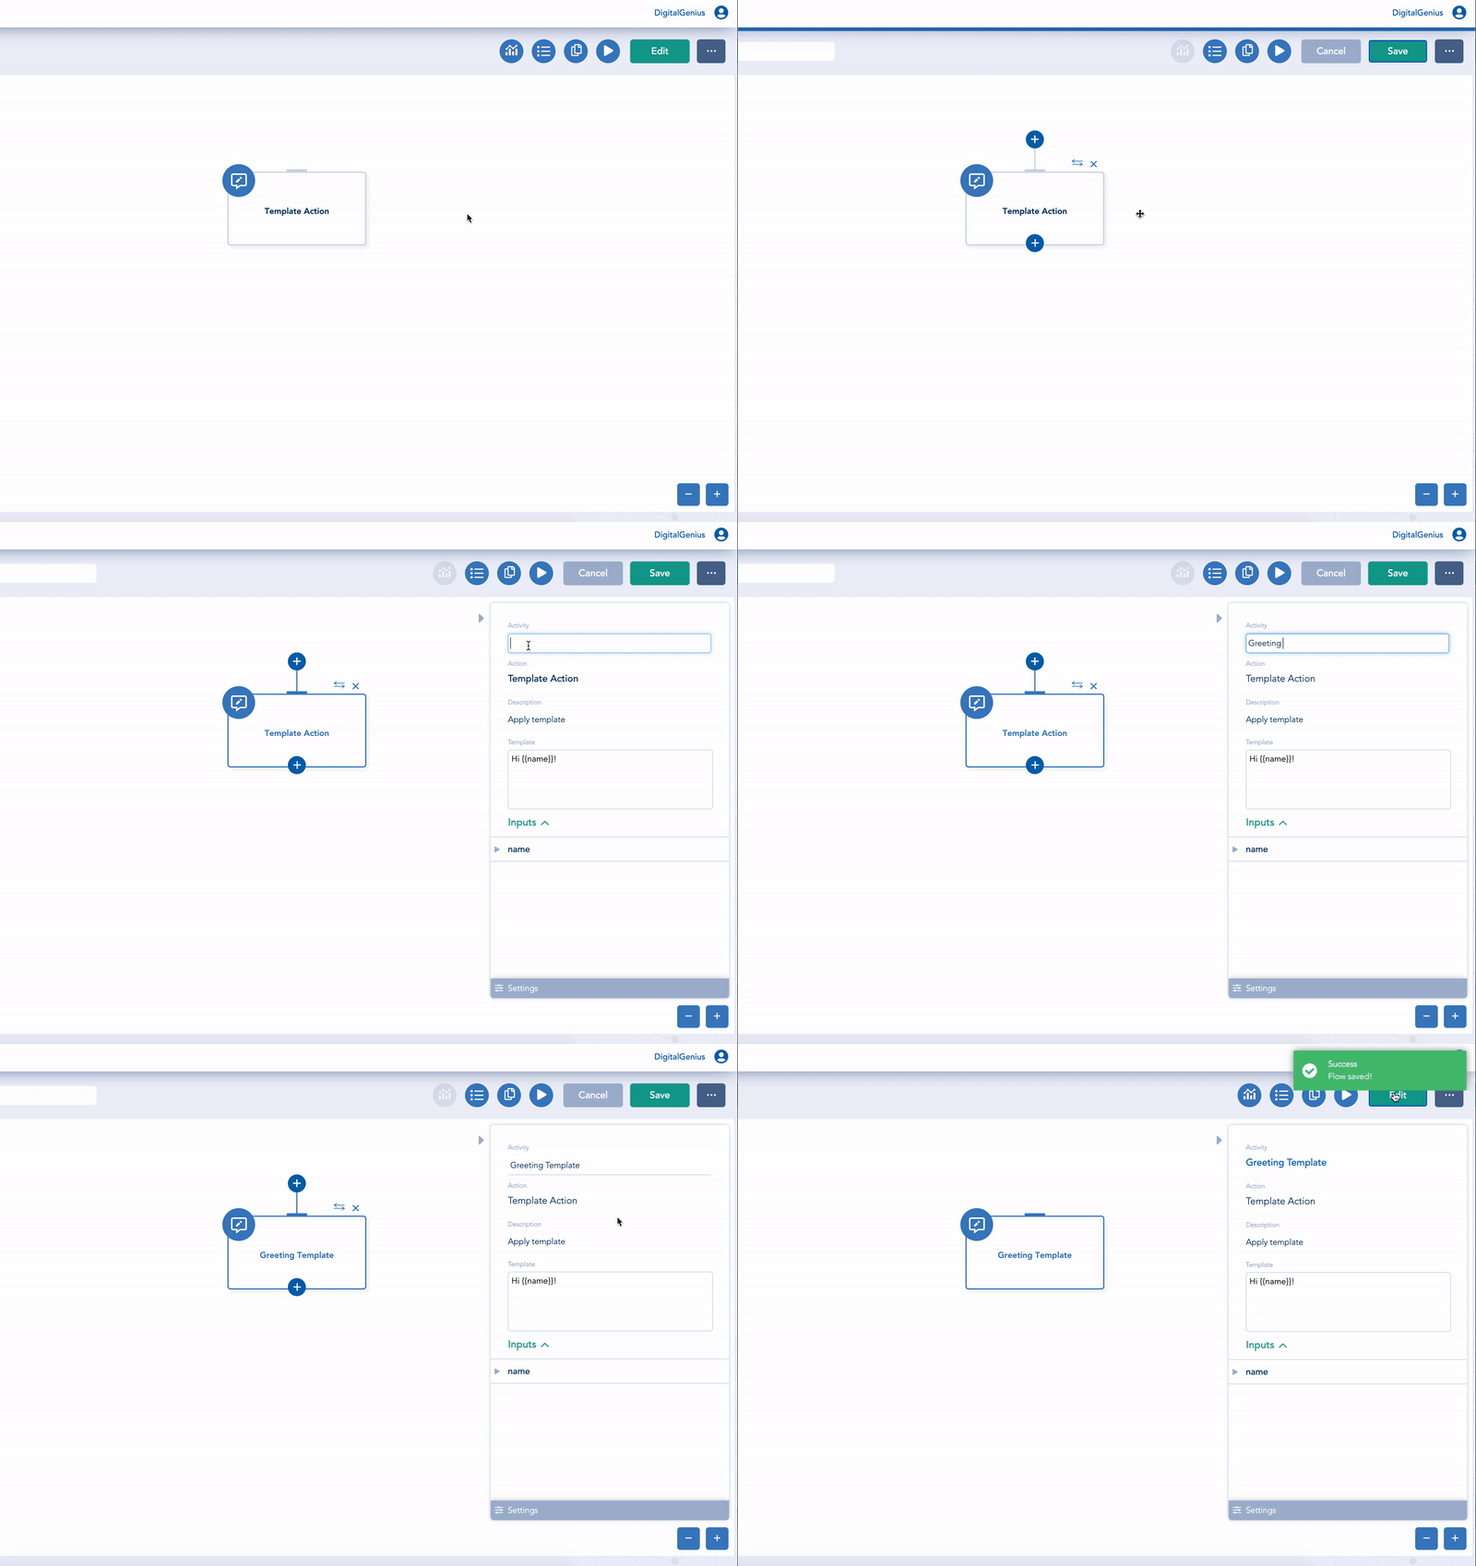
Template Action is the name of the generic action that we are using to generate the templated text, however you can override the name you see in the flow to something more relevant. In our case we are using it to generate a greeting therefore I will call it "Greeting Template". To change the name, enter edit mode, click on the template action and in activity panel (right side panel) enter a name into the Activity field. This should then change the name displayed in the flow.
Updated about 2 months ago
