
Connect to Analytics Flow - Zendesk Trigger
Add New Zendesk Trigger
To add a new Zendesk trigger for DigitalGenius go to Zendesk Settings -> Go to Admin Center -> Object and rules -> Triggers. Click Add Trigger.
Trigger Name: DG Update Last Assignee
Trigger Description: it's optional, you can leave it empty
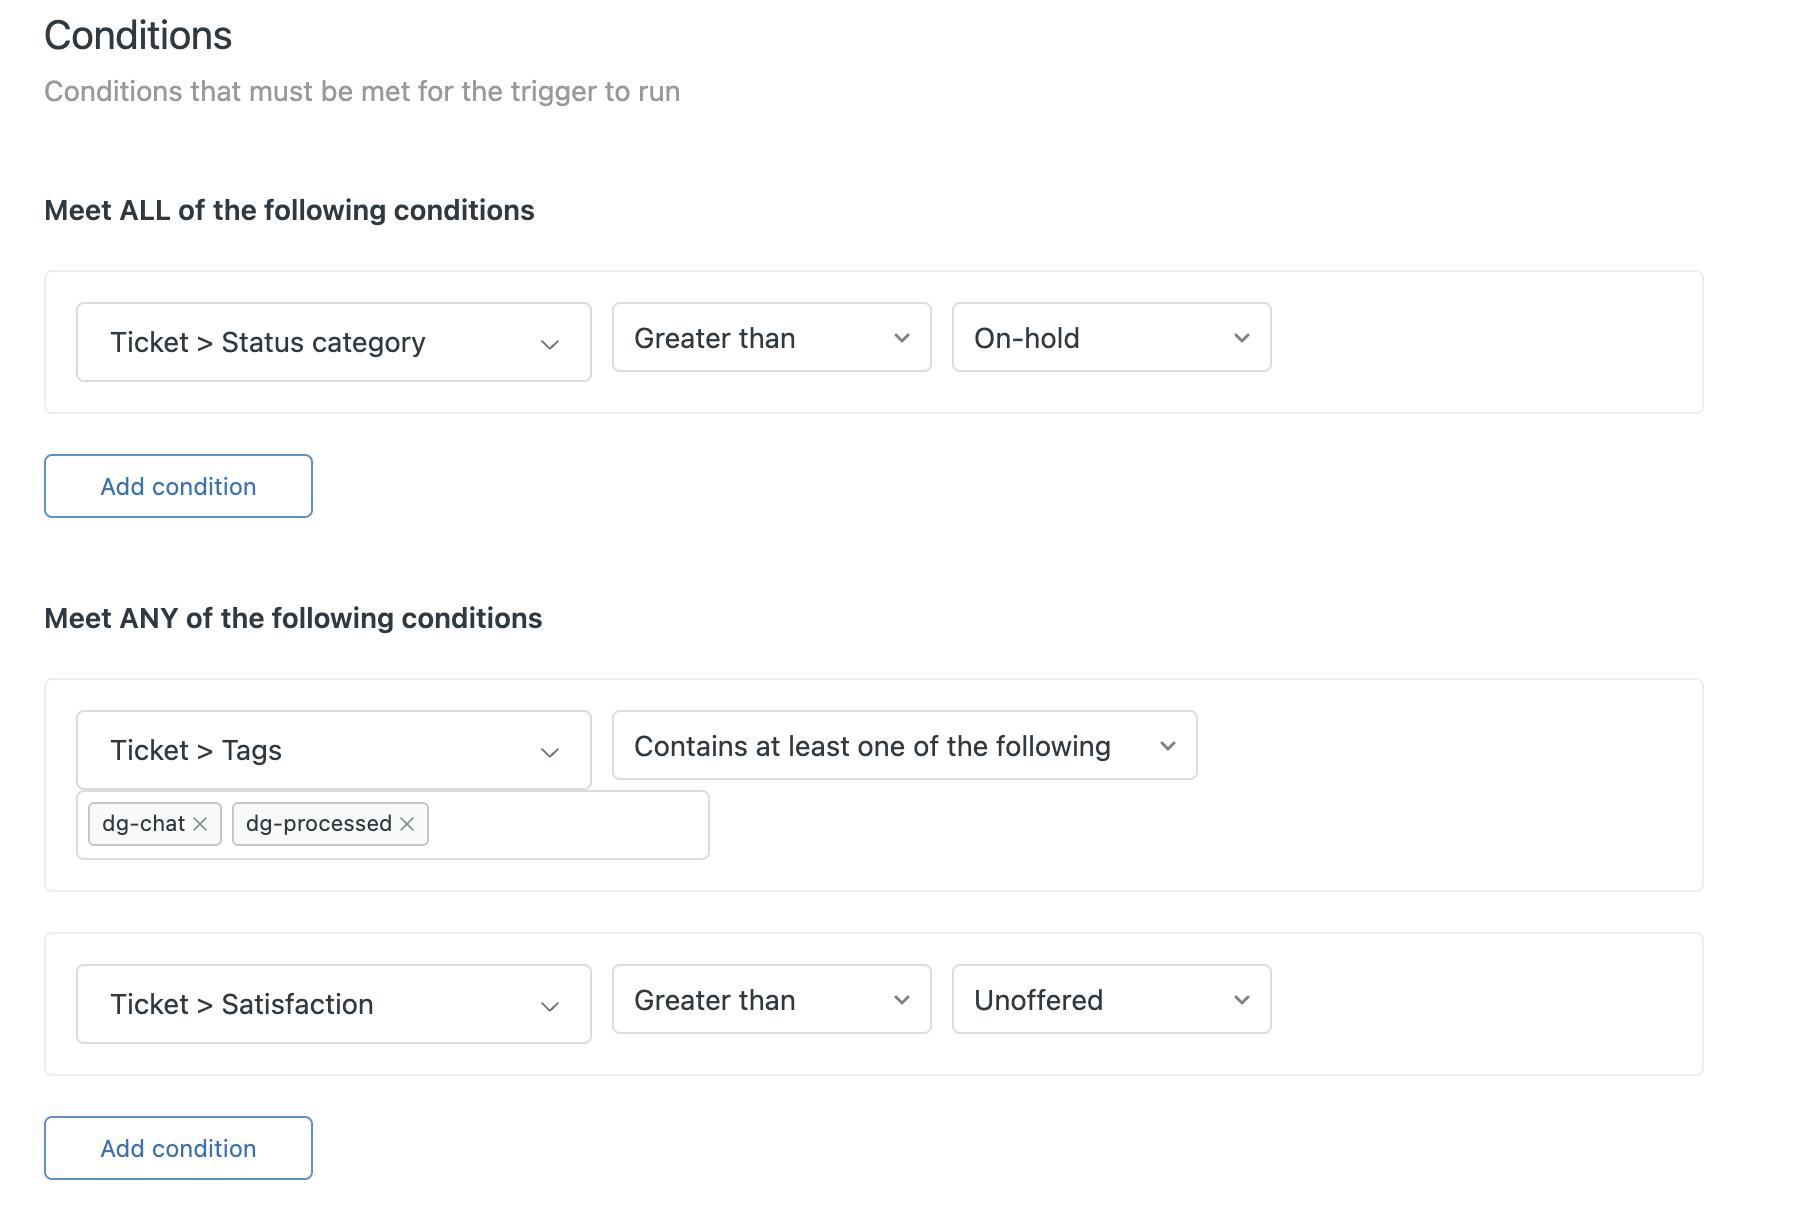
Conditions
- Status
The status condition will be set up to Status greater than On-hold, this would make sure that automation is only being applied to Solved and Closed tickets.
- Tags and Satisfaction
The tags condition will be set up to Contains at least one of the following and in the tags list you need to add "dg-processed, dg-chat" and Satisfaction Greater than Unoffered (if Satisfaction object exists)
Actions
In the Actions section, you need to add an action: Notify active webhook and select DG Automation Webhook.
In the JSON body, use the following JSON object:
{
   "action_id":"analytics flow_id",
   "external_id":"{{ticket.id}}",
   "inputs":{

              "user_email":"{{ticket.requester.email}}",
              "ticket_id":"{{ticket.id}}",
	  "last_assignee": "{{ticket.assignee.email}}",
               "csat":"{{satisfaction.current_rating}}",
	  "csat_comment":"{{satisfaction.current_comment}}",
	  "status":"{{ticket.status}}",
	  "tags":"{{ticket.tags}}",
	  "csat_survey_sent":"{{satisfaction.rating_section}}"

   }
}
Please note, you need to replace "analytics flow_id" with the id of the Analytics flow
Save Trigger
Once all the conditions and actions are created or updated, do not forget to save the trigger by clicking the Create/Save button.
Updated 9 months ago