
Create Dixa API Token
Open Third Party Agents
In your Dixa account open Settings -> AI Agents -> Third Party Agents -> and Select DigitalGenius.
If the "DigitalGenius" option does not appear, please ask Dixa directly to enable this option.
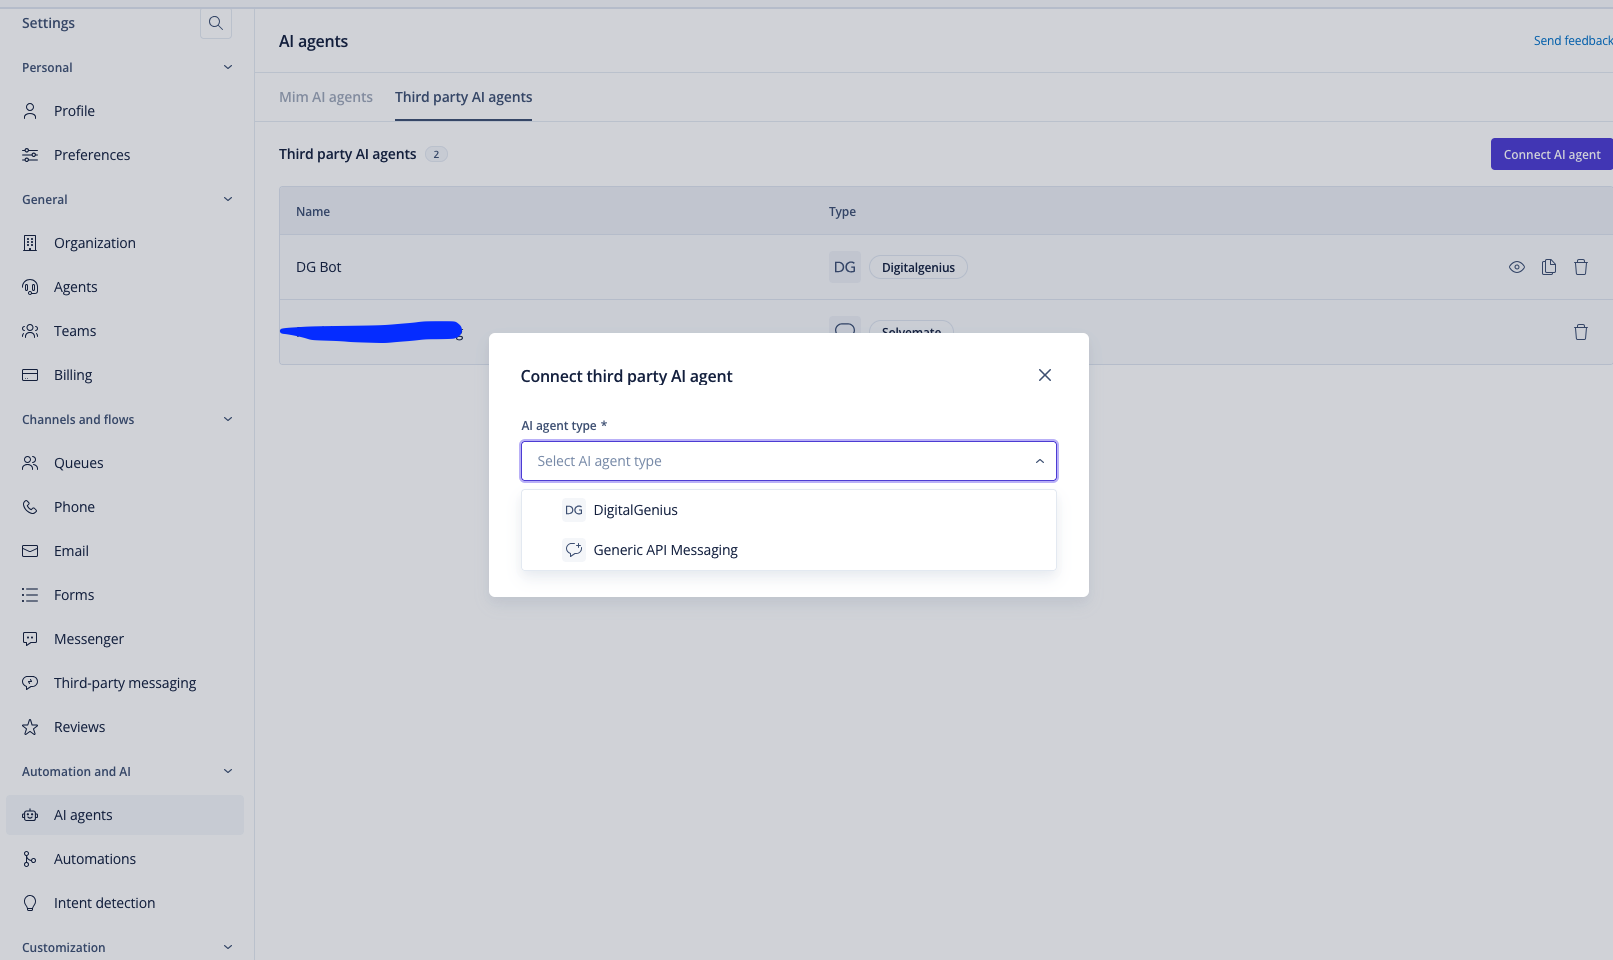
Create New Token
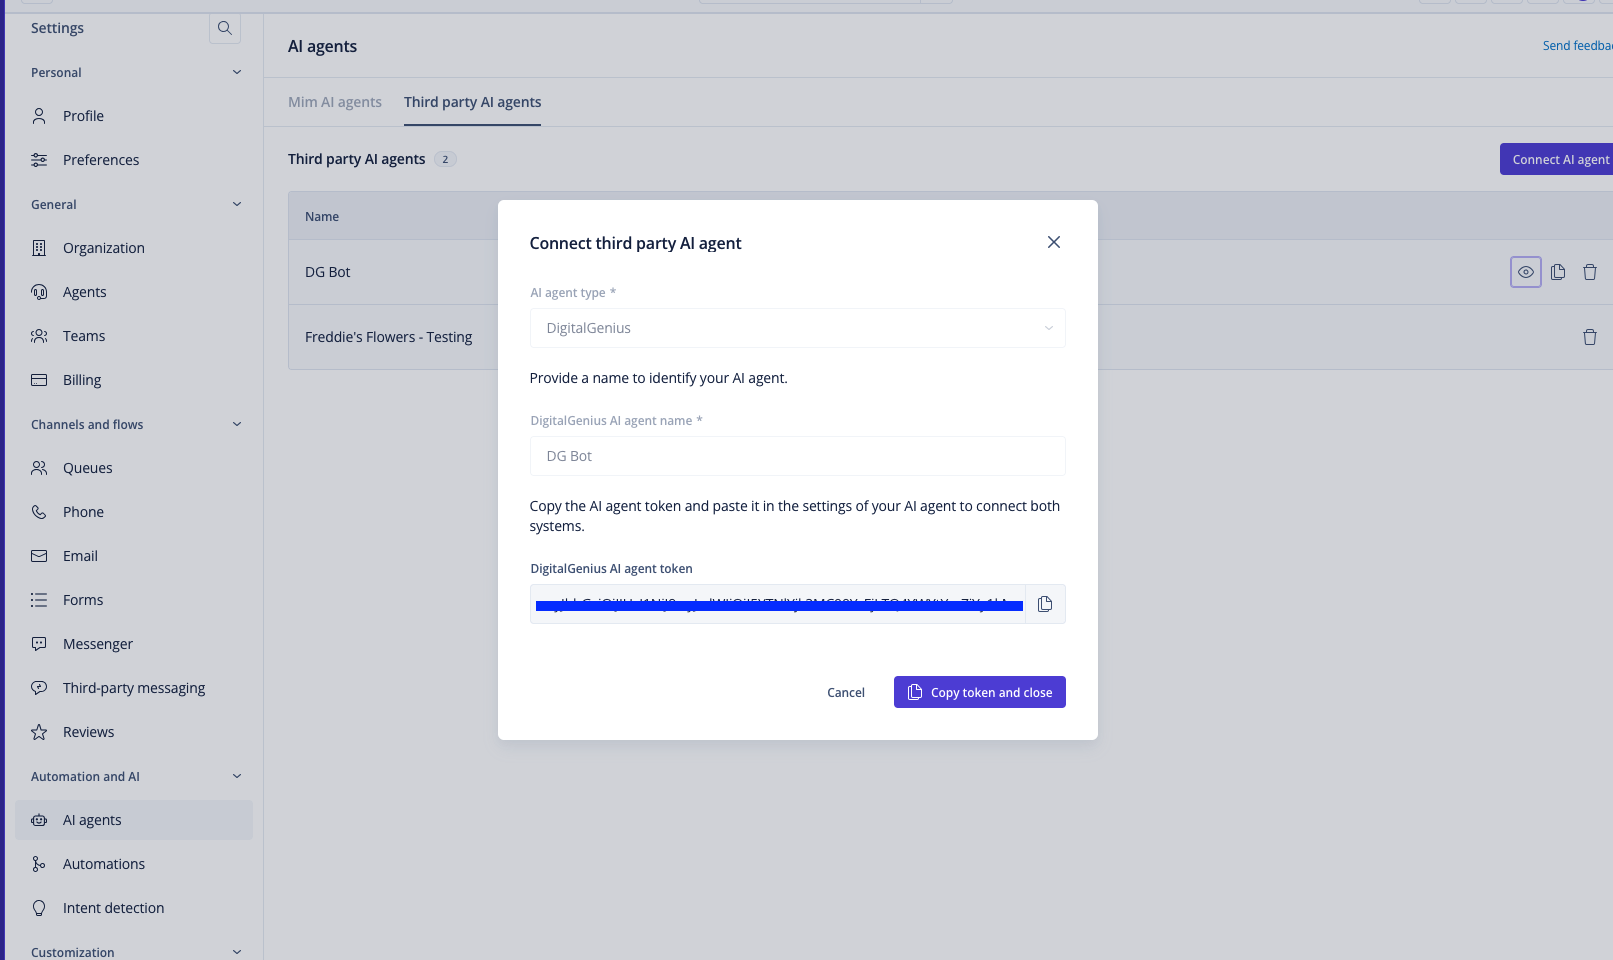
Name the agent "DG Bot" - exactly as written.
Copy the token and save it somewhere safe as you will need it for the next step.
Create Dixa Connection in DG
Go back to DigitalGenius dashboard and open the Modules page.

In the list of modules find and open the Dixa module. Then start adding a new connection by clicking on New Connection button.

Next on the New Connection pop up enter the name for your connection and paste the API token you created in Dixa. For the name use something to identify the Dixa account you created the API token in.

Finally click Connect and upon successful connection you should see a success notification and your newly added connection in the list of Dixa connections.

Finally test that the connection is working. Click on the 3 dots icon at the bottom right corner of the connection and select Test. This will not make any changes to your Dixa account, this will only try to retrieve some data from your Dixa account.

If test is successful you shall see a green tick.

If the test is unsuccessful then you will see a red cross.

Updated 4 months ago