Dixa
The following four steps will guide you on how to integrate Dixa events with DigitalGenius.
Step 1. Create the entry flow
Create a new flow that will be the entry flow to handle end-user messages. Copy the id of the flow as it will be used to set up the Dixa webhook.
Step 2. Create the Dixa webhook
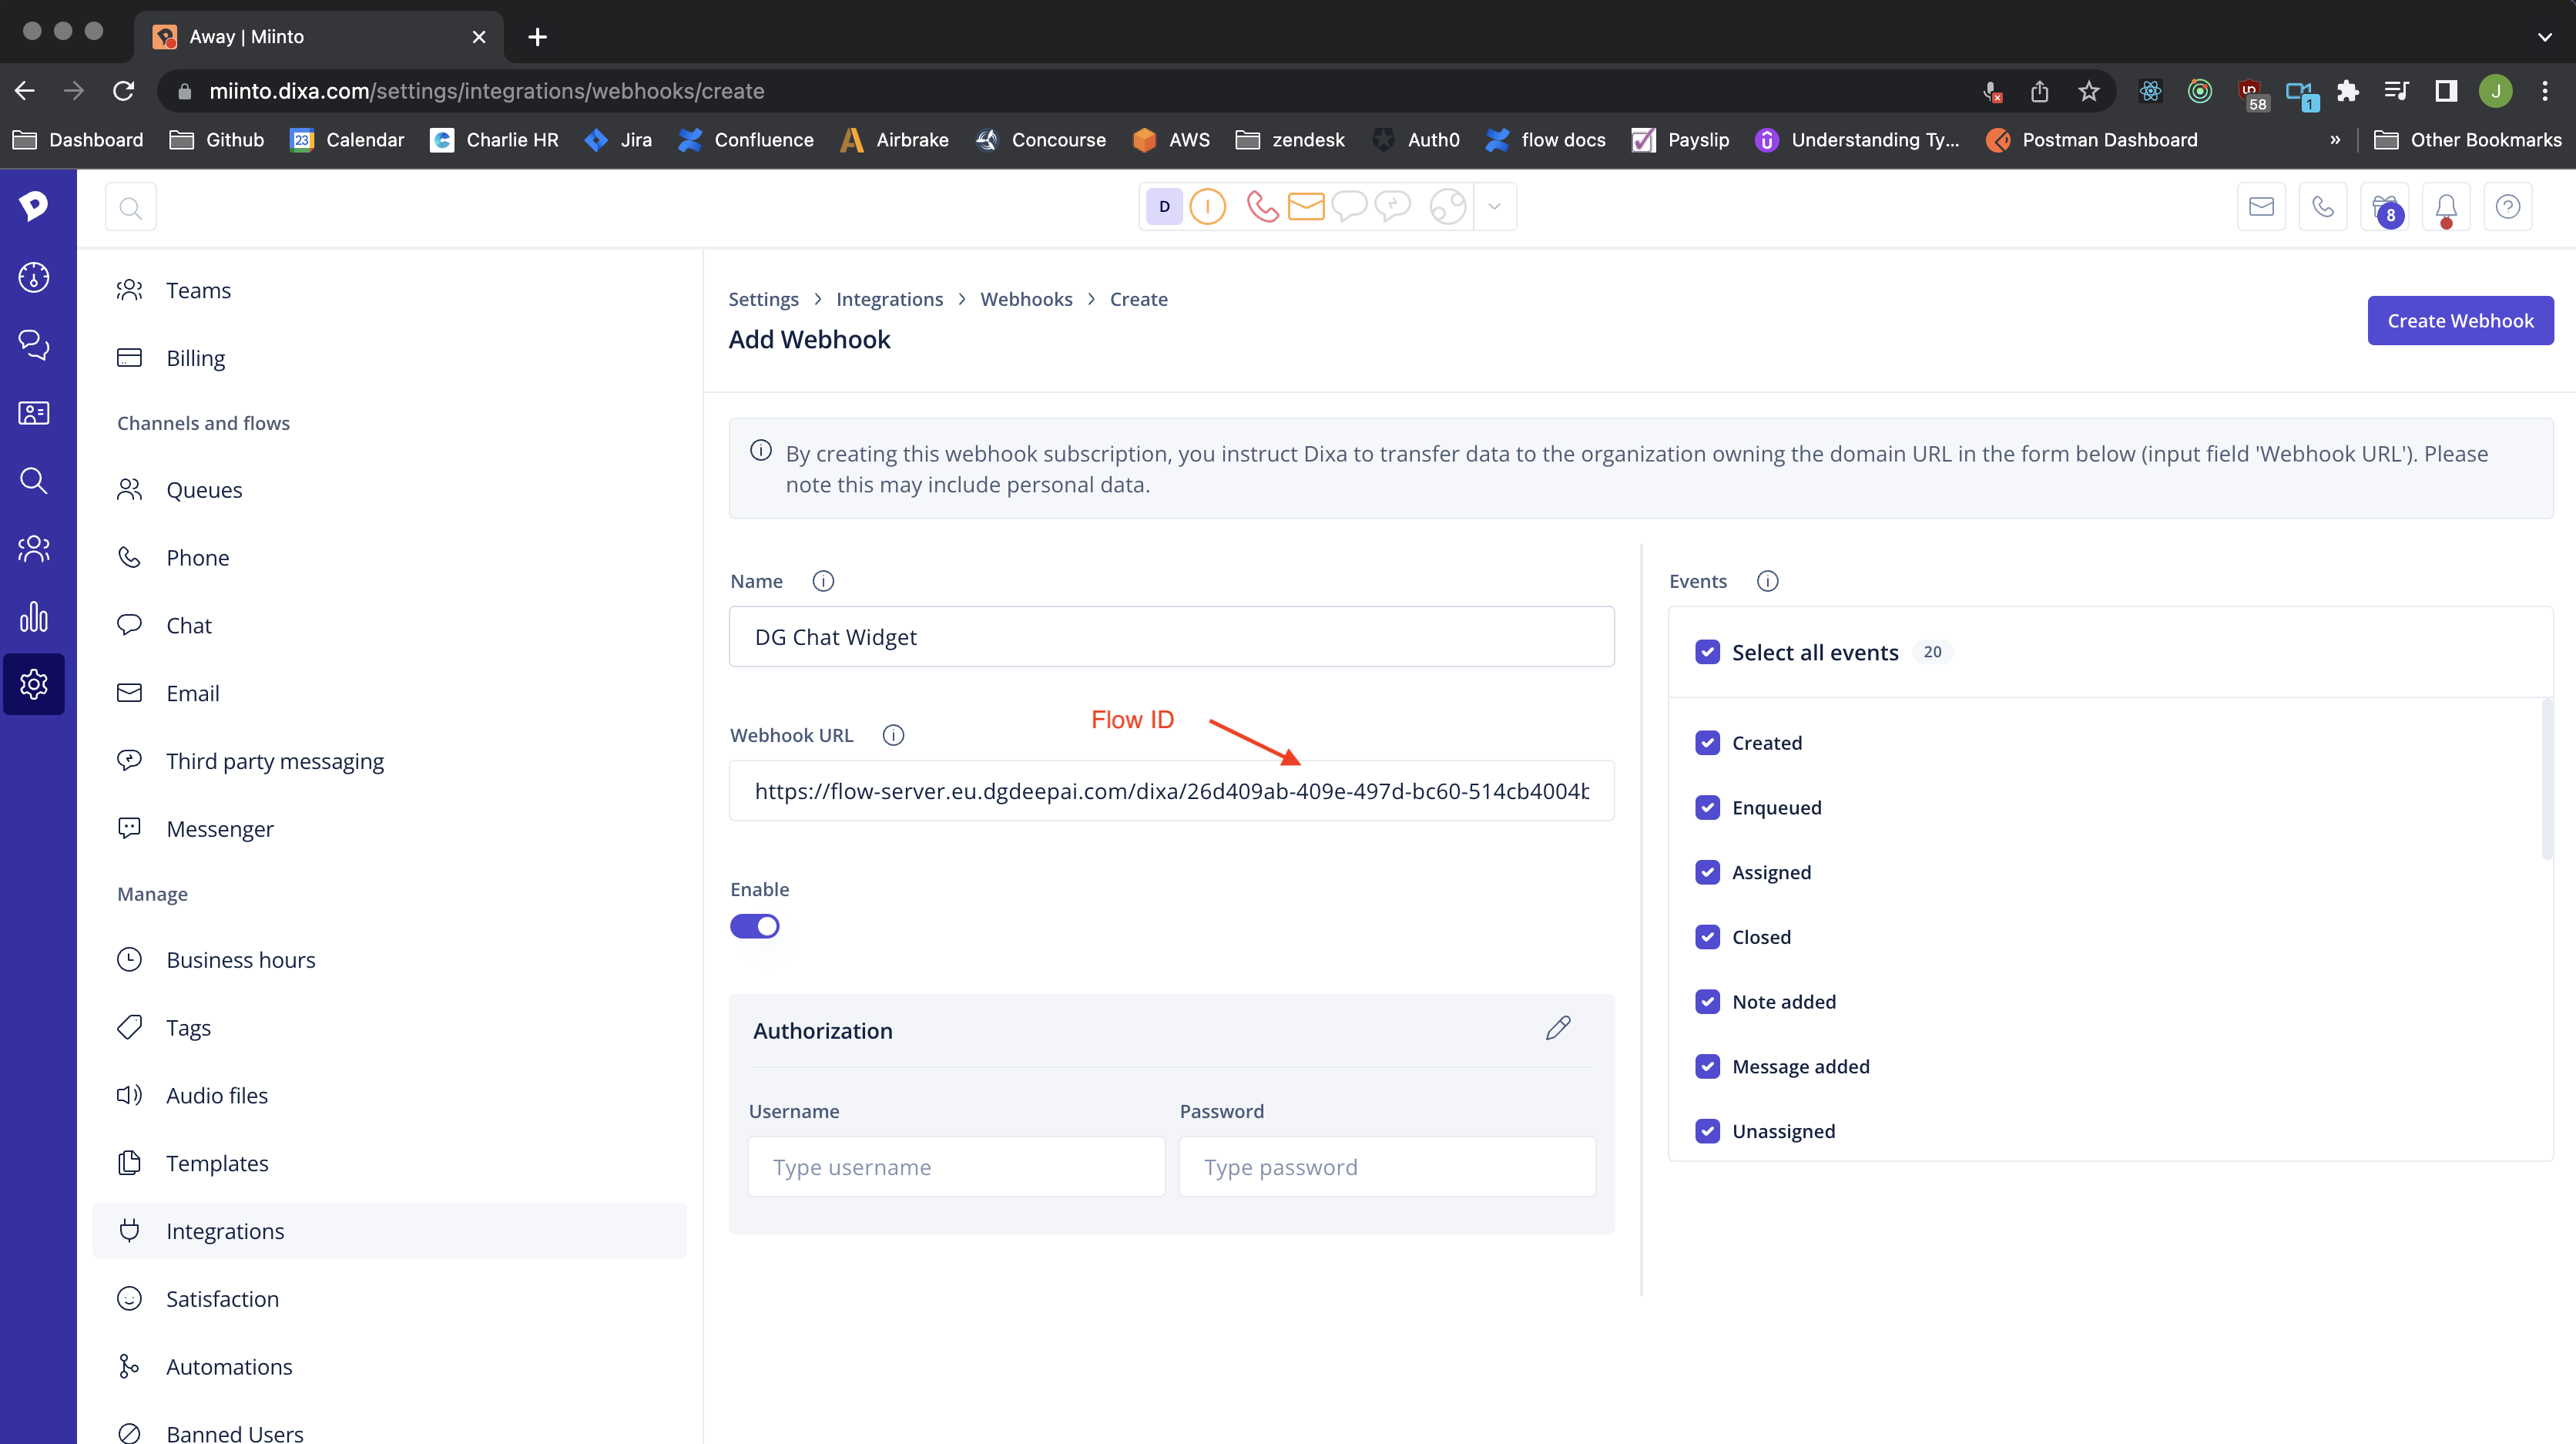
Navigate to Settings -> Integrations -> Webhooks -> Click on Add Webhook.
The webhook URL will depend on your region, EU or US, and we will use the flow id from the previous step.
https://flow-server.{{region}}.dgdeepai.com/dixa/{{flow_id}}/webhook
Examples
EU: https://flow-server.eu.dgdeepai.com/dixa/4dfcc257-bc88-49ed-a6b7-0f55da38fbe5/webhook
US: https://flow-server.eu.dgdeepai.com/dixa/4dfcc257-bc88-49ed-a6b7-0f55da38fbe5/webhook
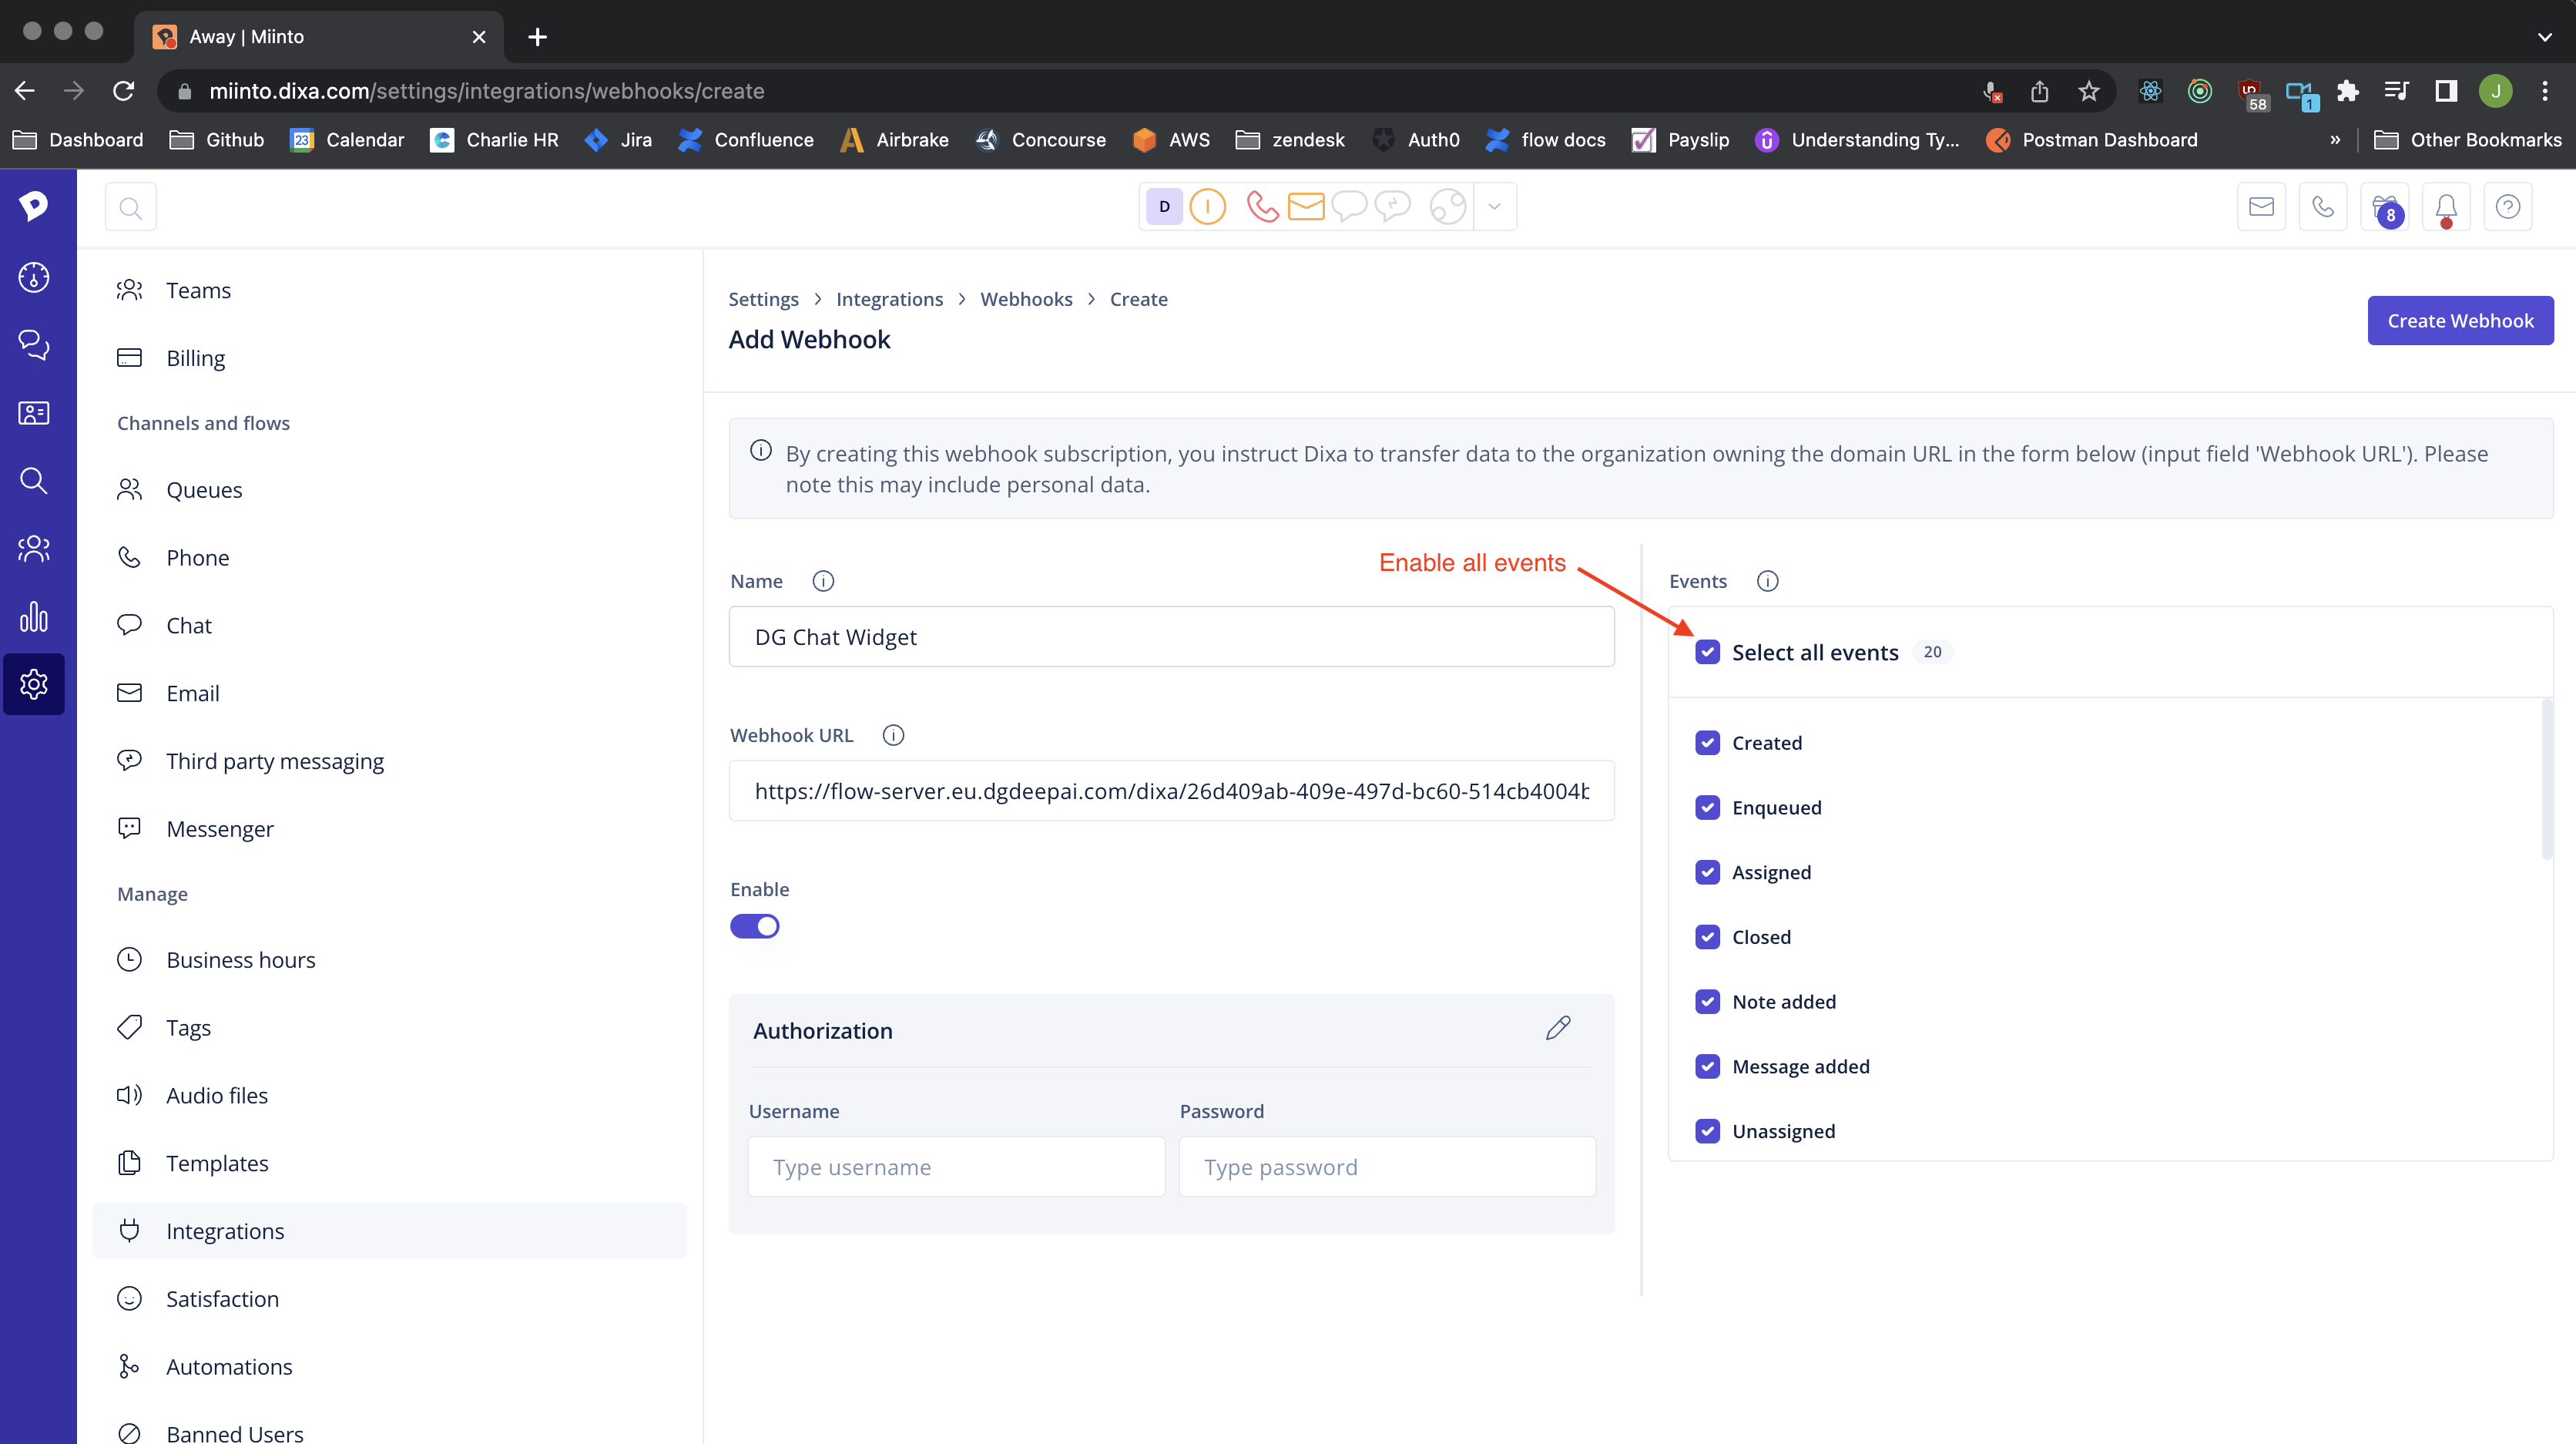
For events, be sure to enable all events:
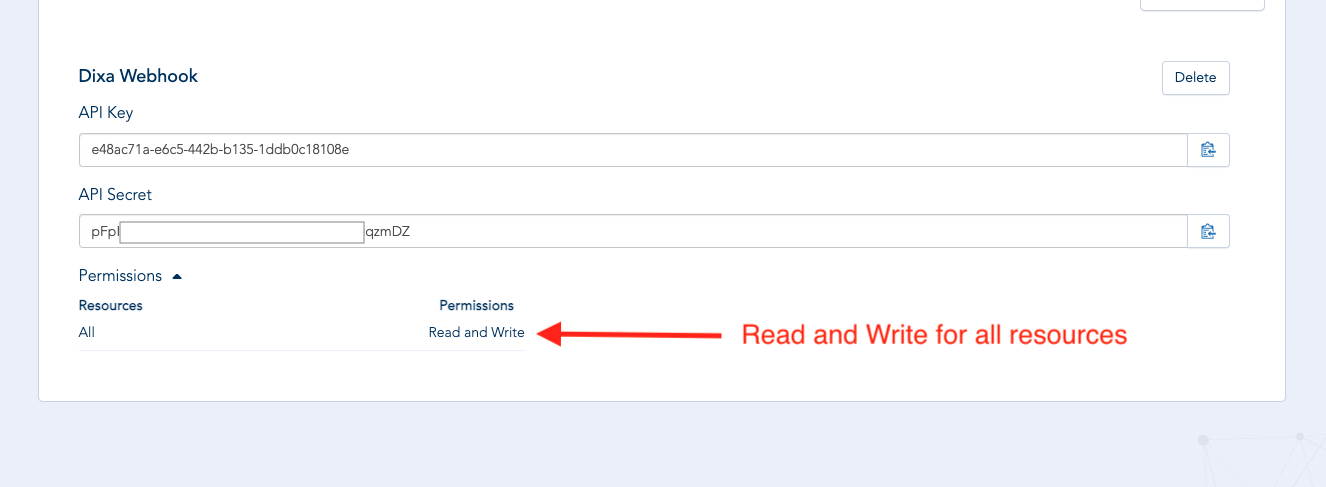
In order to authorise the webhook, create a new token in the customers DigitalGenius dashboard in the Tools -> Api Token section. Be sure to give the token pair Read and Write permissions for All resources.
Copy the api key/secret pair and create a new Authorization for the Dixa webhook, using the DG api key as the username and the secret as the password.
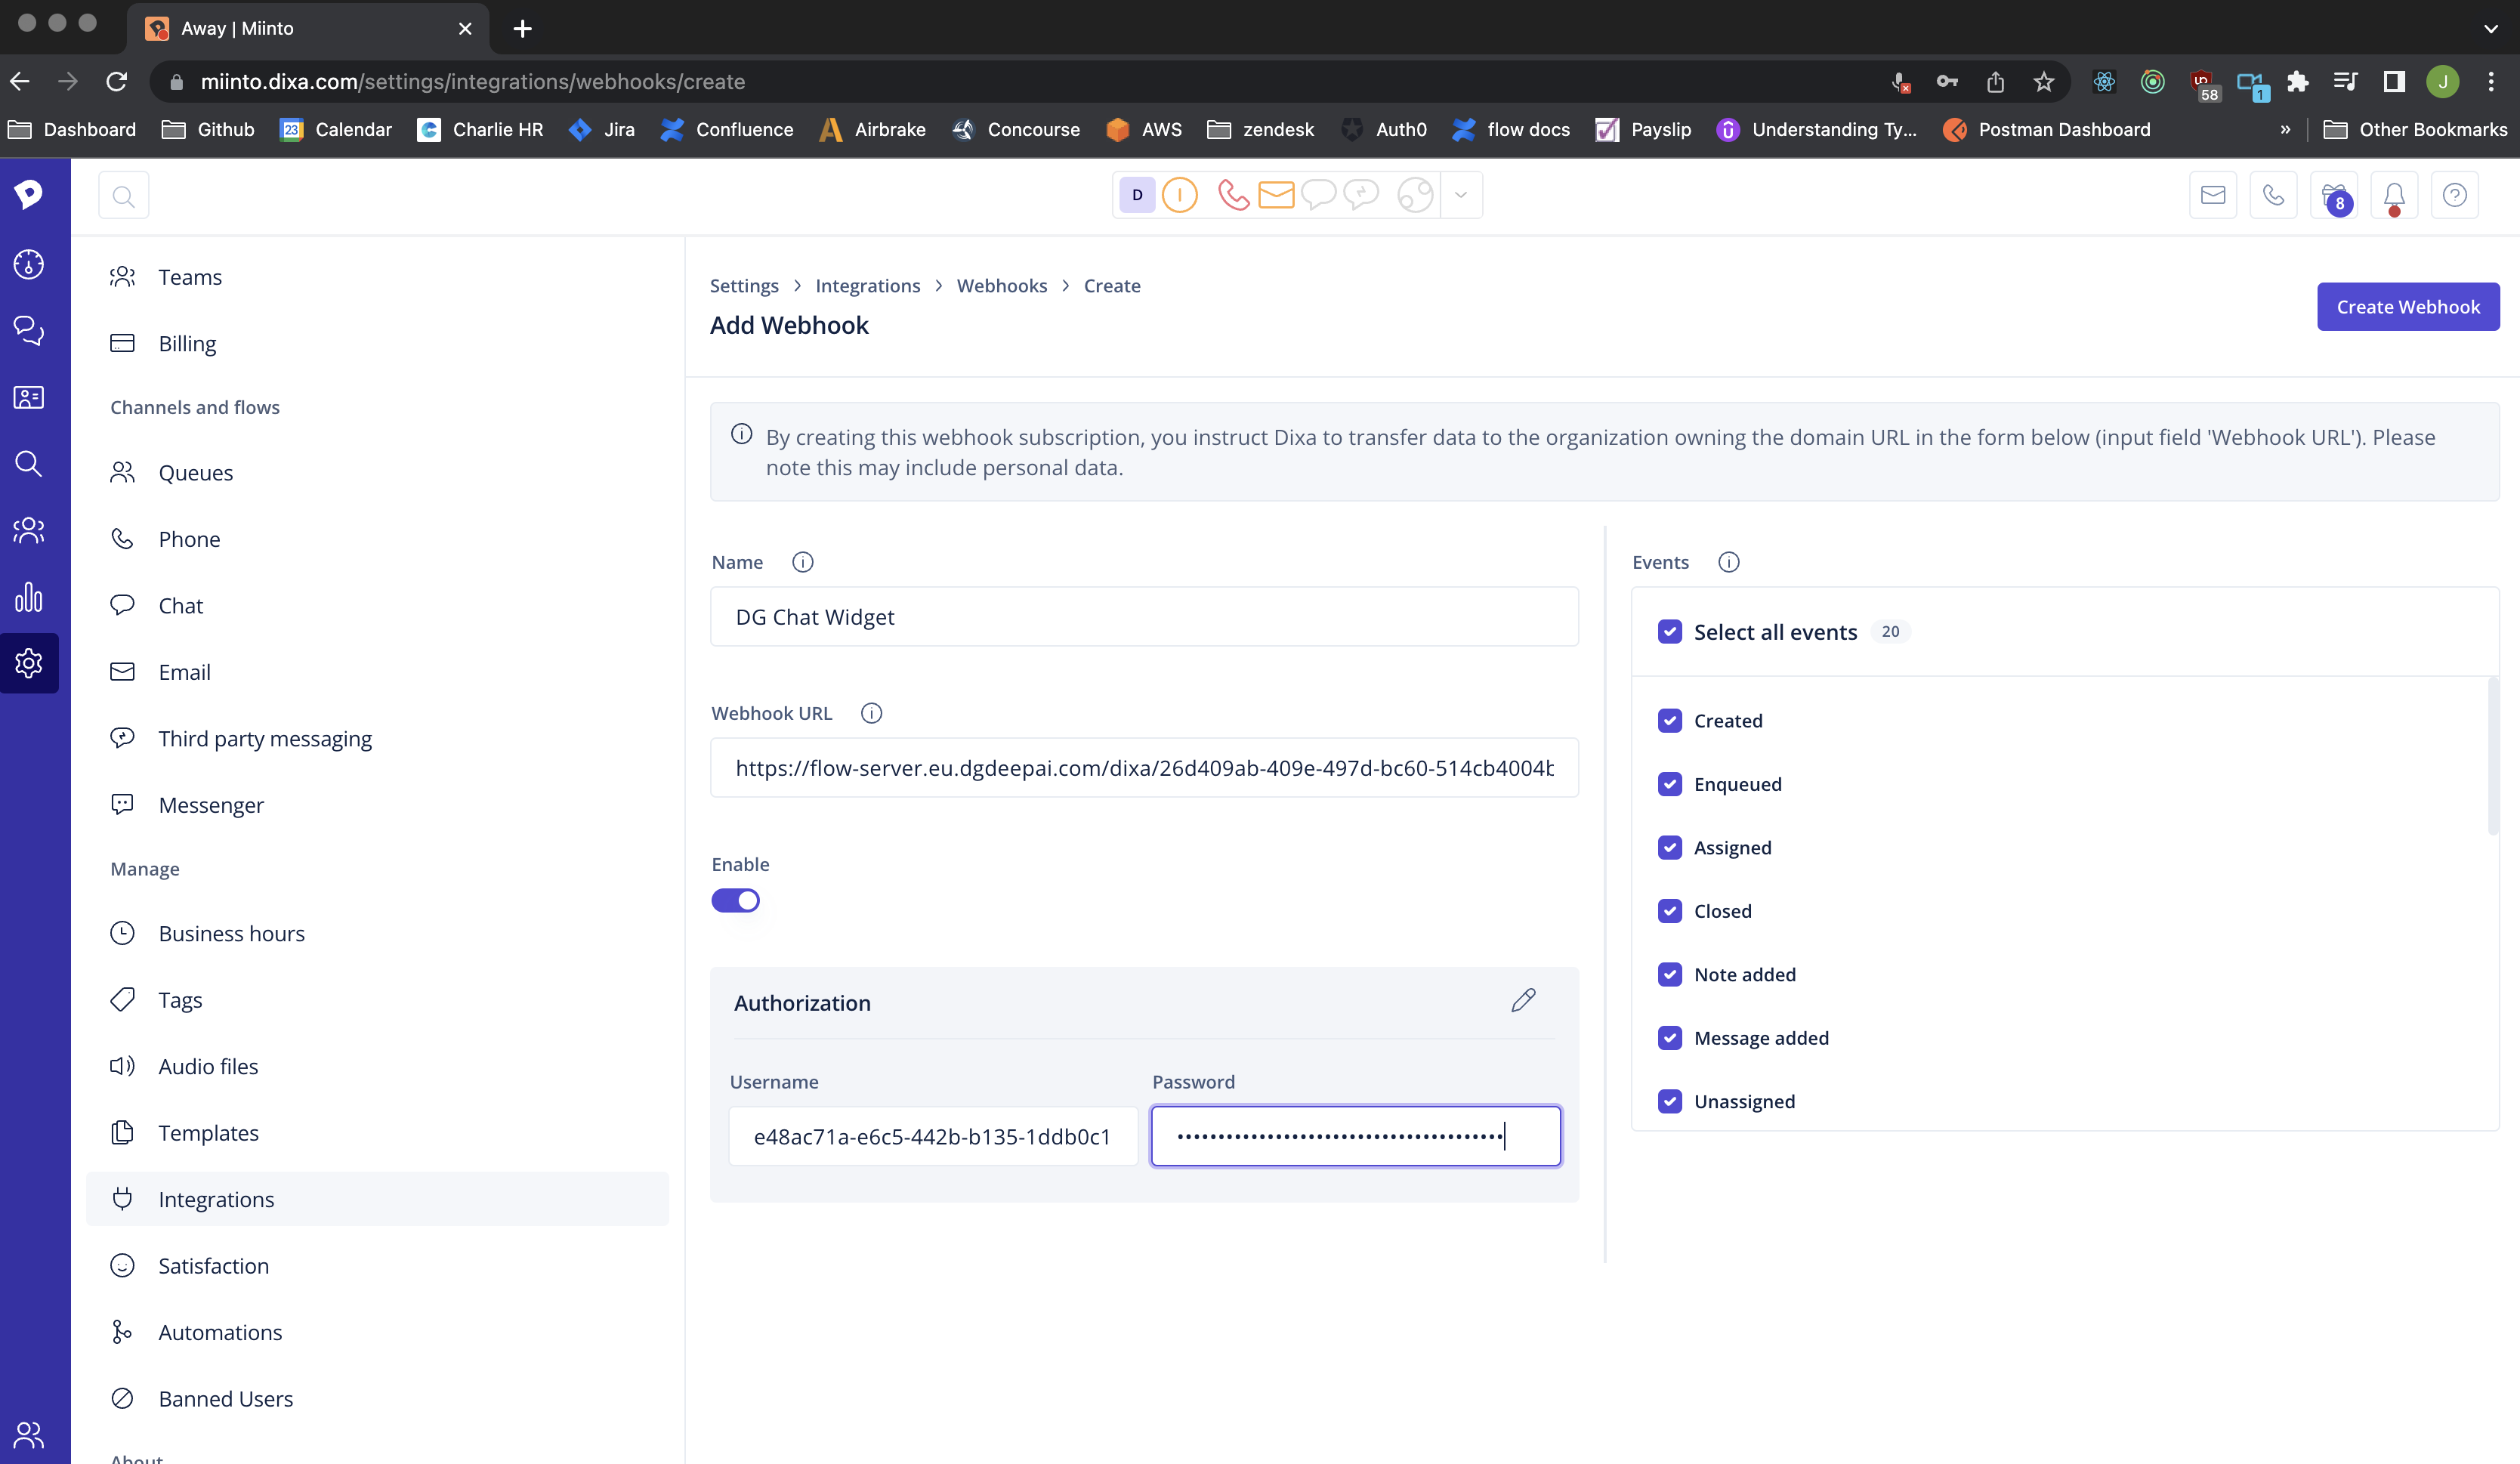
Finally, click on Create Webhook.
Step 3. Create a Dixa API token
Navigate to Settings -> Integrations -> API Tokens and create a new token and copy it to your clipboard
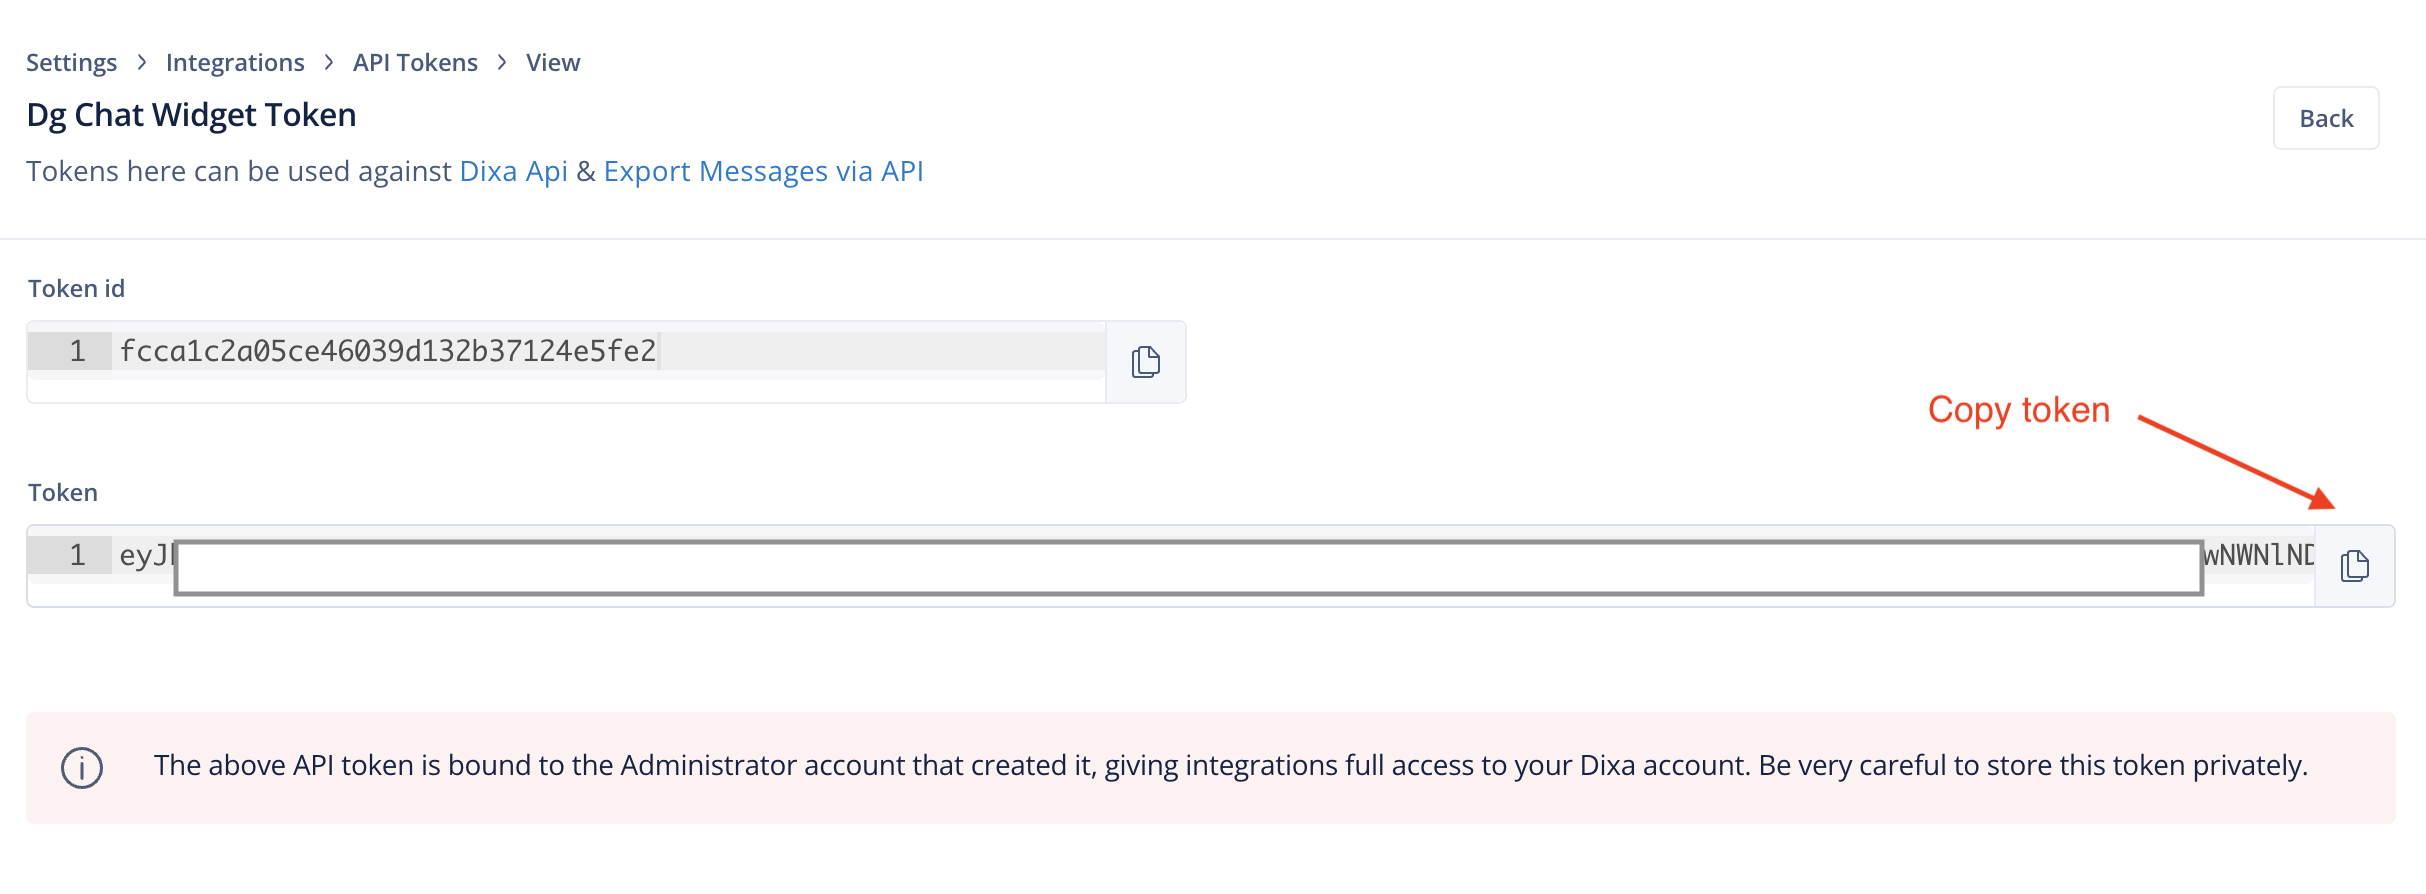
Step 4. Create the connection on the DigitalGenius dashboard
Go to the customers Dg Dashboard and navigate to Modules / Dixa and create a new connection. We will now paste the API token generated in the previous steps. Provide a descriptive name for the new connection.
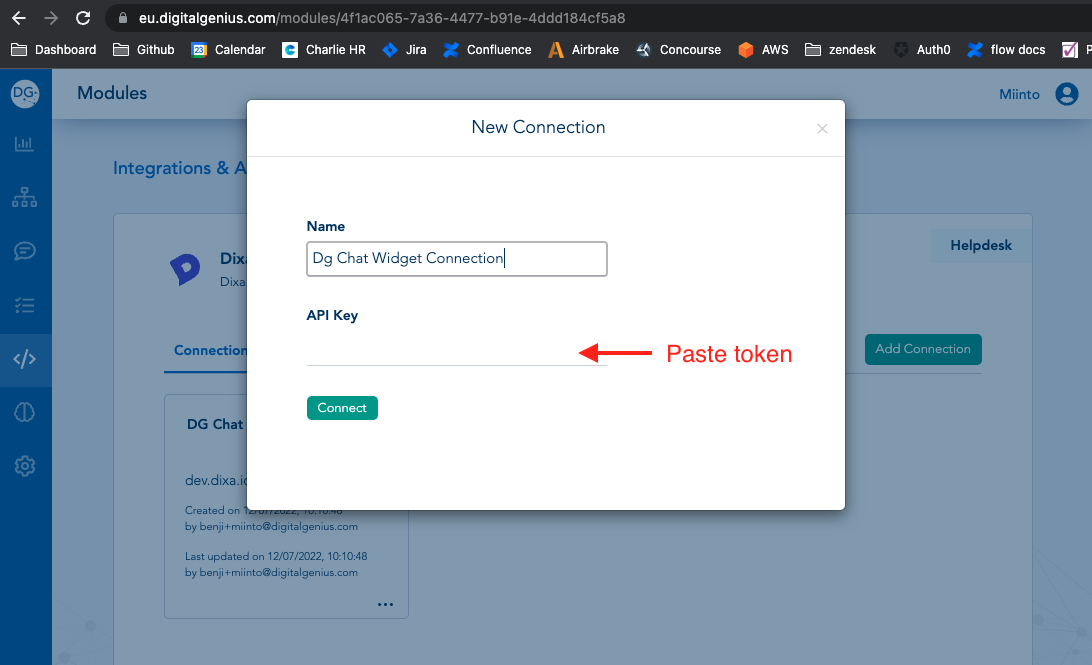
Finally, click on the i icon in the newly created connection and copy the connection id.
Updated 3 months ago