Adyen
Webhook based integration with Adyen
The following four steps will guide you on how to integrate Adyen payment notifications with DigitalGenius.
Step 1. Create the connection on DigitalGenius dashboard
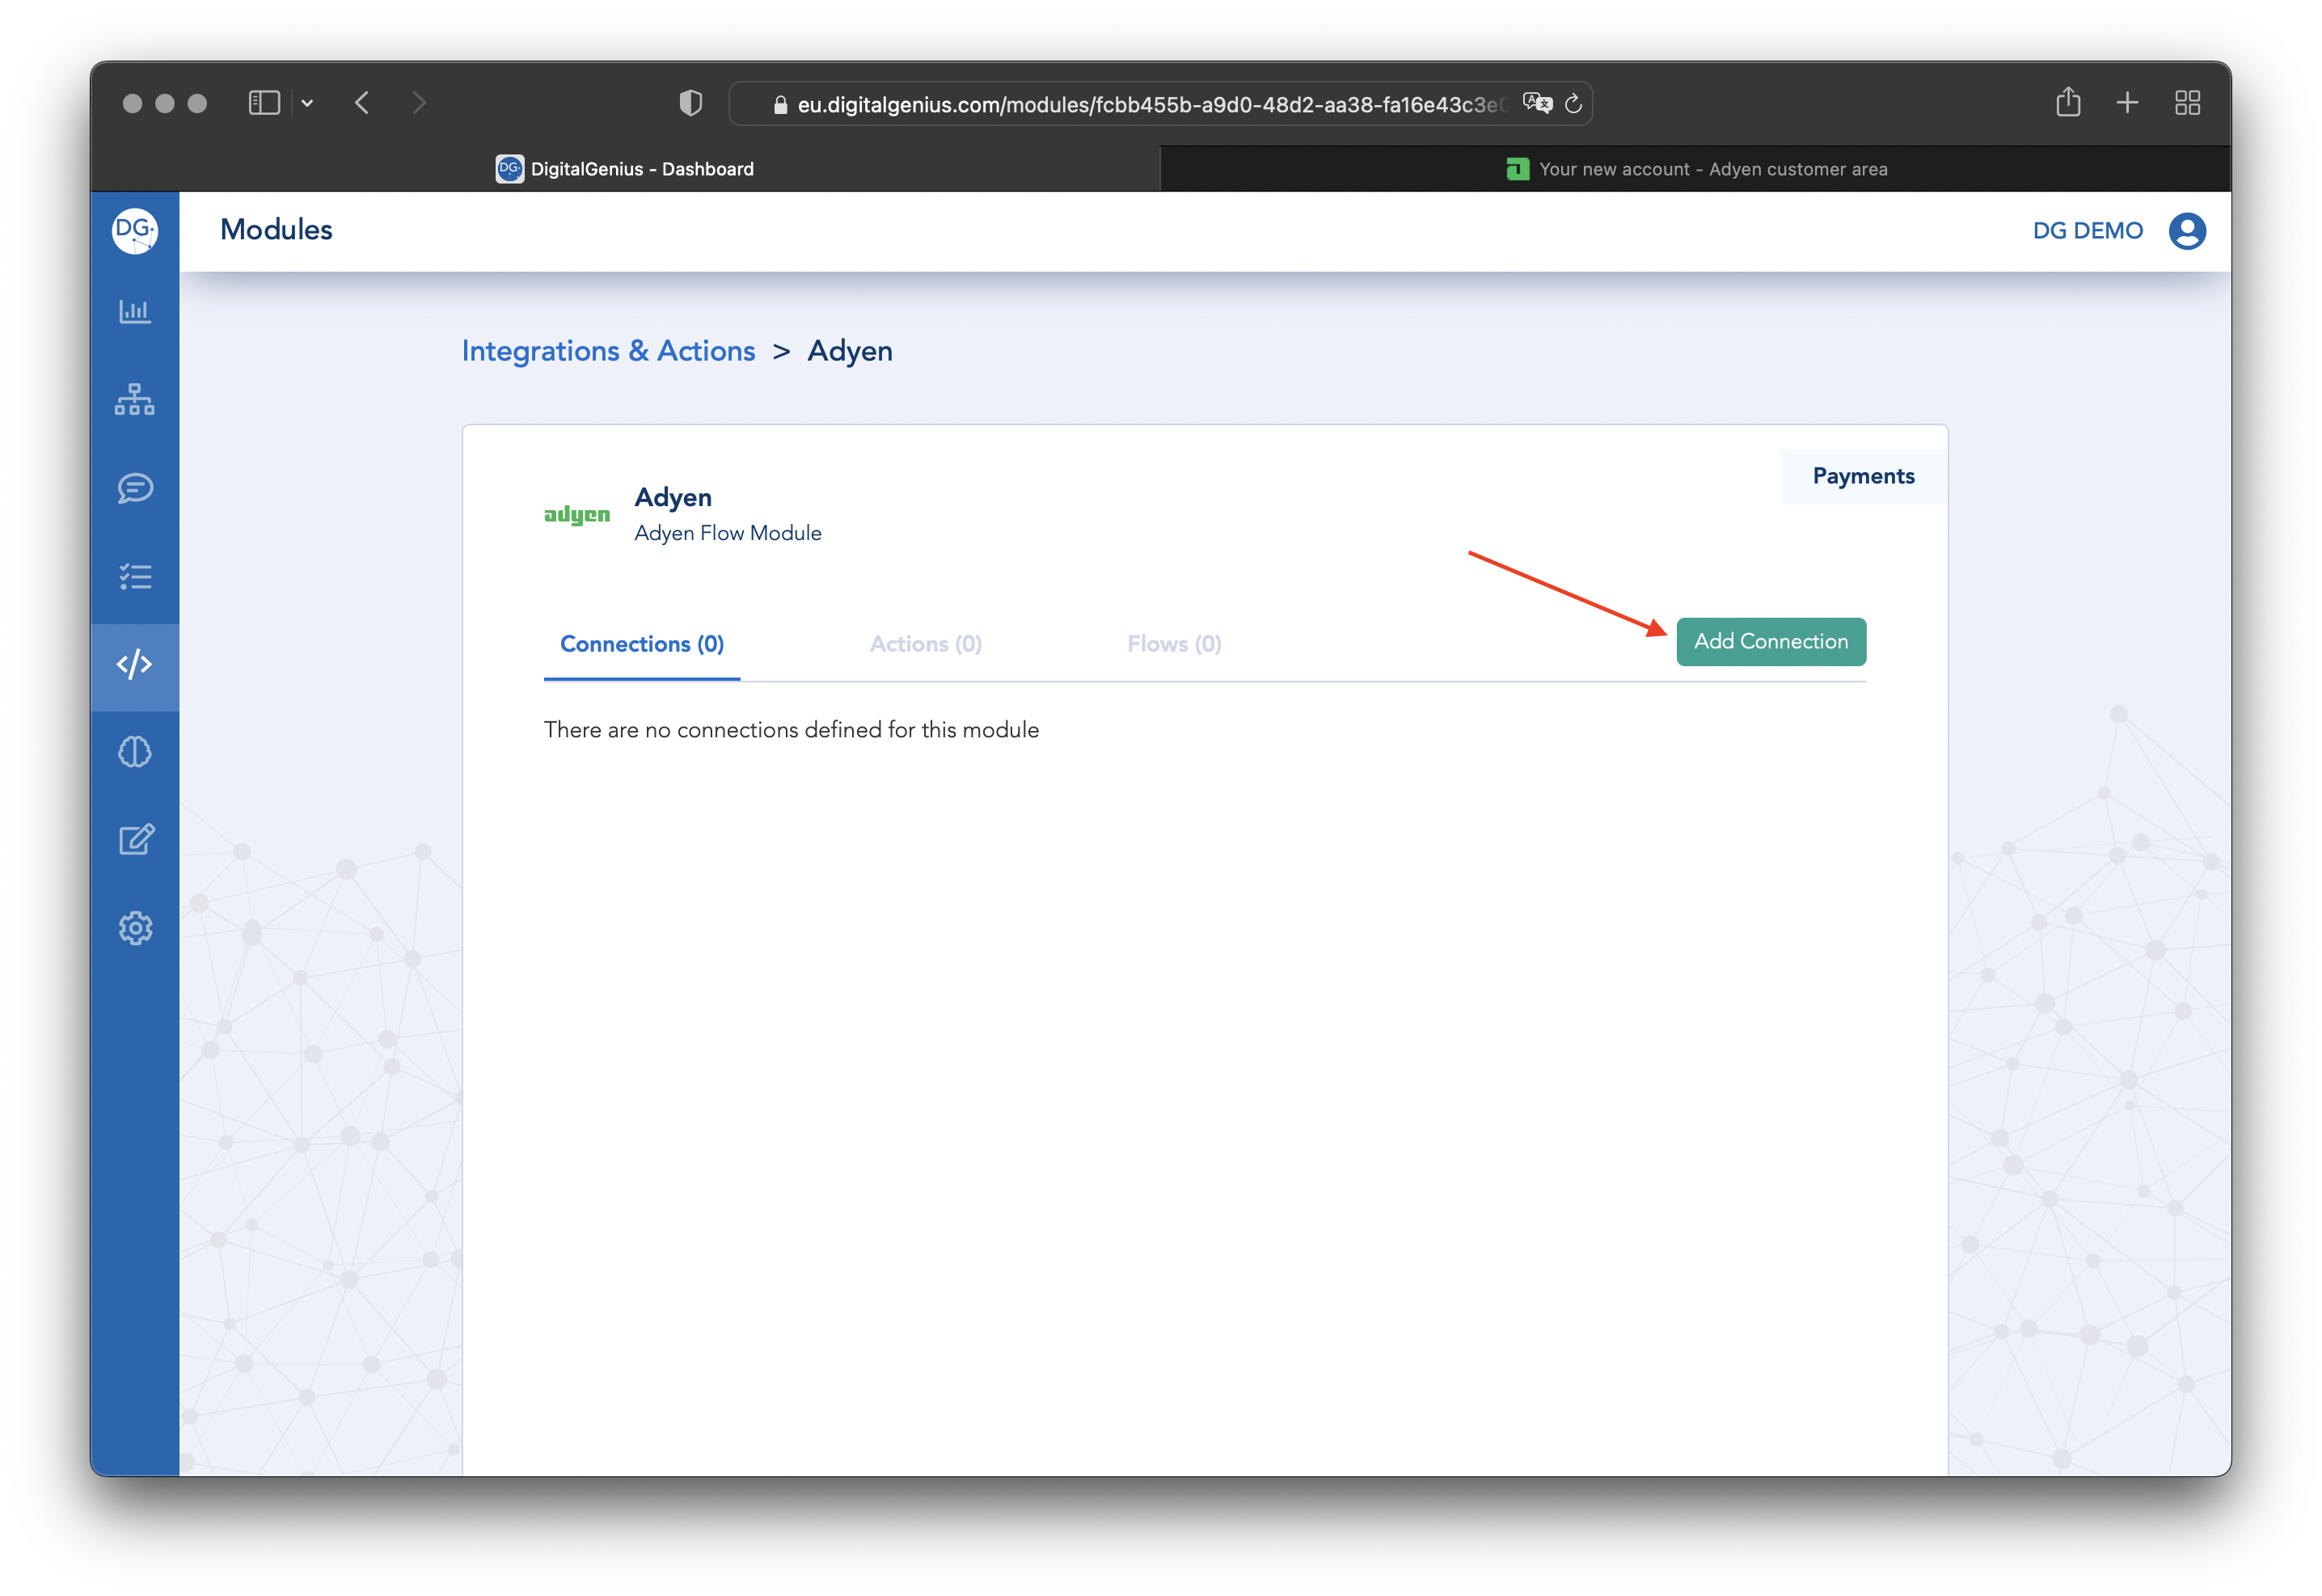
From your DigitalGenius dashboard go to Modules section and click on the Adyen module. Click on Add Connection.
Fill out the Name field for the new connection and then the Adyen Account company name field.
The API Key and HMAC Key will be set up in the next steps. Leave the fields empty for now.
You can click on the Connect button now to save the new connection.
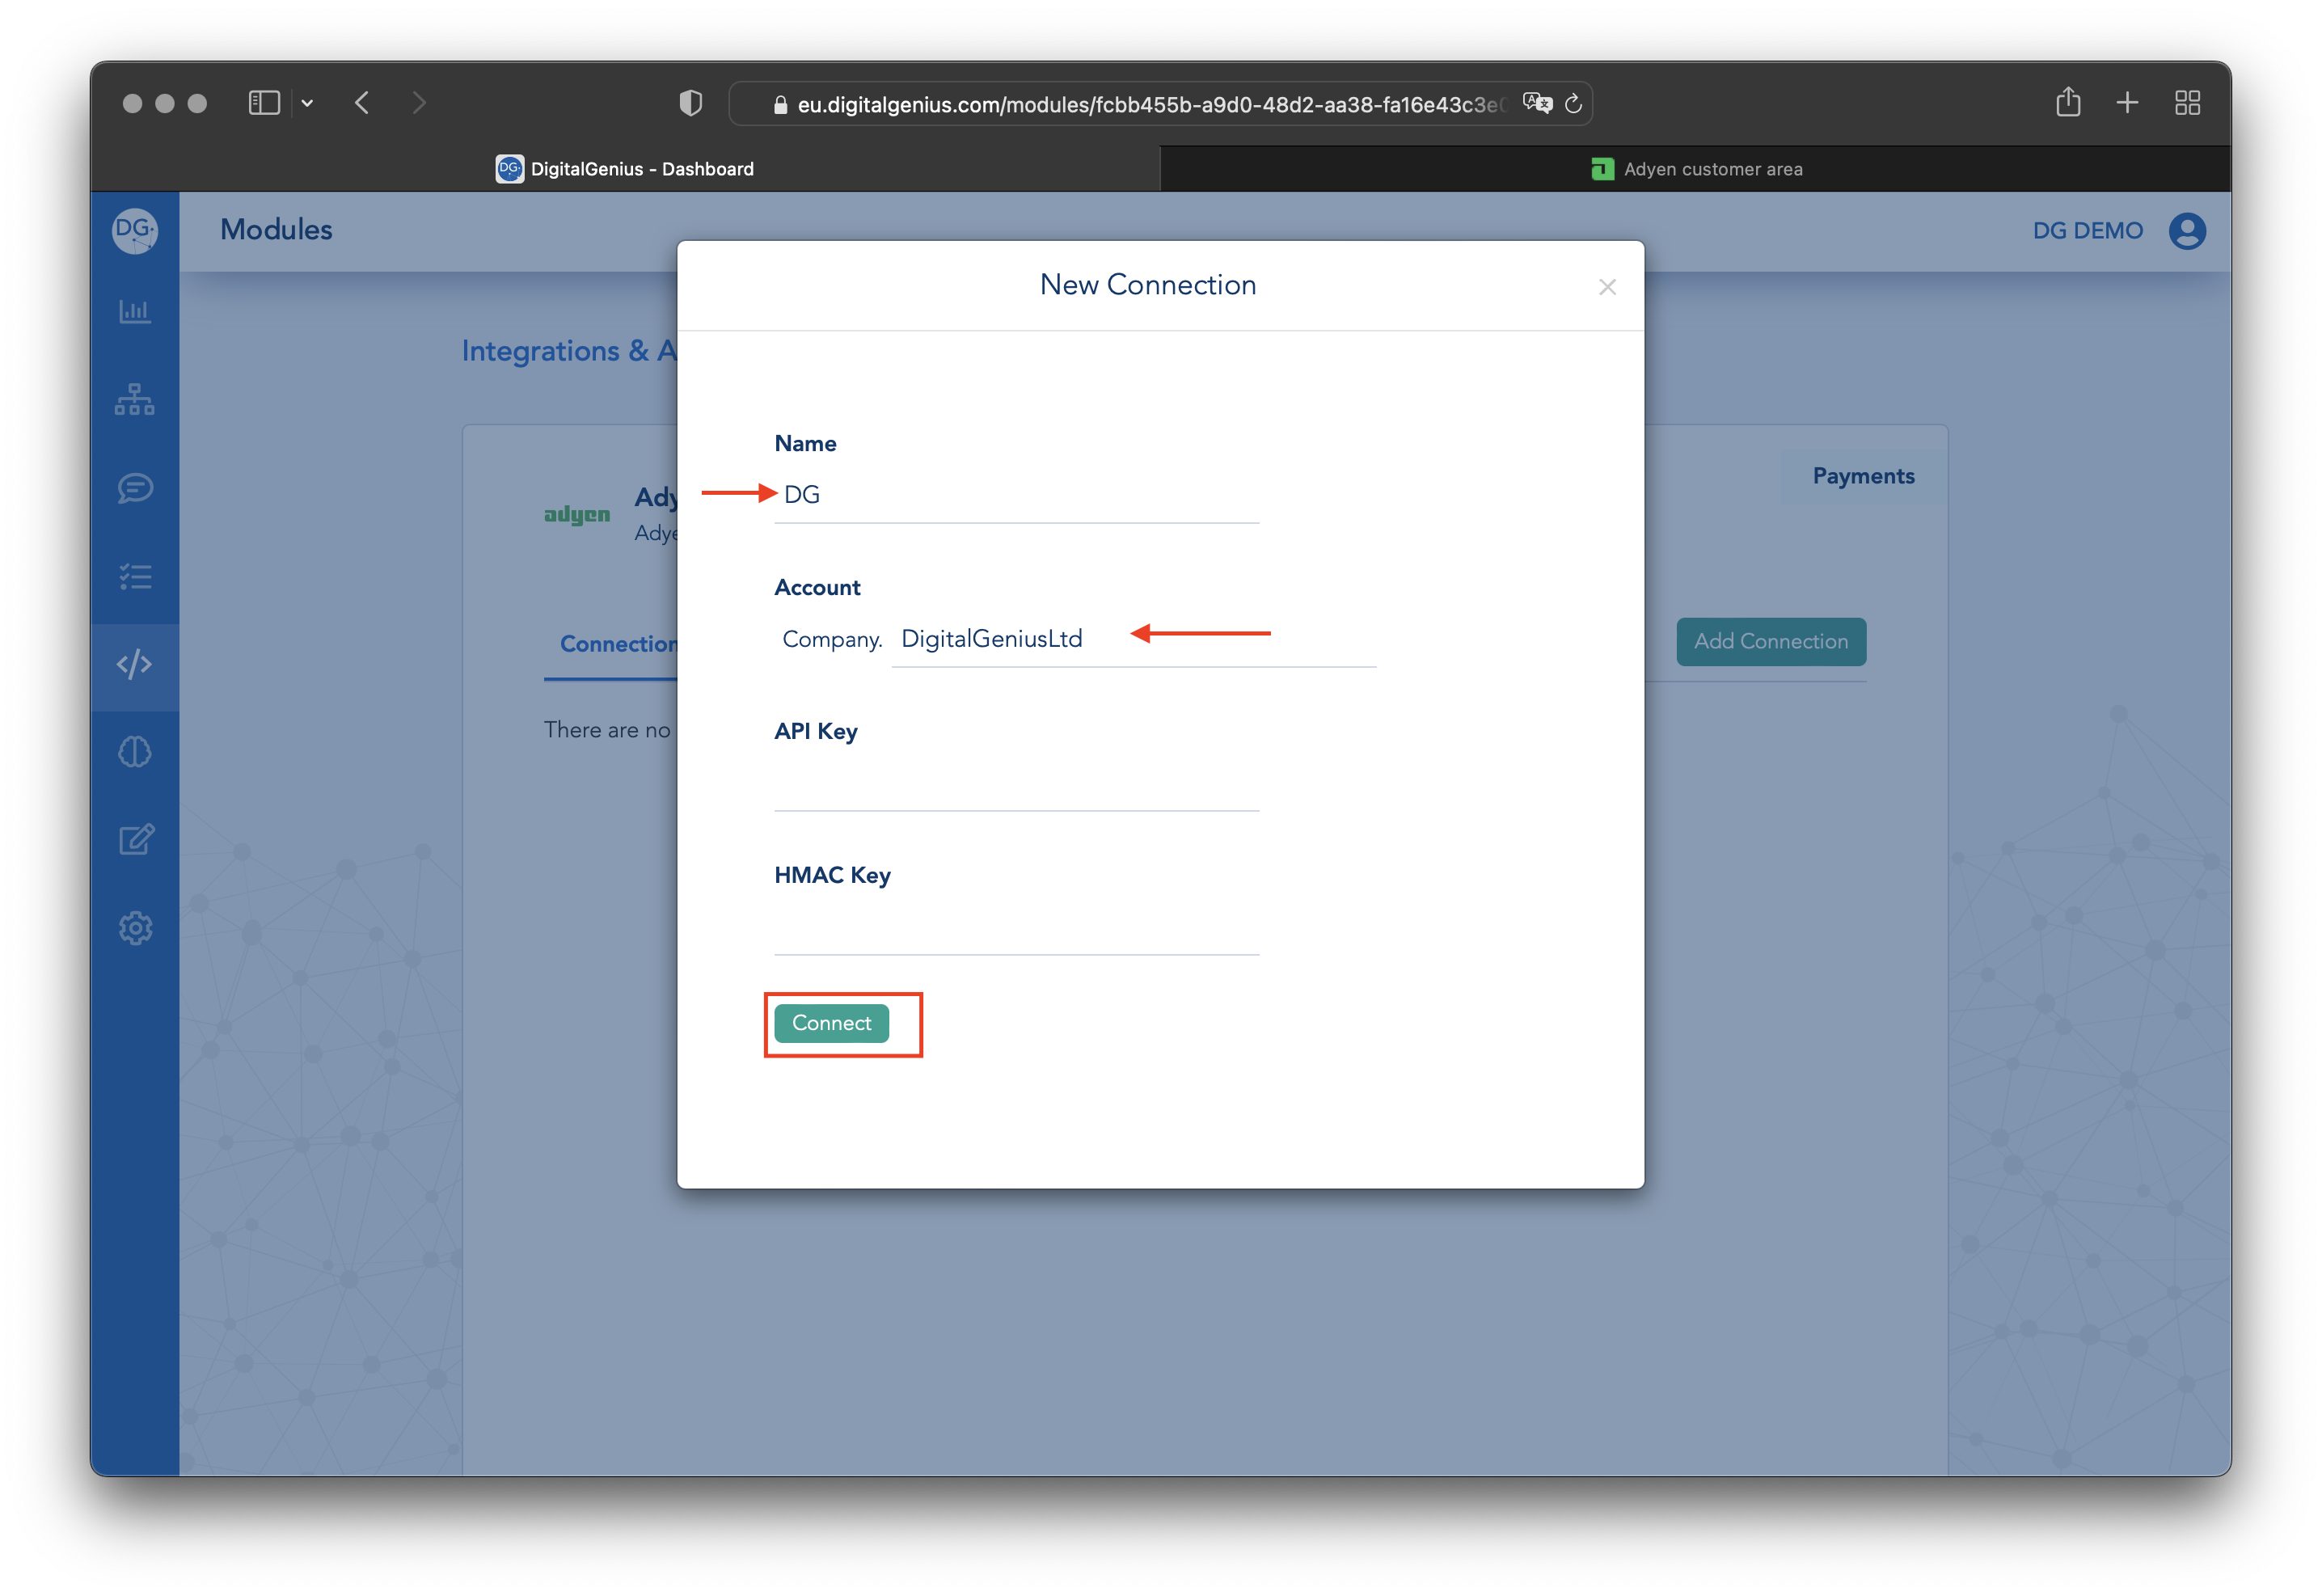
Adyen Account fieldYou can copy the Adyen account name, aka the company name, from the top left menu of the Adyen dashboard.
Copy the DigitalGenius Connection Id. It will be needed in the next step when we set up the Adyen webhook.
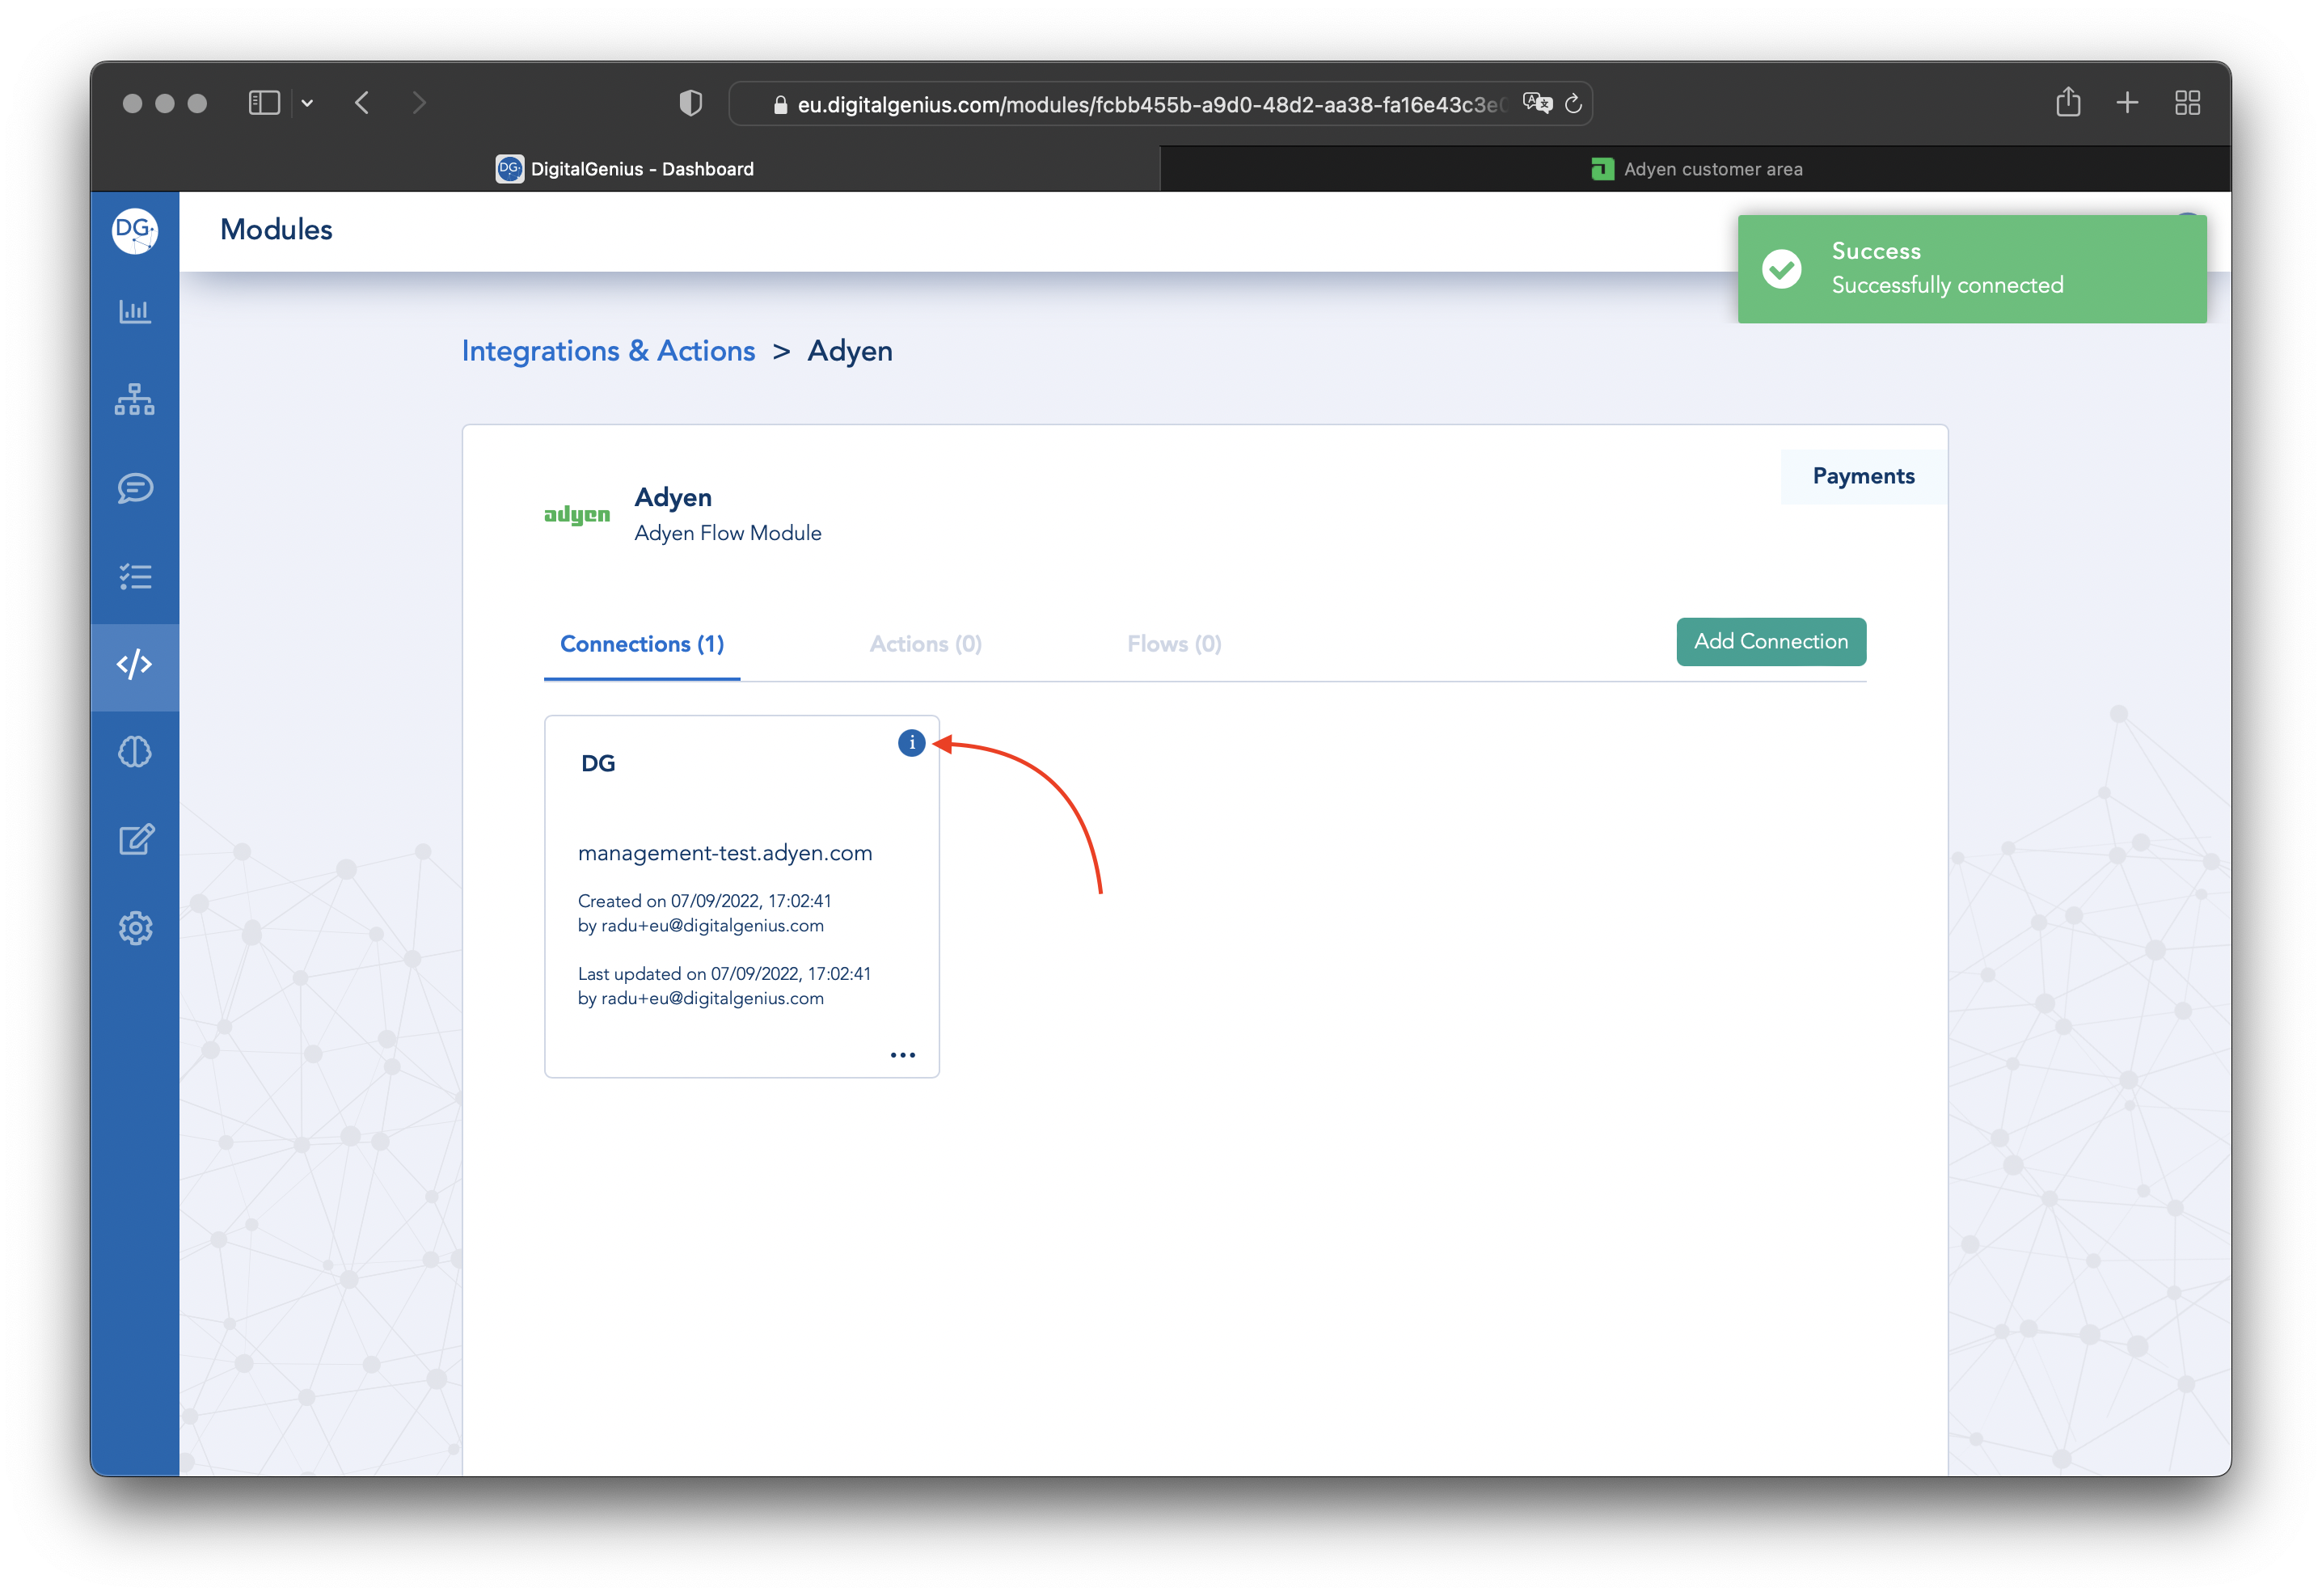
Click on the i button.
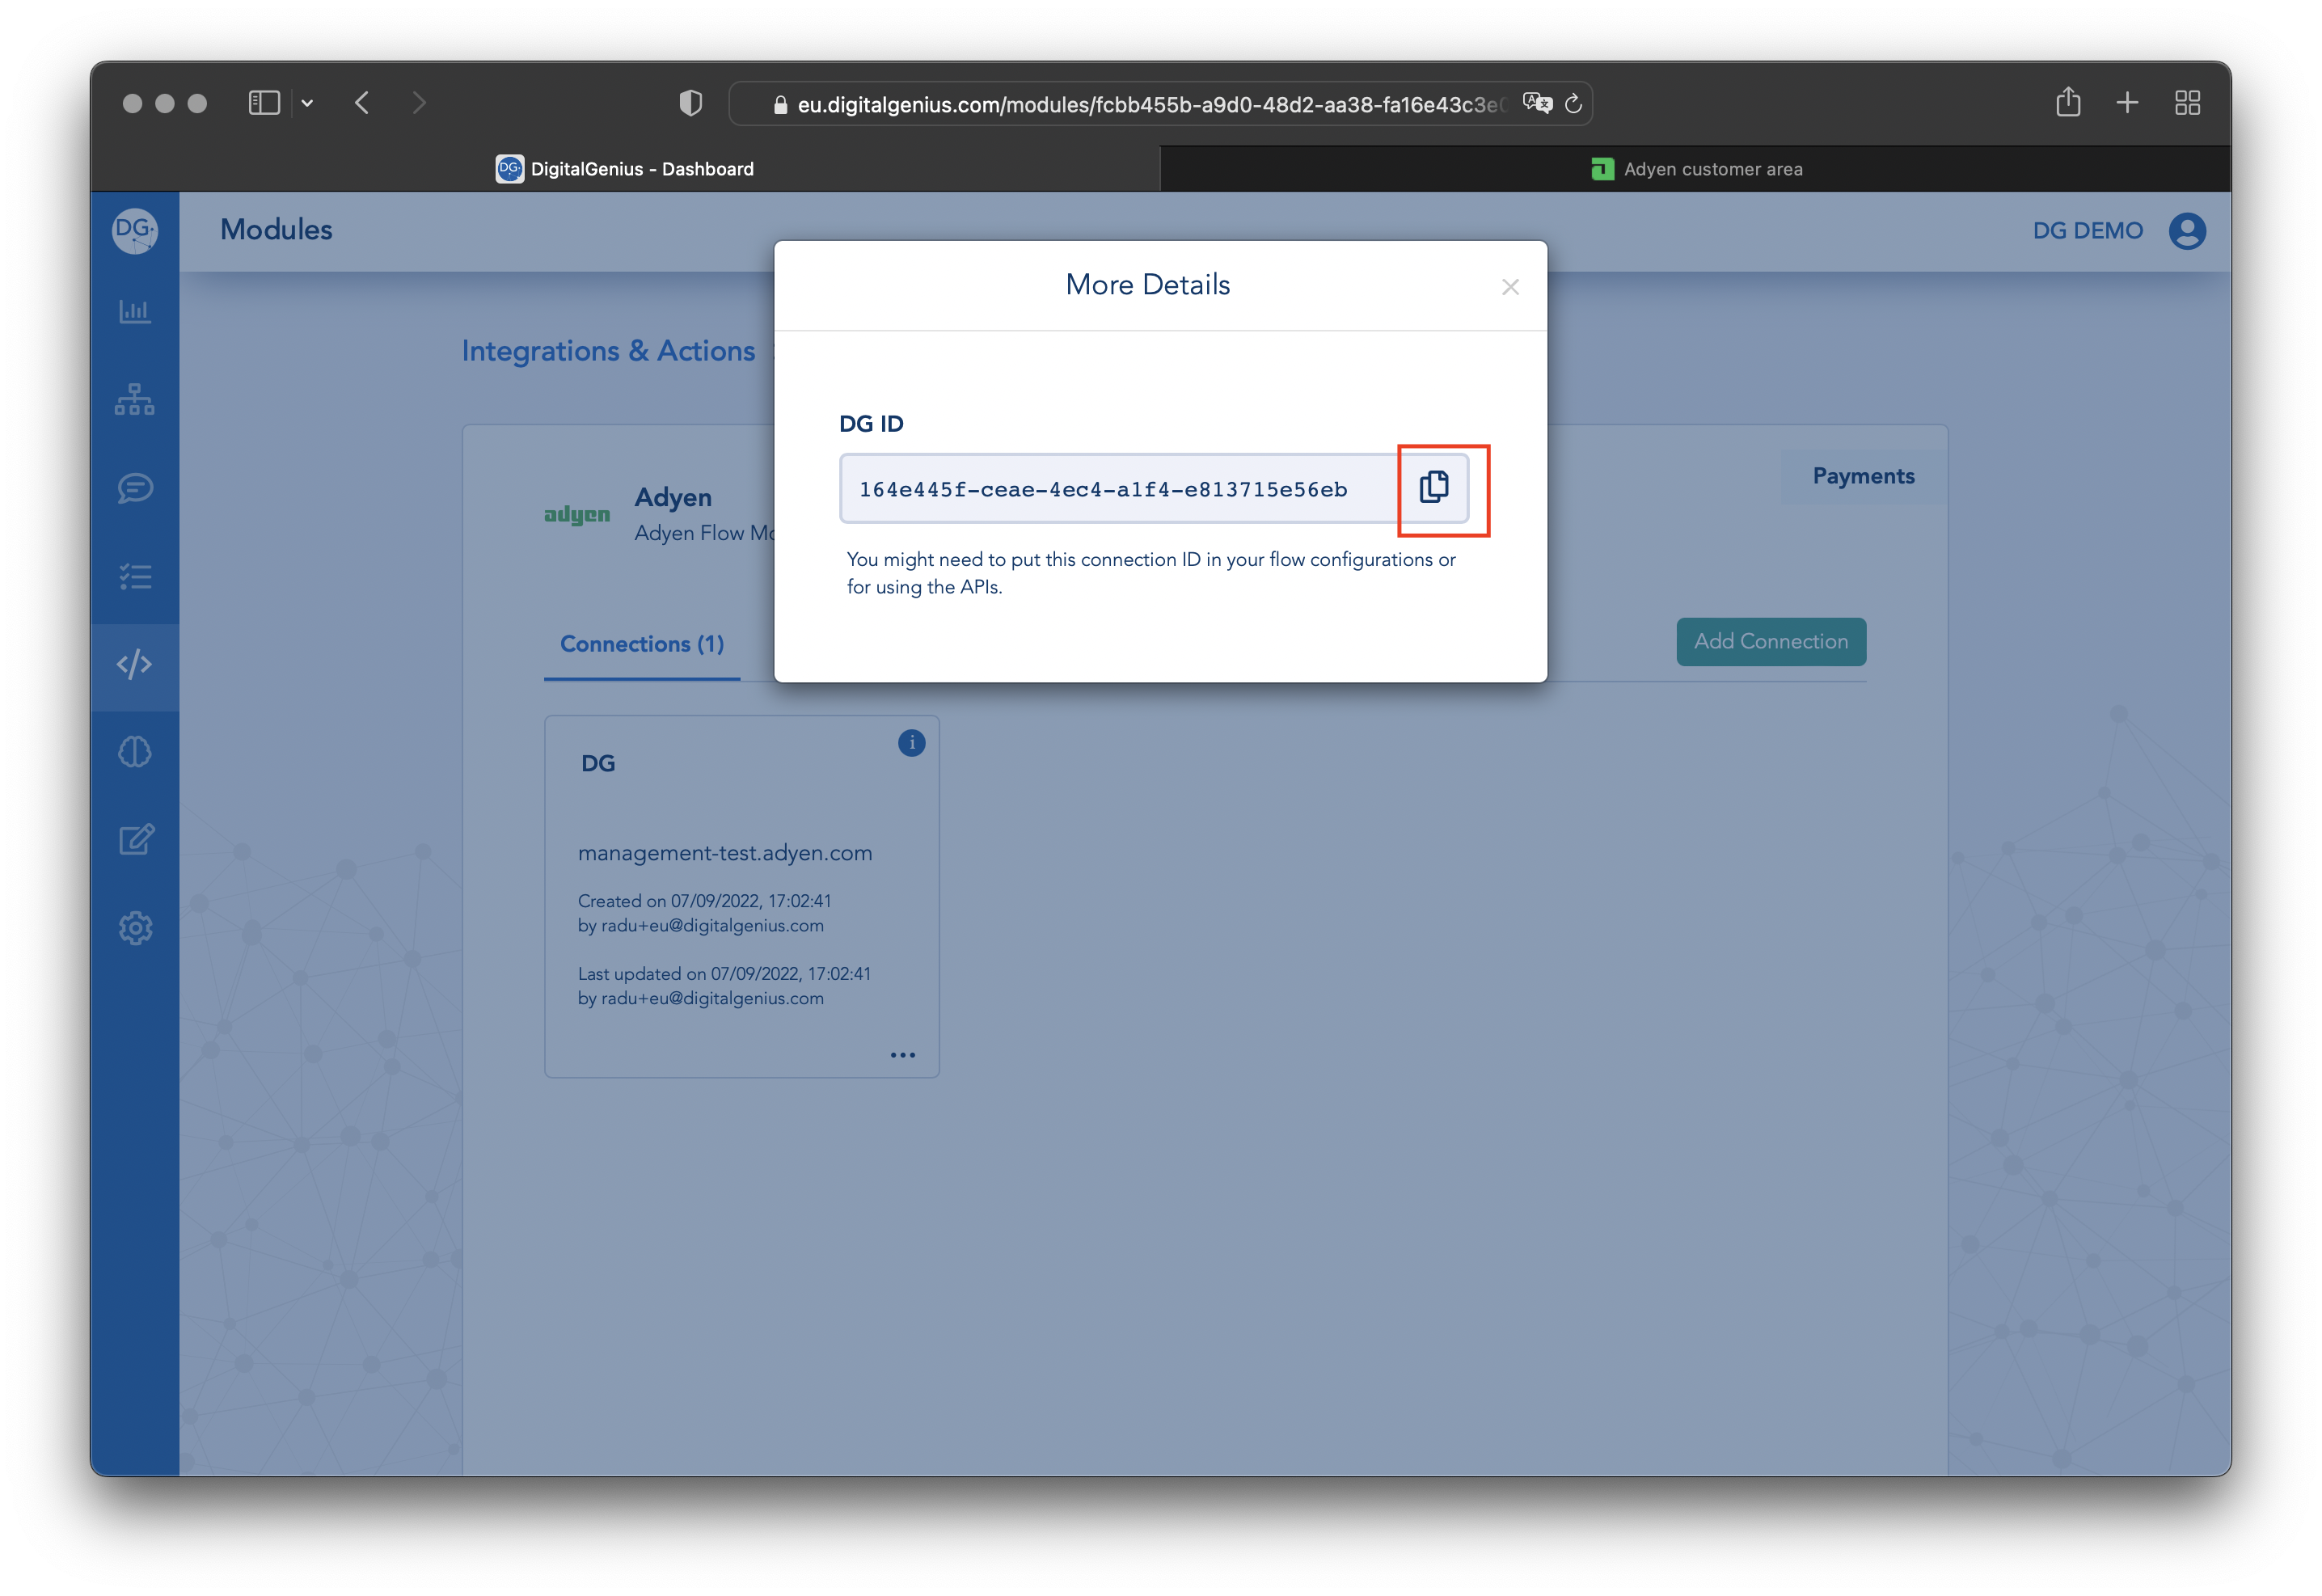
Copy the DG Connection Id.
Step 2. Create the Adyen webhook
In a new tab go to you Adyen account.
Navigate to Developers / Webhooks section and click on Add new standard notification webhook.
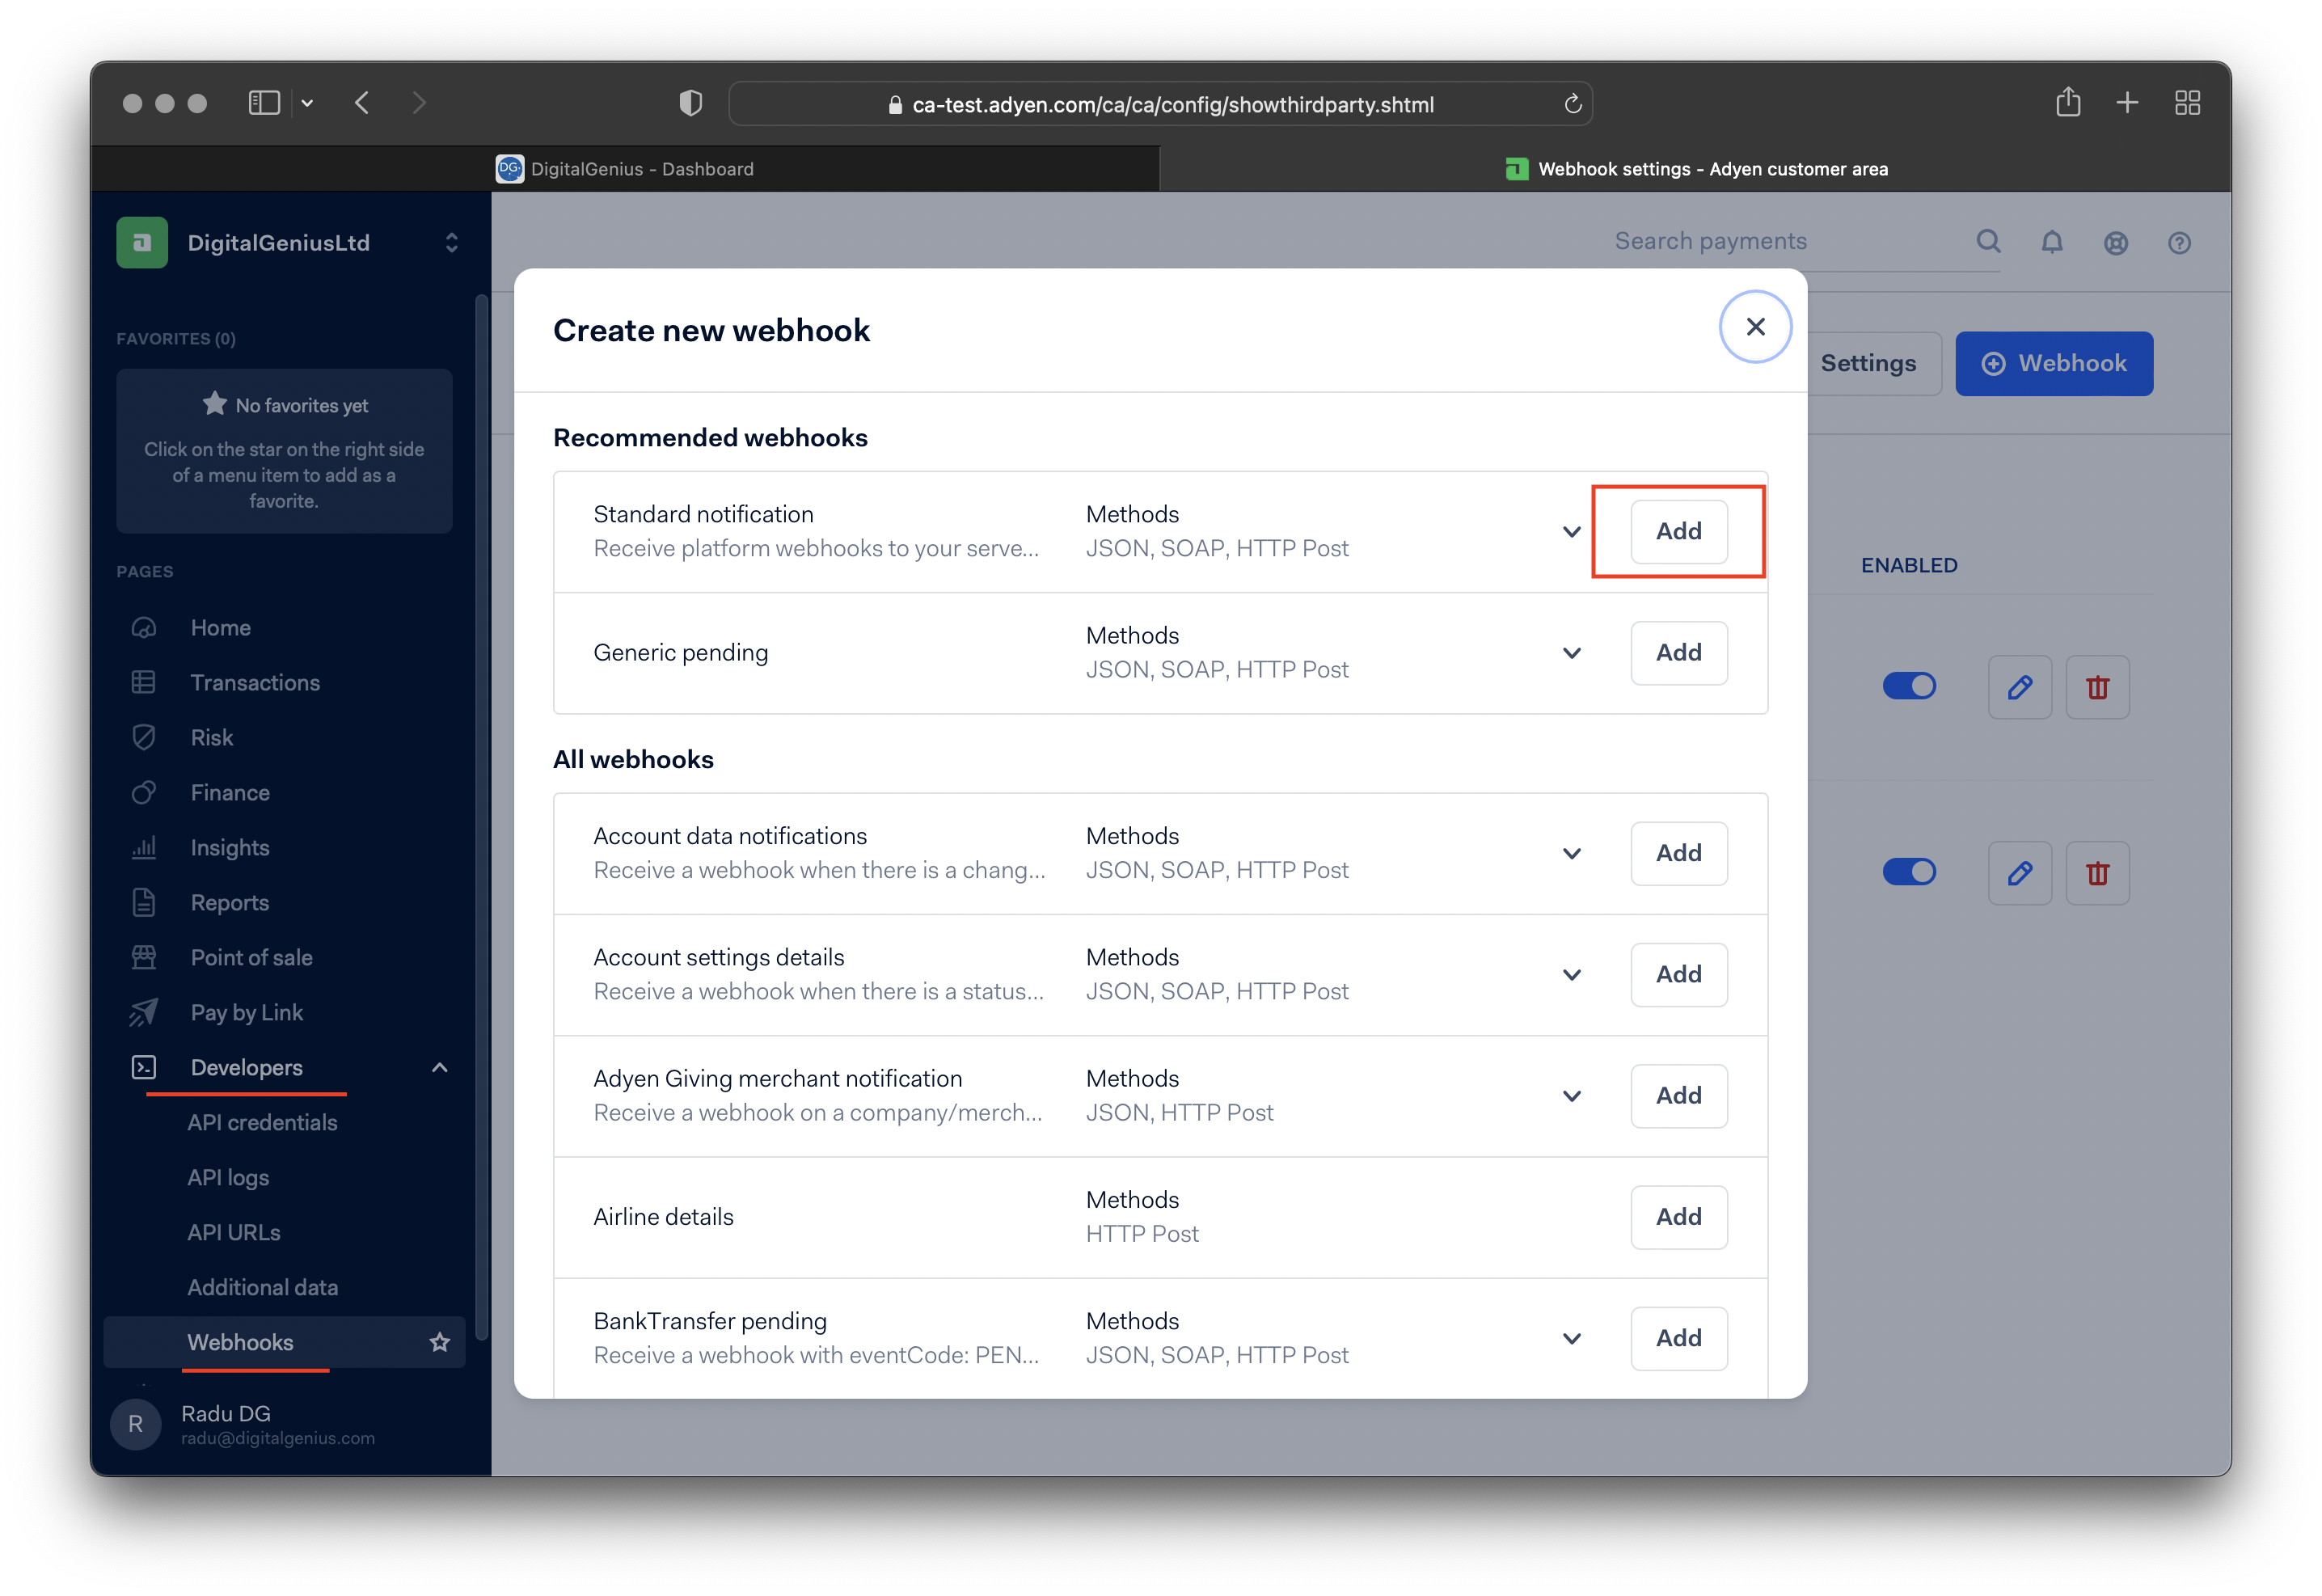
For the webhook target the URL will depend on your region, EU or US, and we will use the connection id from the previous step.
https://flow-server.{{region}}.dgdeepai.com/adyen/{{connection_id}}/webhook
Examples
- EU: https://flow-server.eu.dgdeepai.com/adyen/164e445f-ceae-4ec4-a1f4-e813715e56eb/webhook
- US: https://flow-server.eu.dgdeepai.com/adyen/164e445f-ceae-4ec4-a1f4-e813715e56eb/webhook
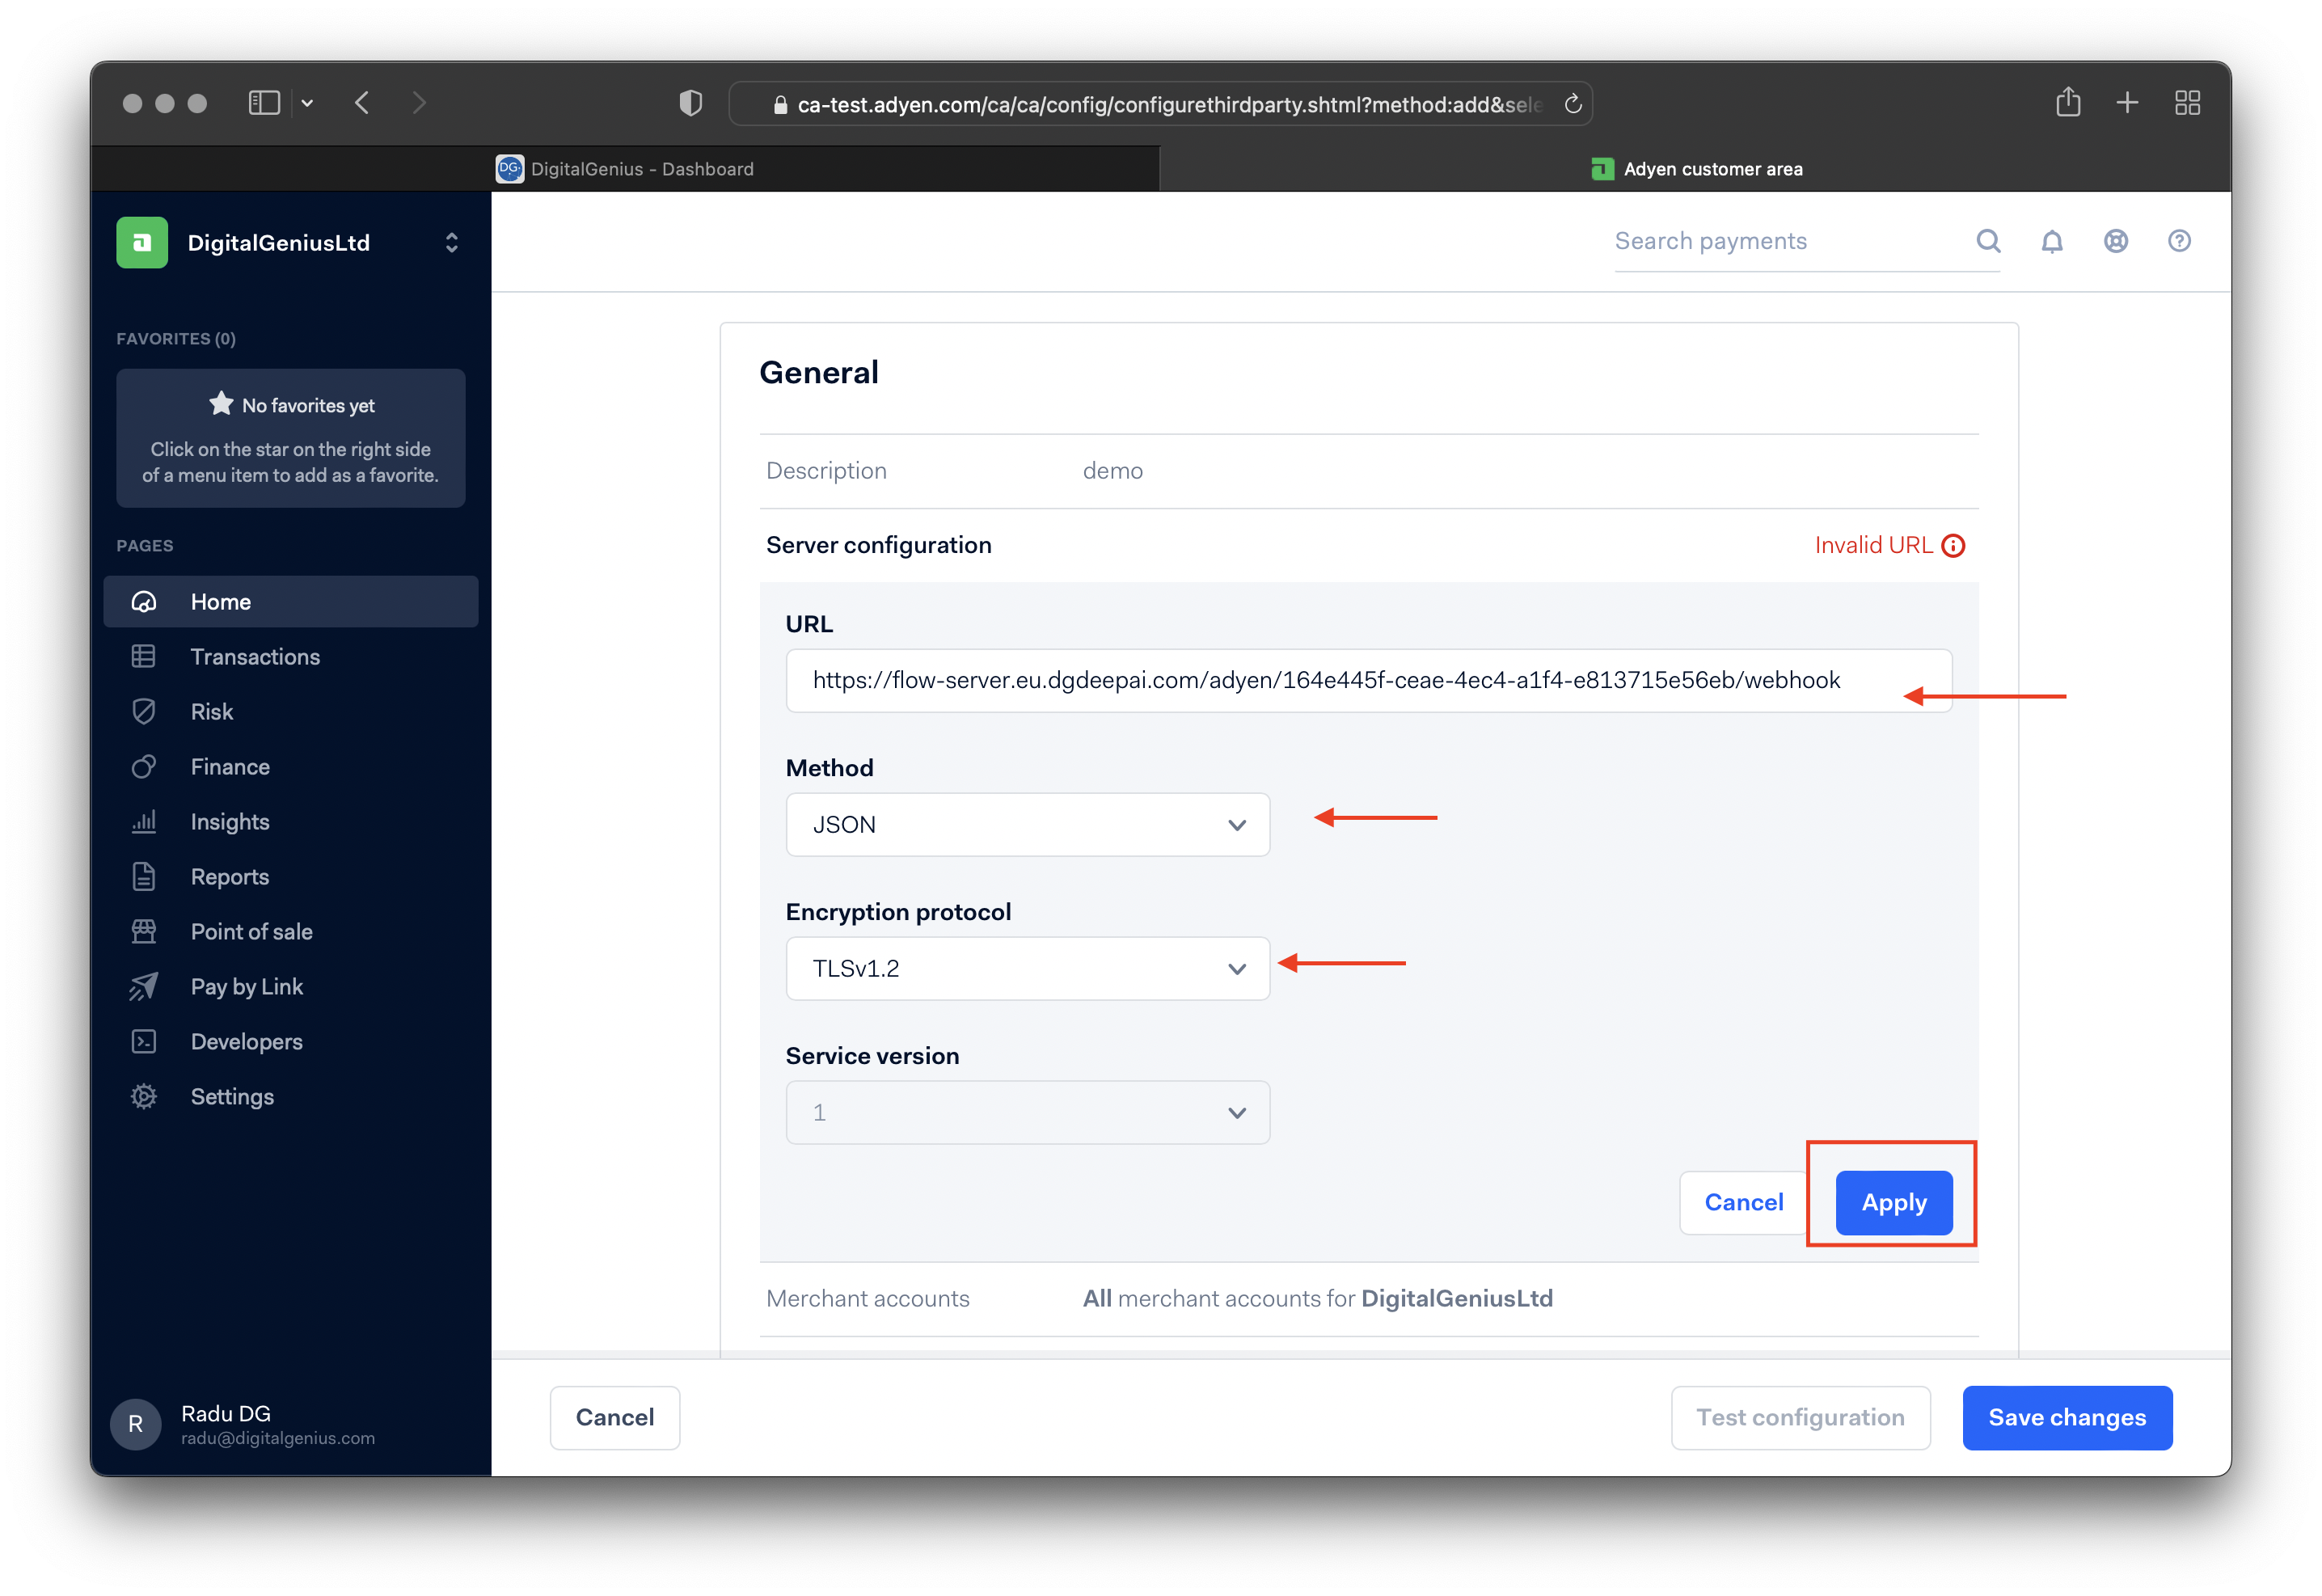
Click on Save changes after configuring the webhook server
Use the DigitalGenius API key and secret in order to define the Basic authentication section.
See API Key/Secret on how to obtain/copy a DigitalGenius API key/secret pair.
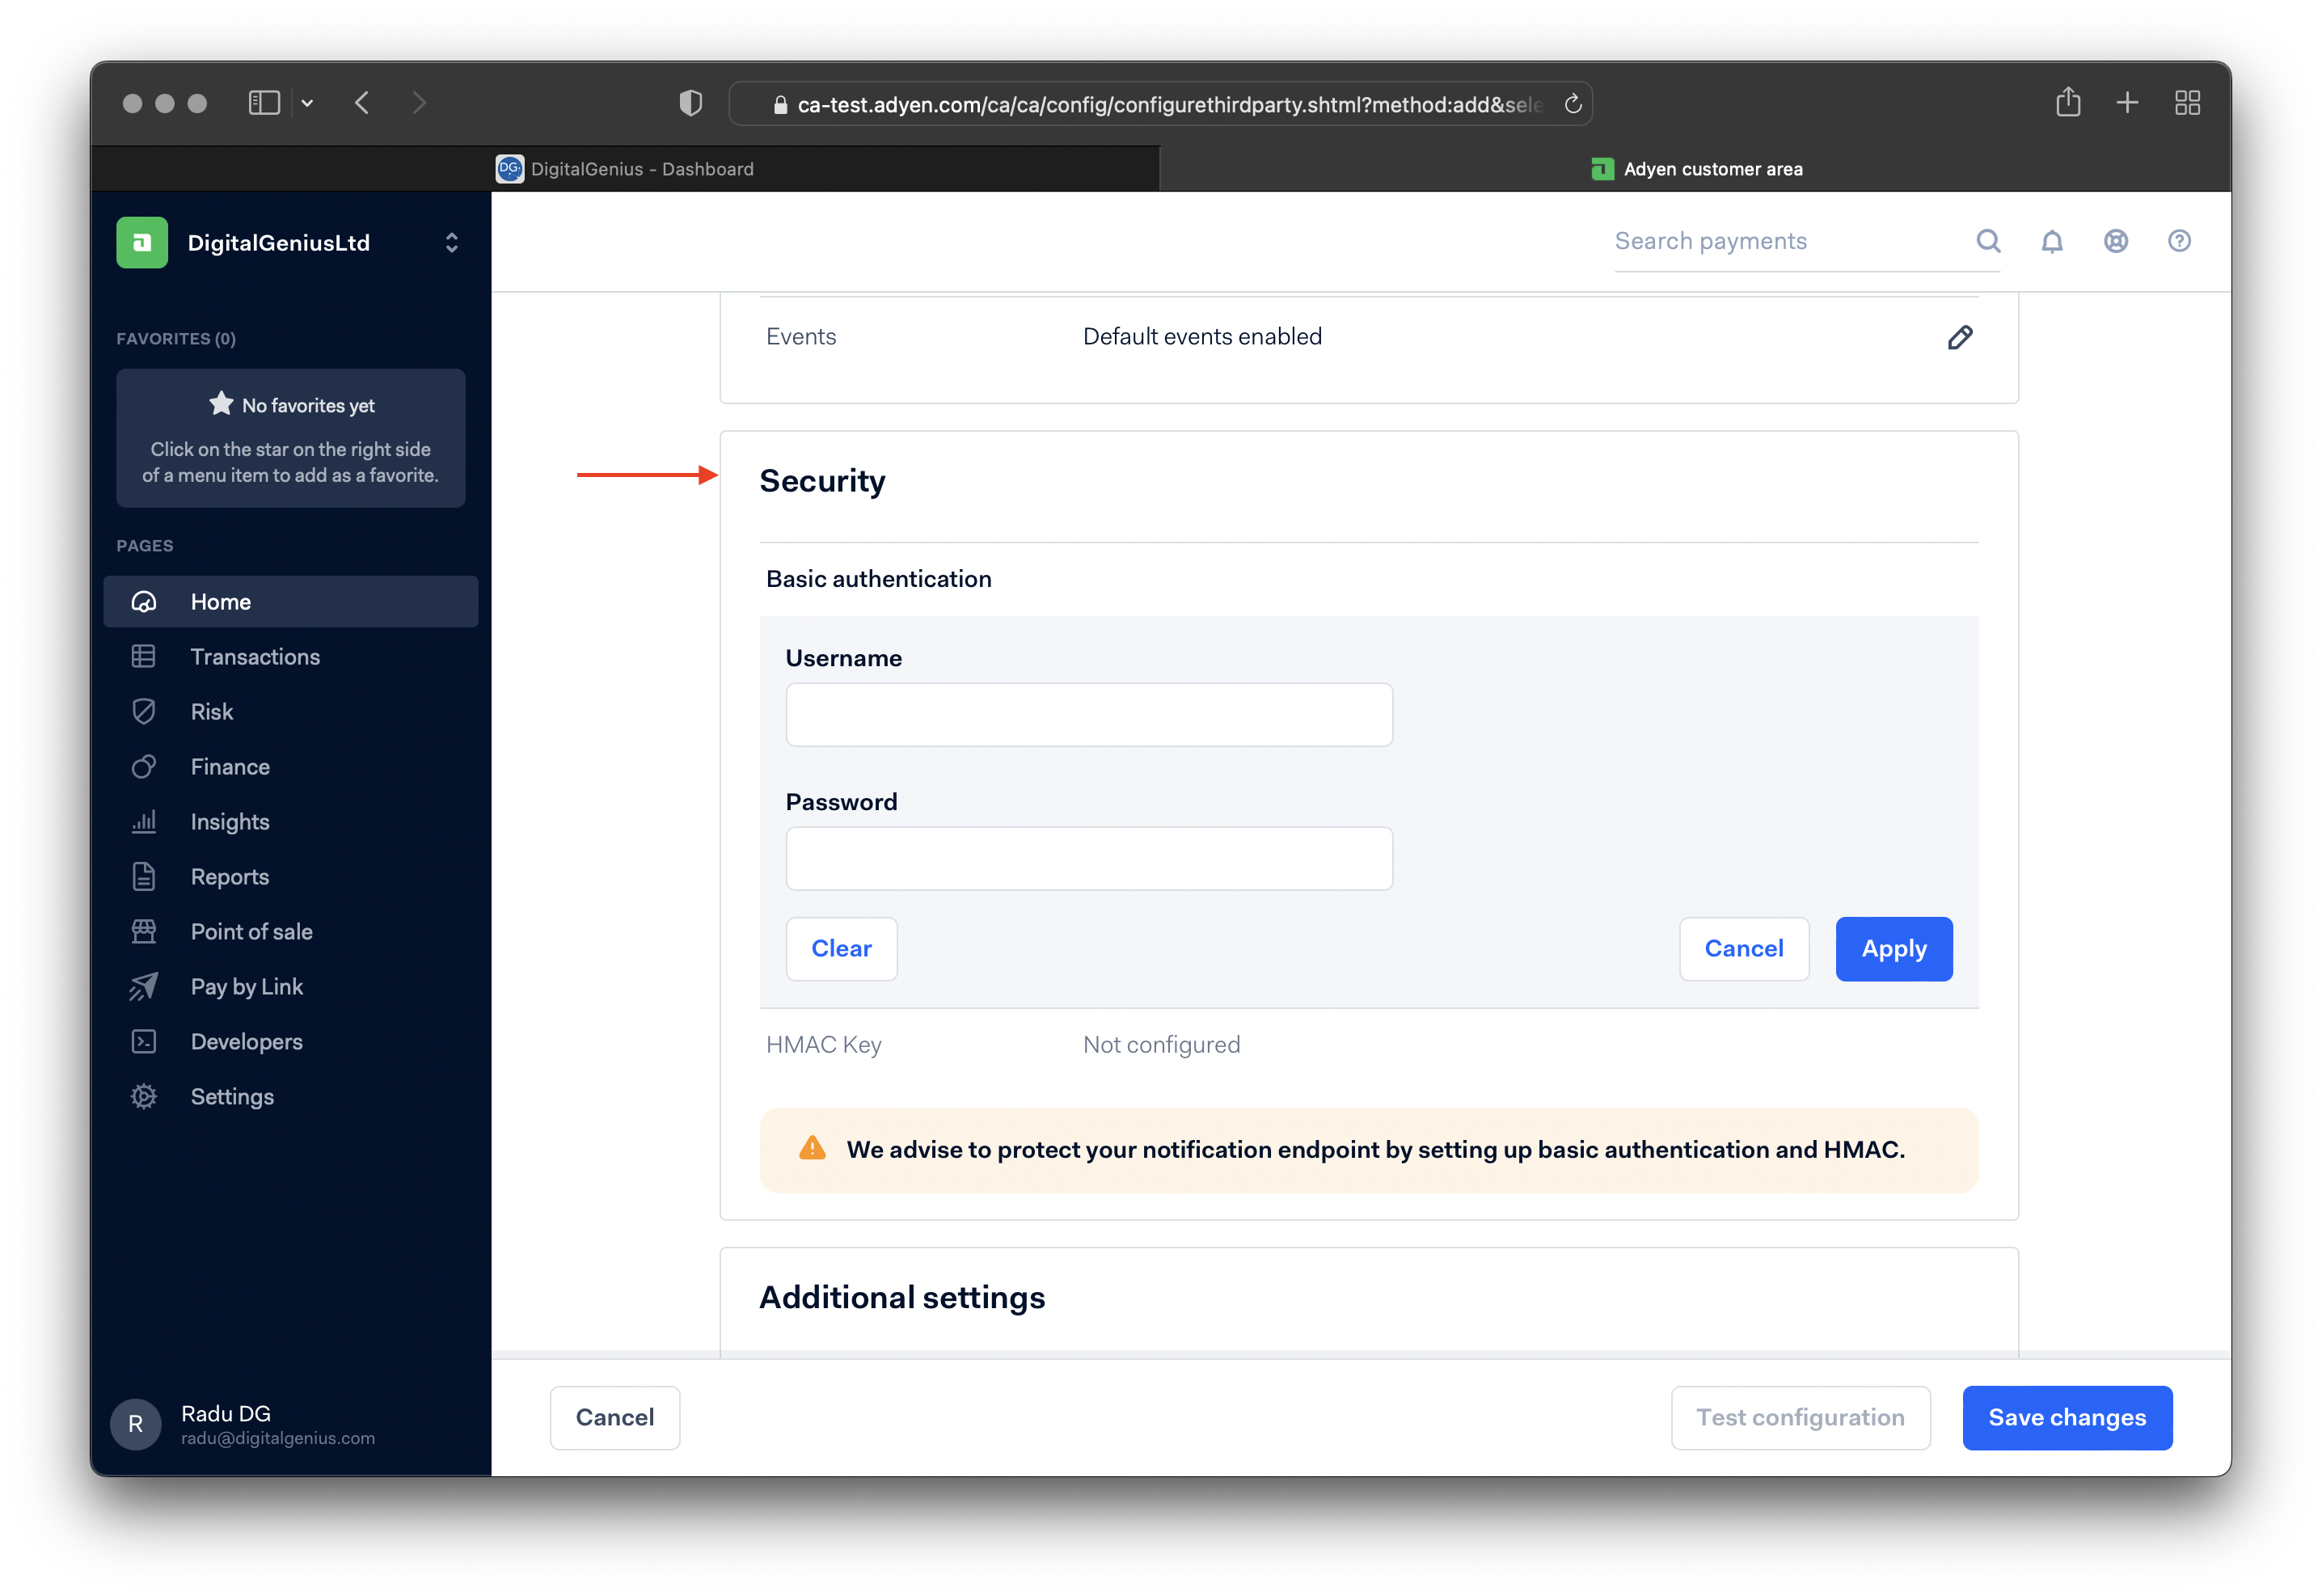
Apply and save the changes.
Generate a new HMAC Key and copy it. Click Apply and then Save changes
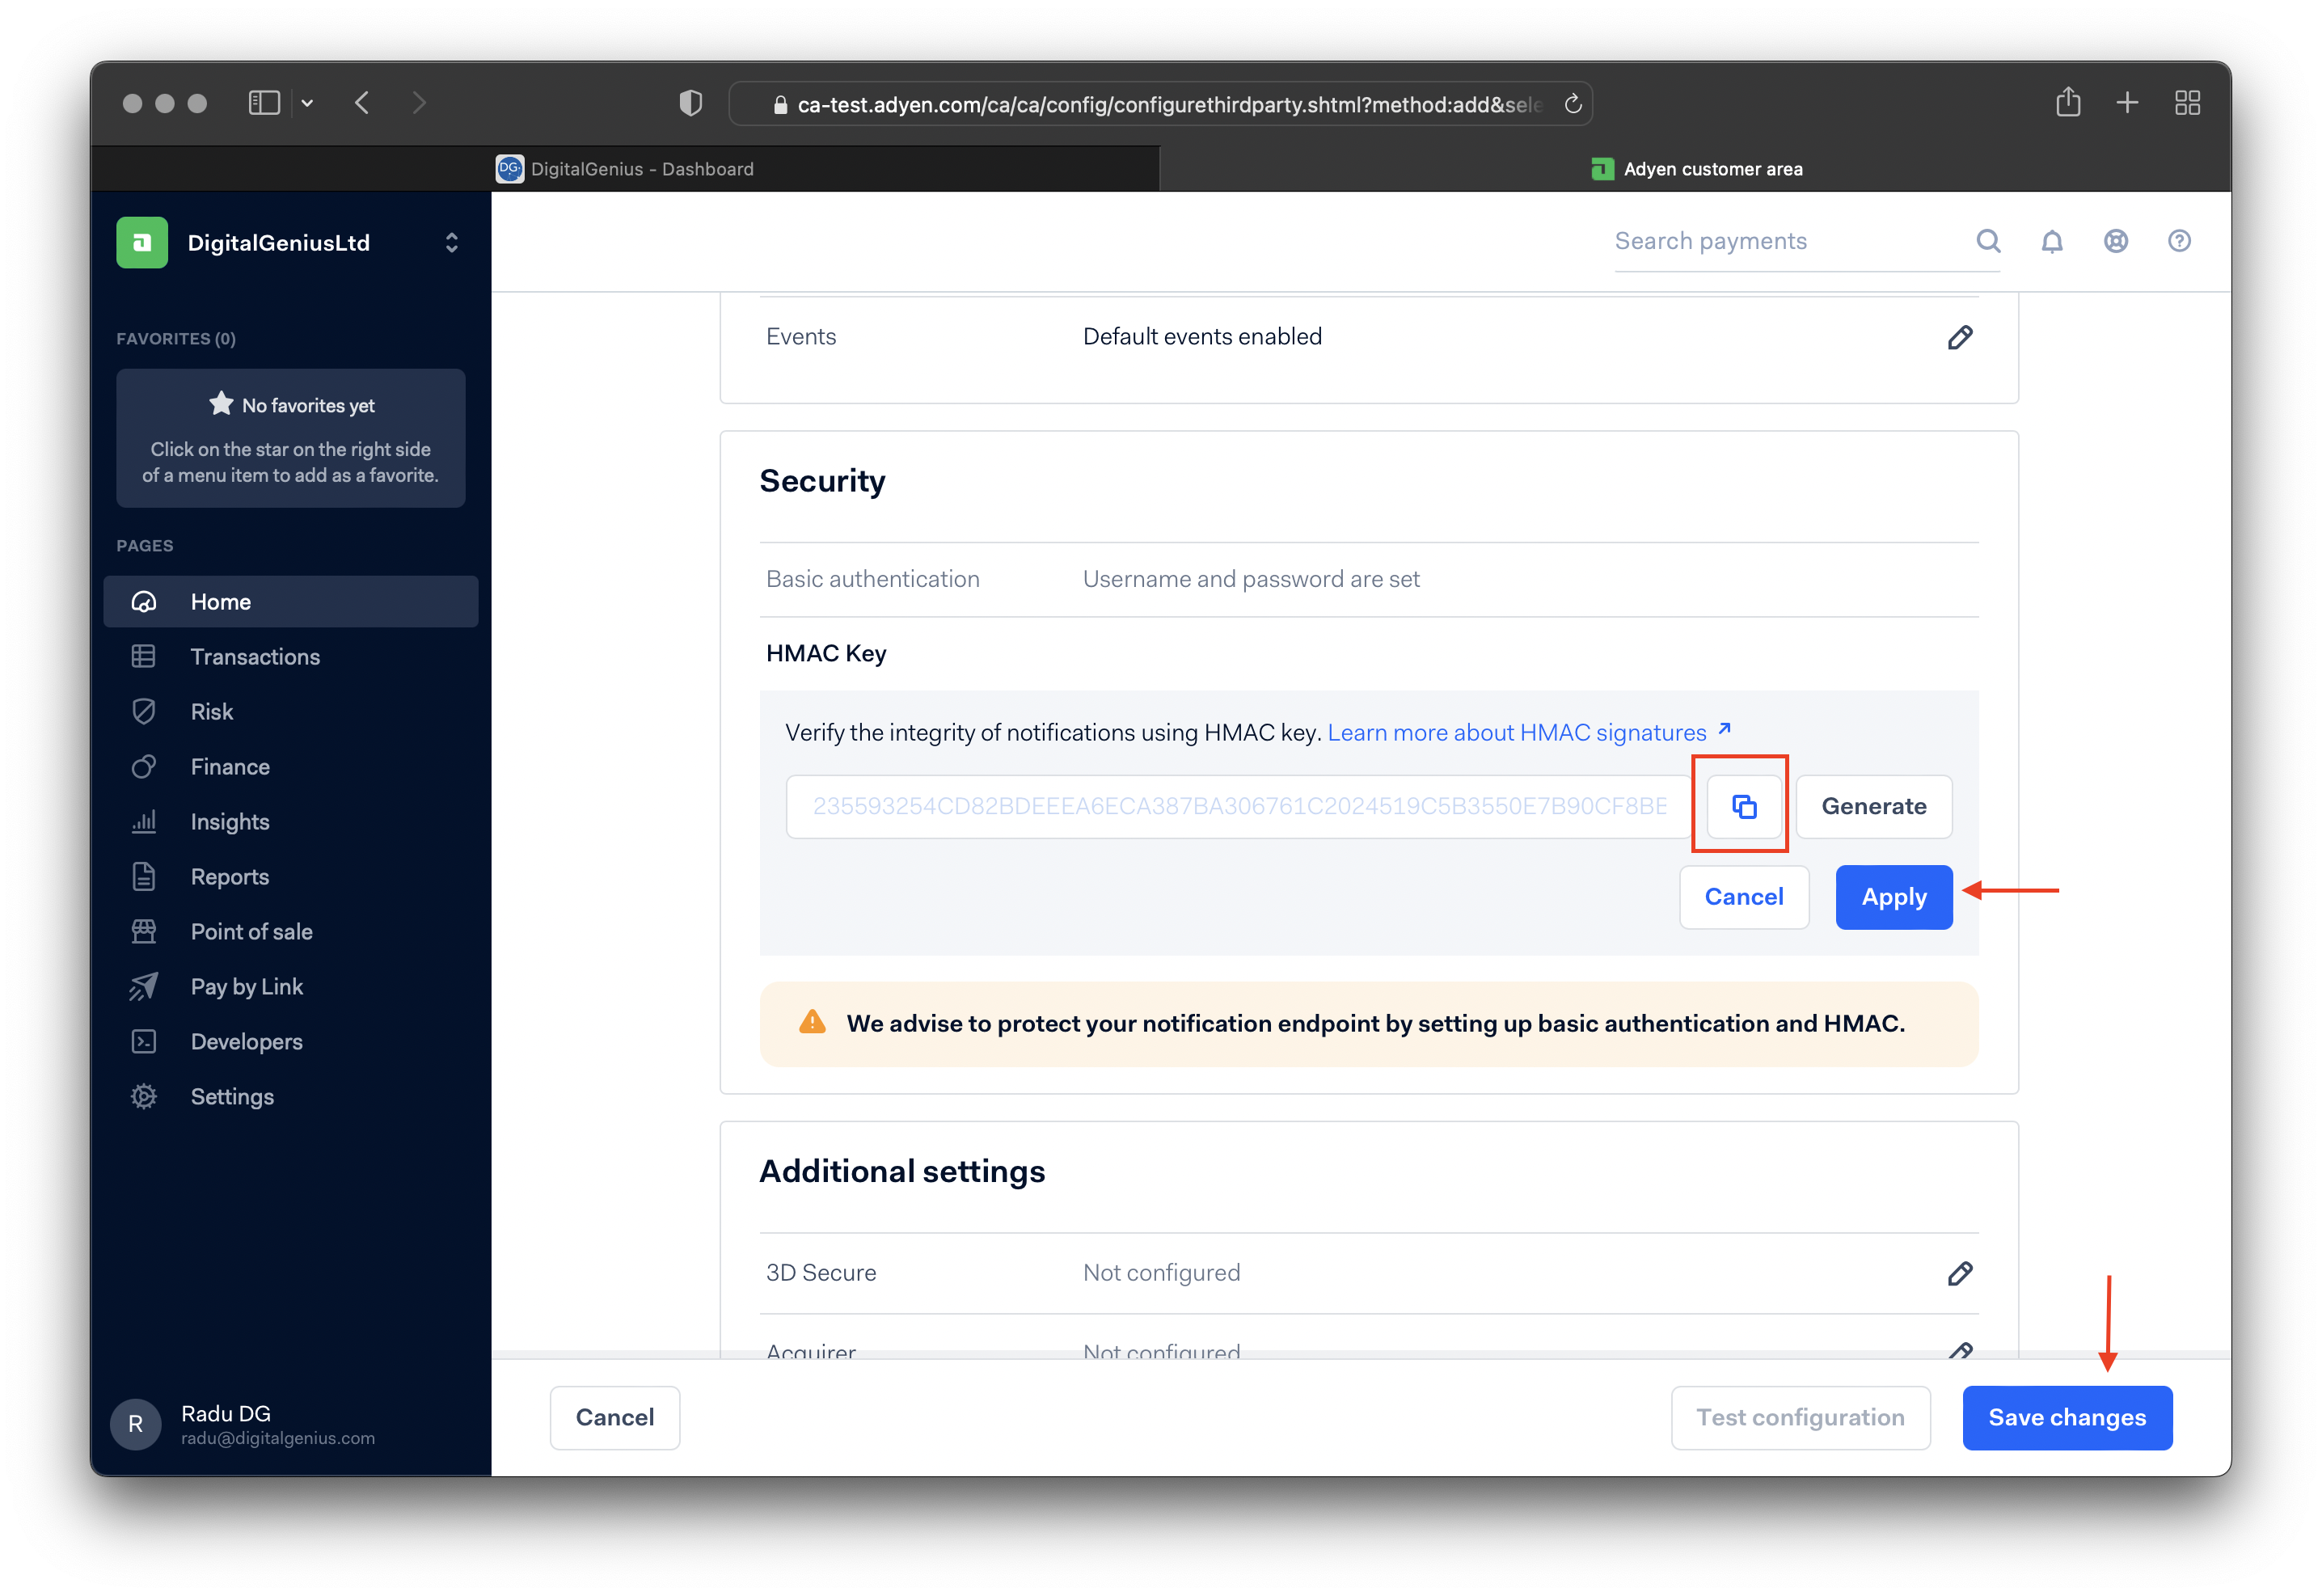
Save the generated HMAC key in a temporary text file as it will be needed later.
Step 3. Create a new Adyen credential
Navigate to Developer / API Credentials section.
Create new credential and copy the generated API key.
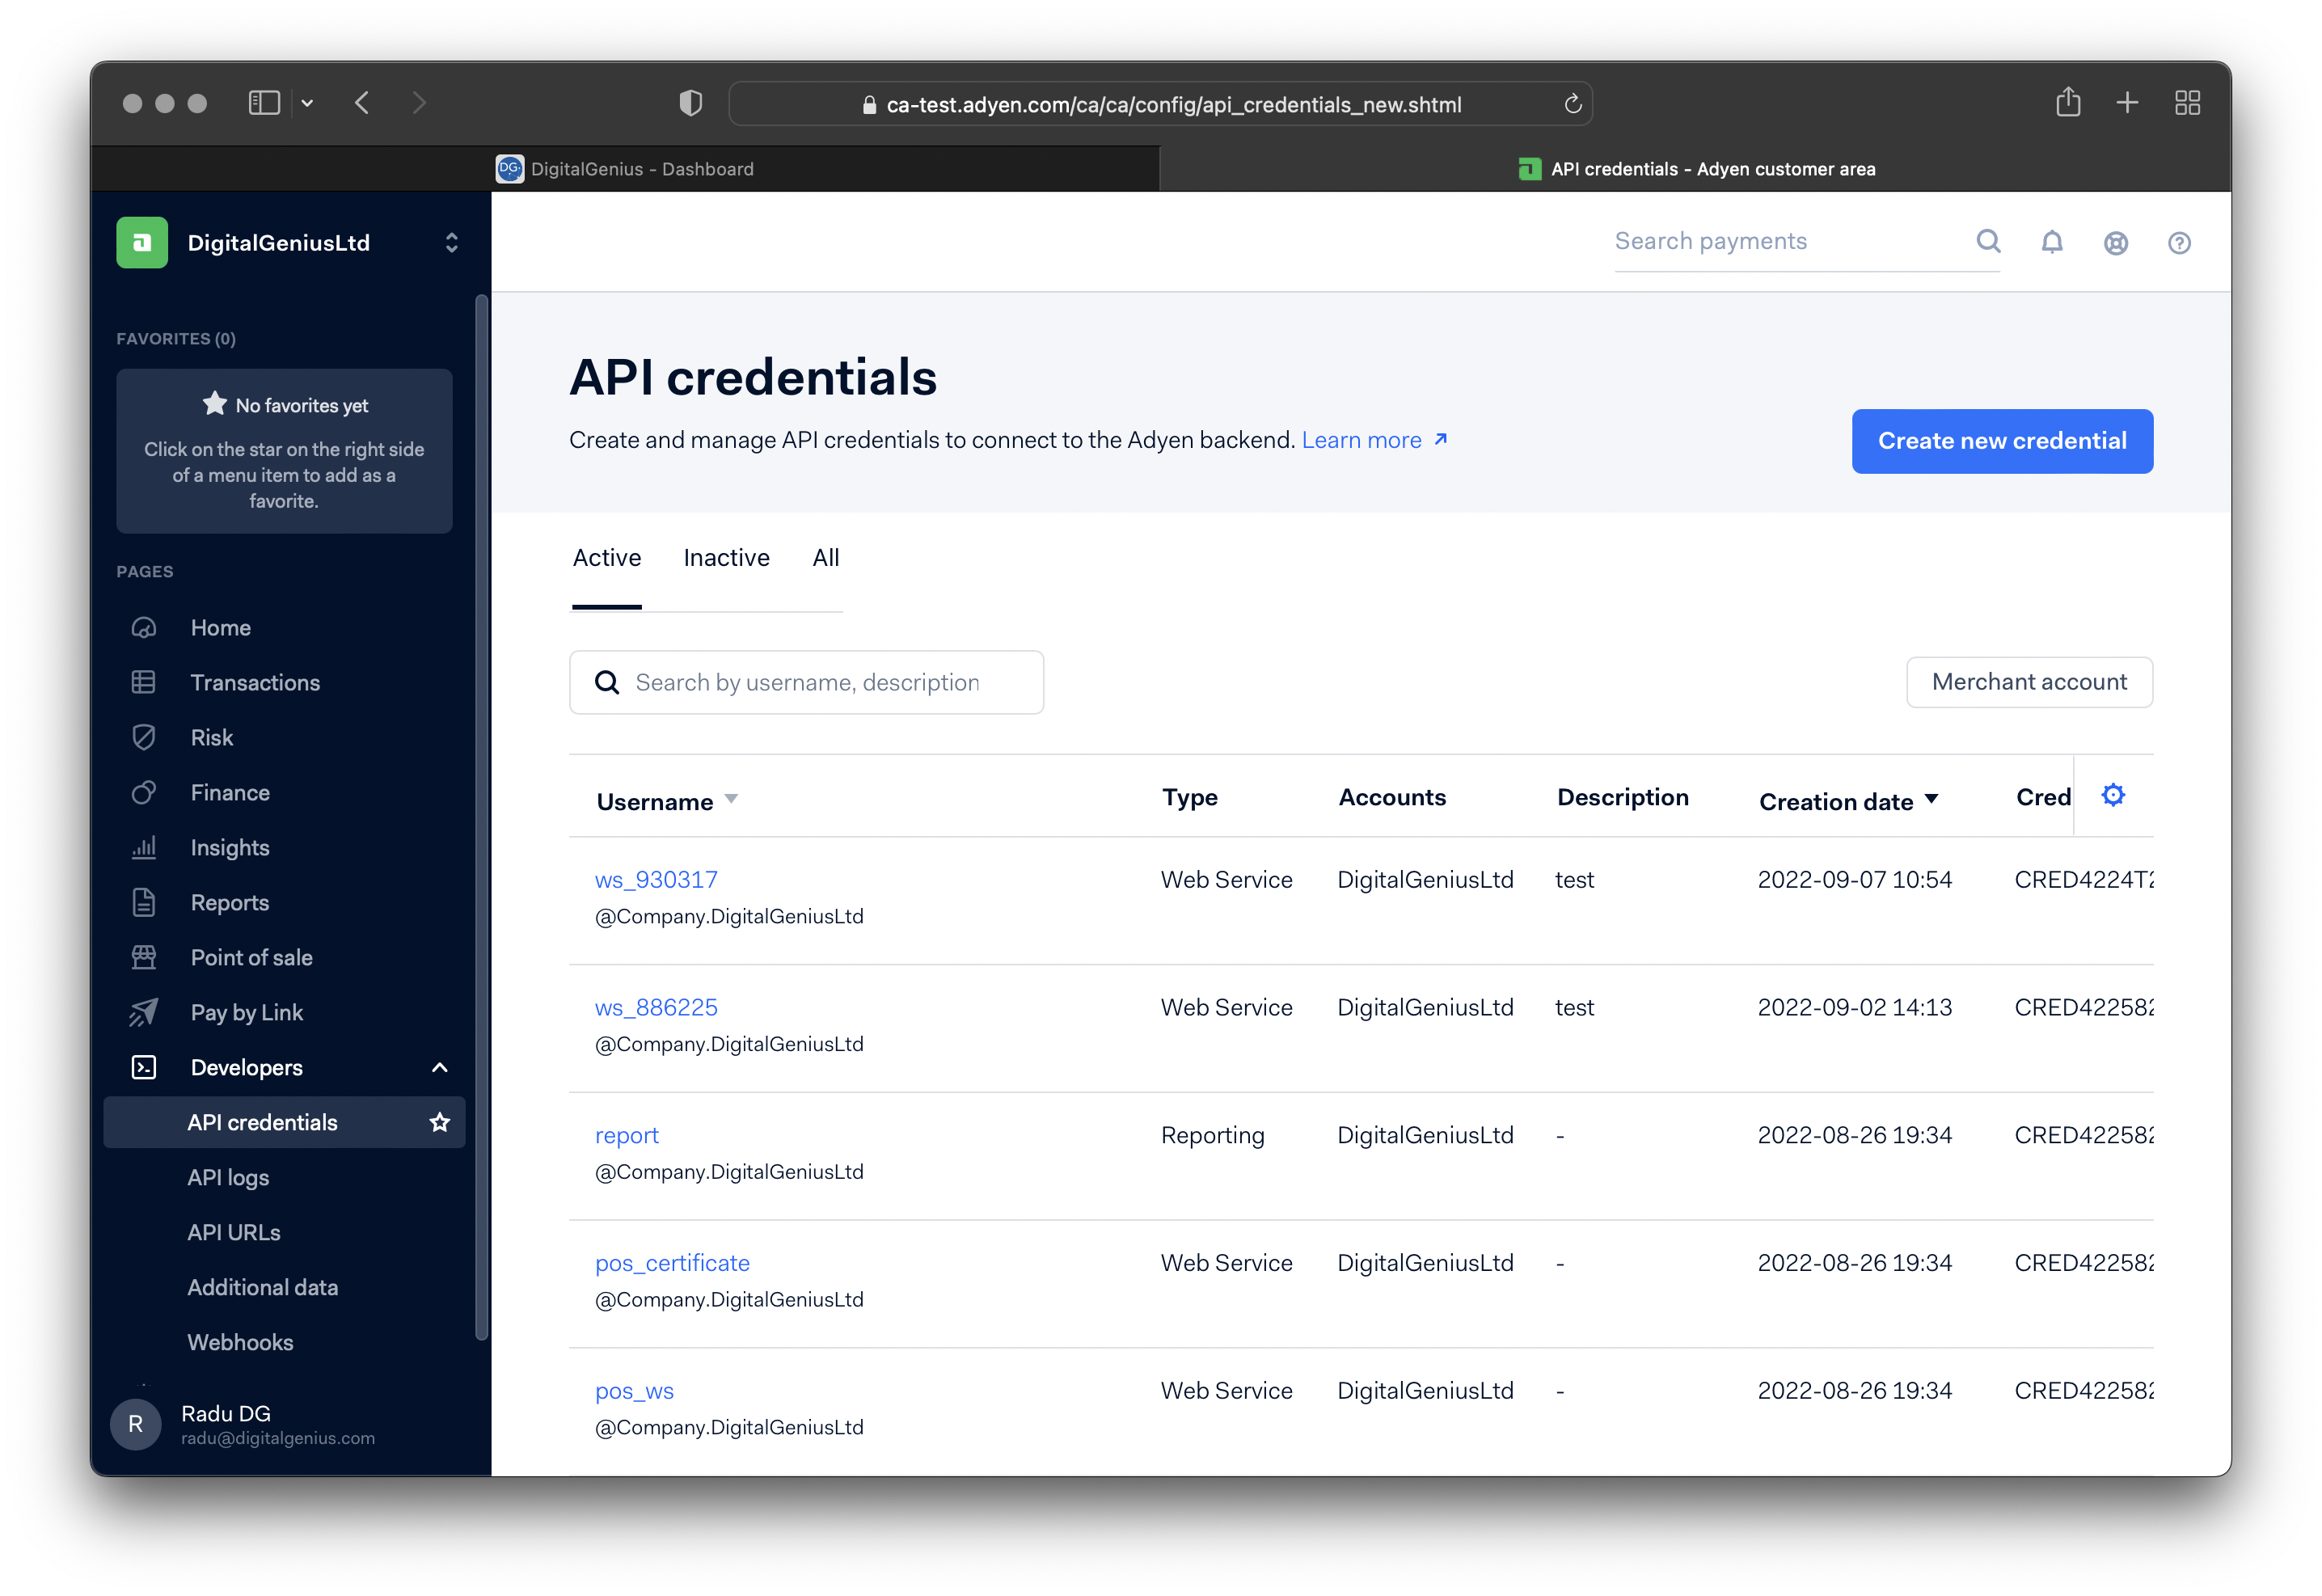
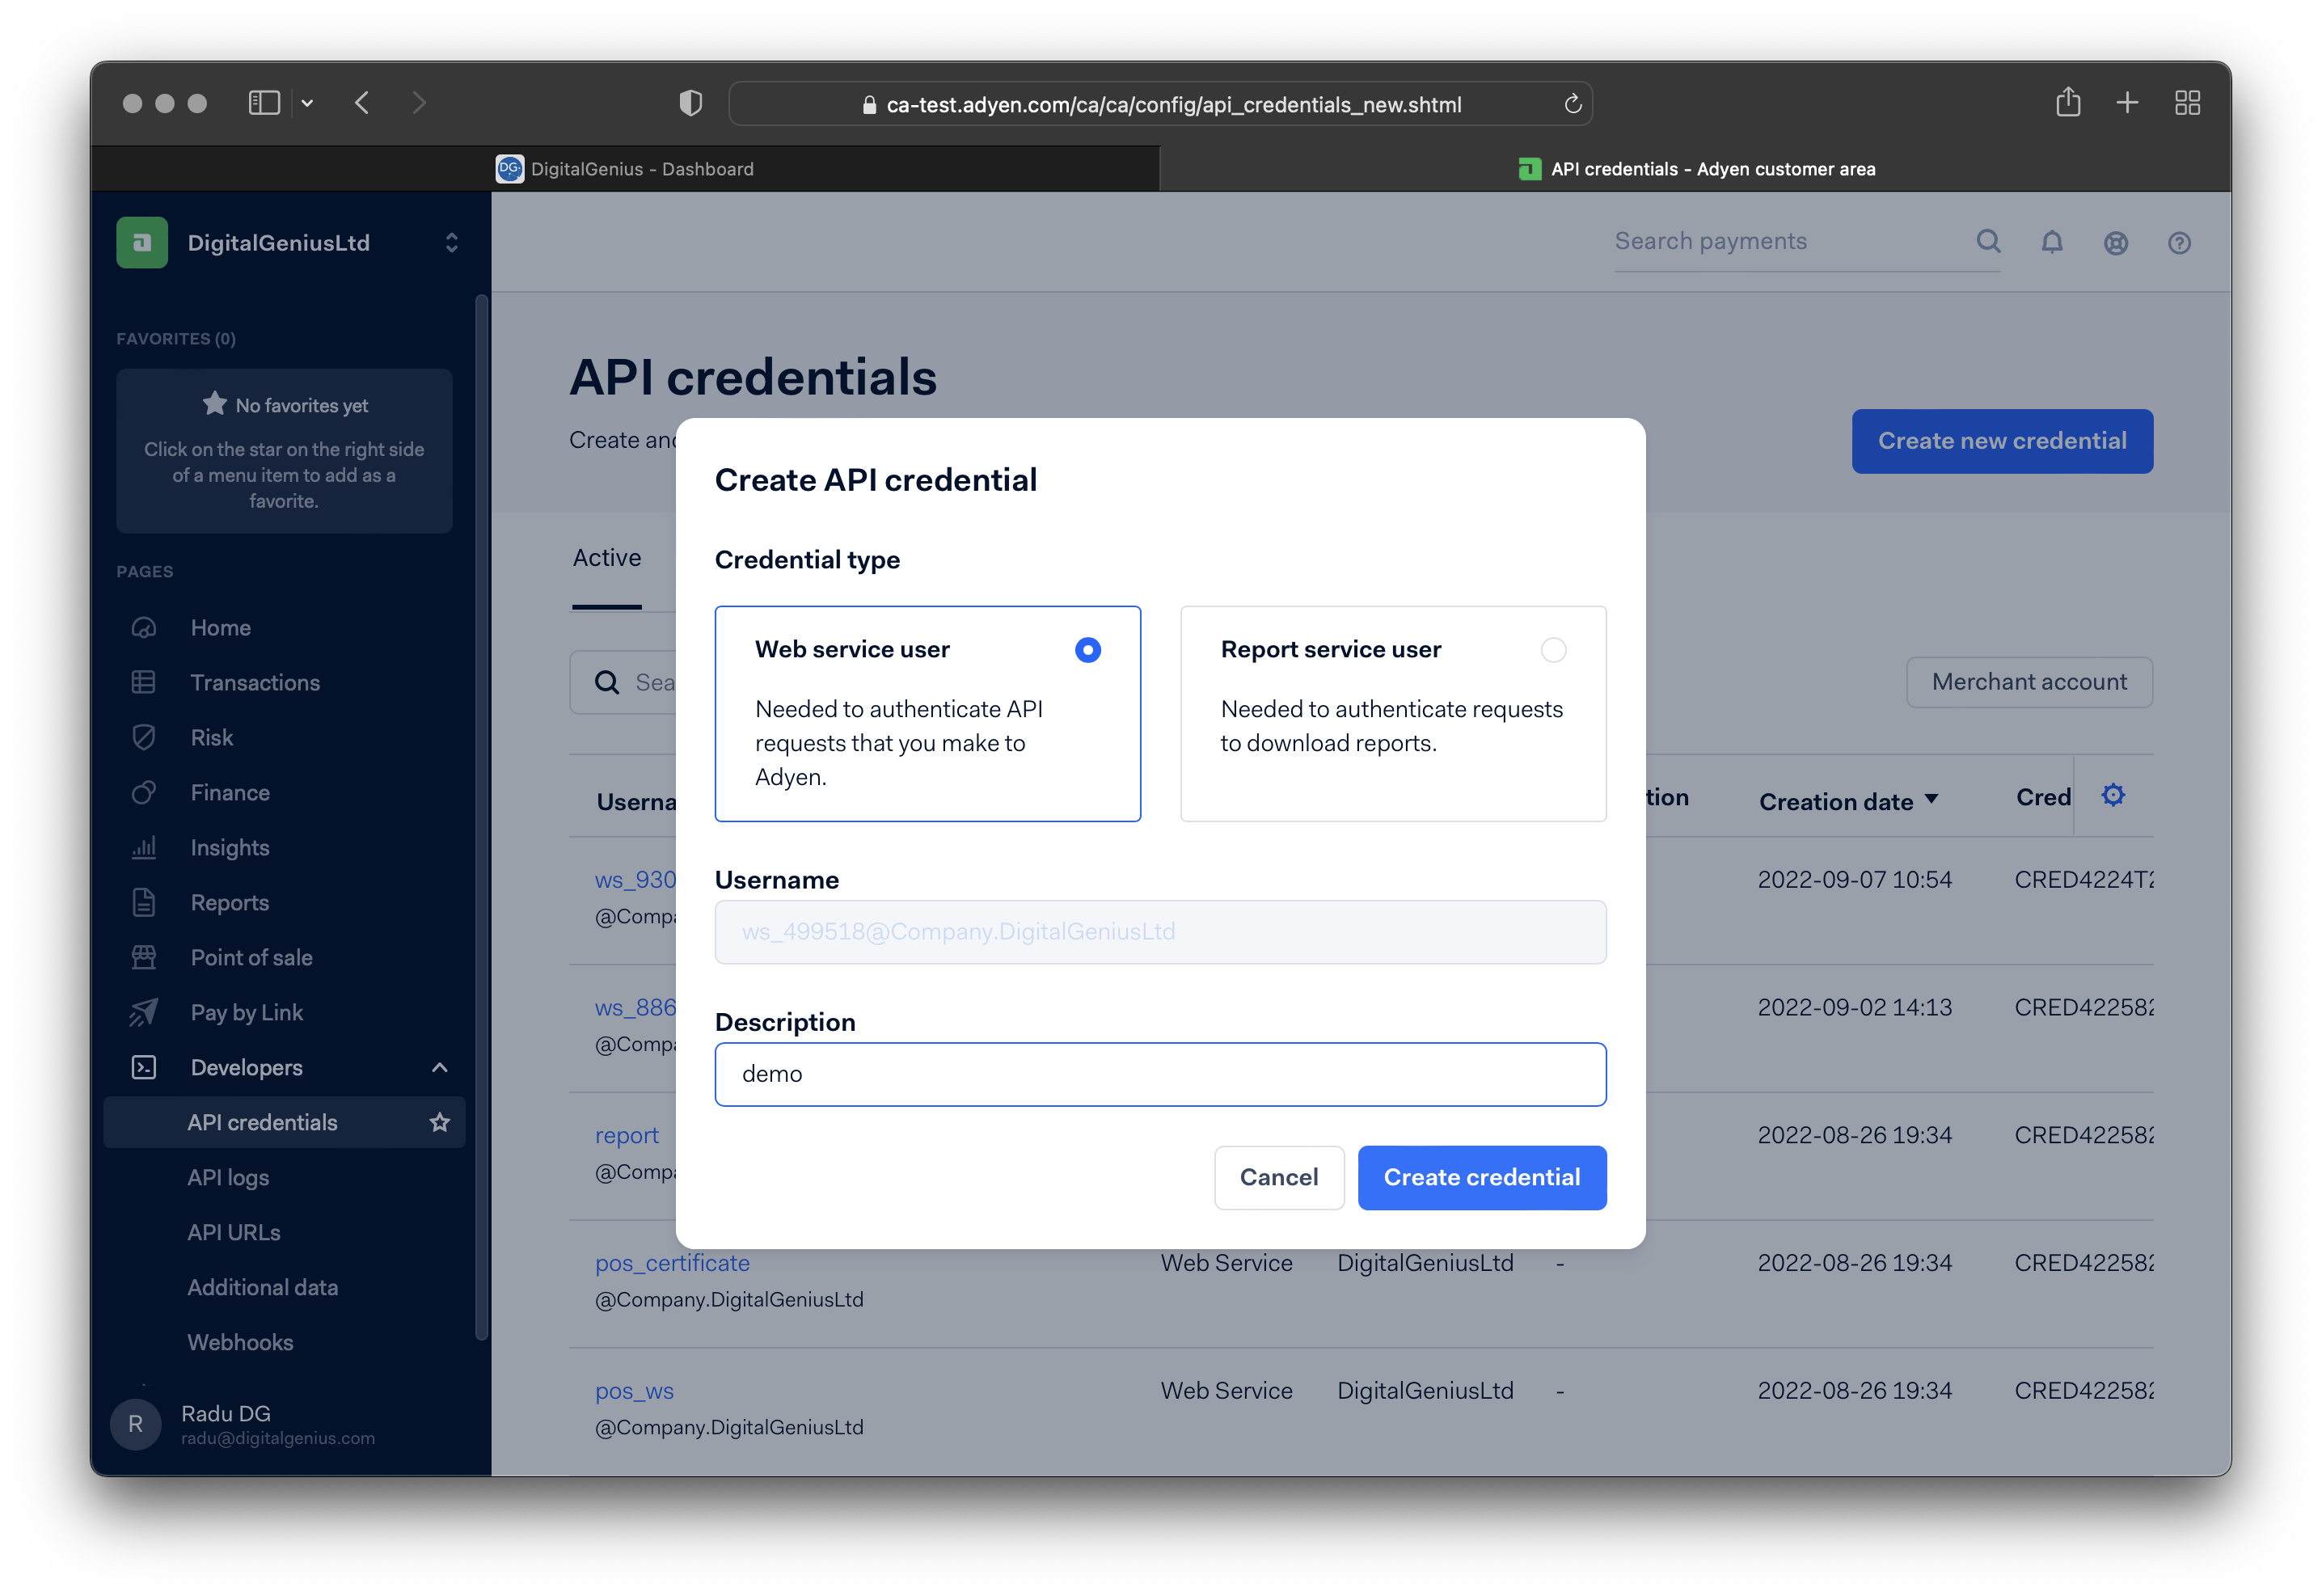
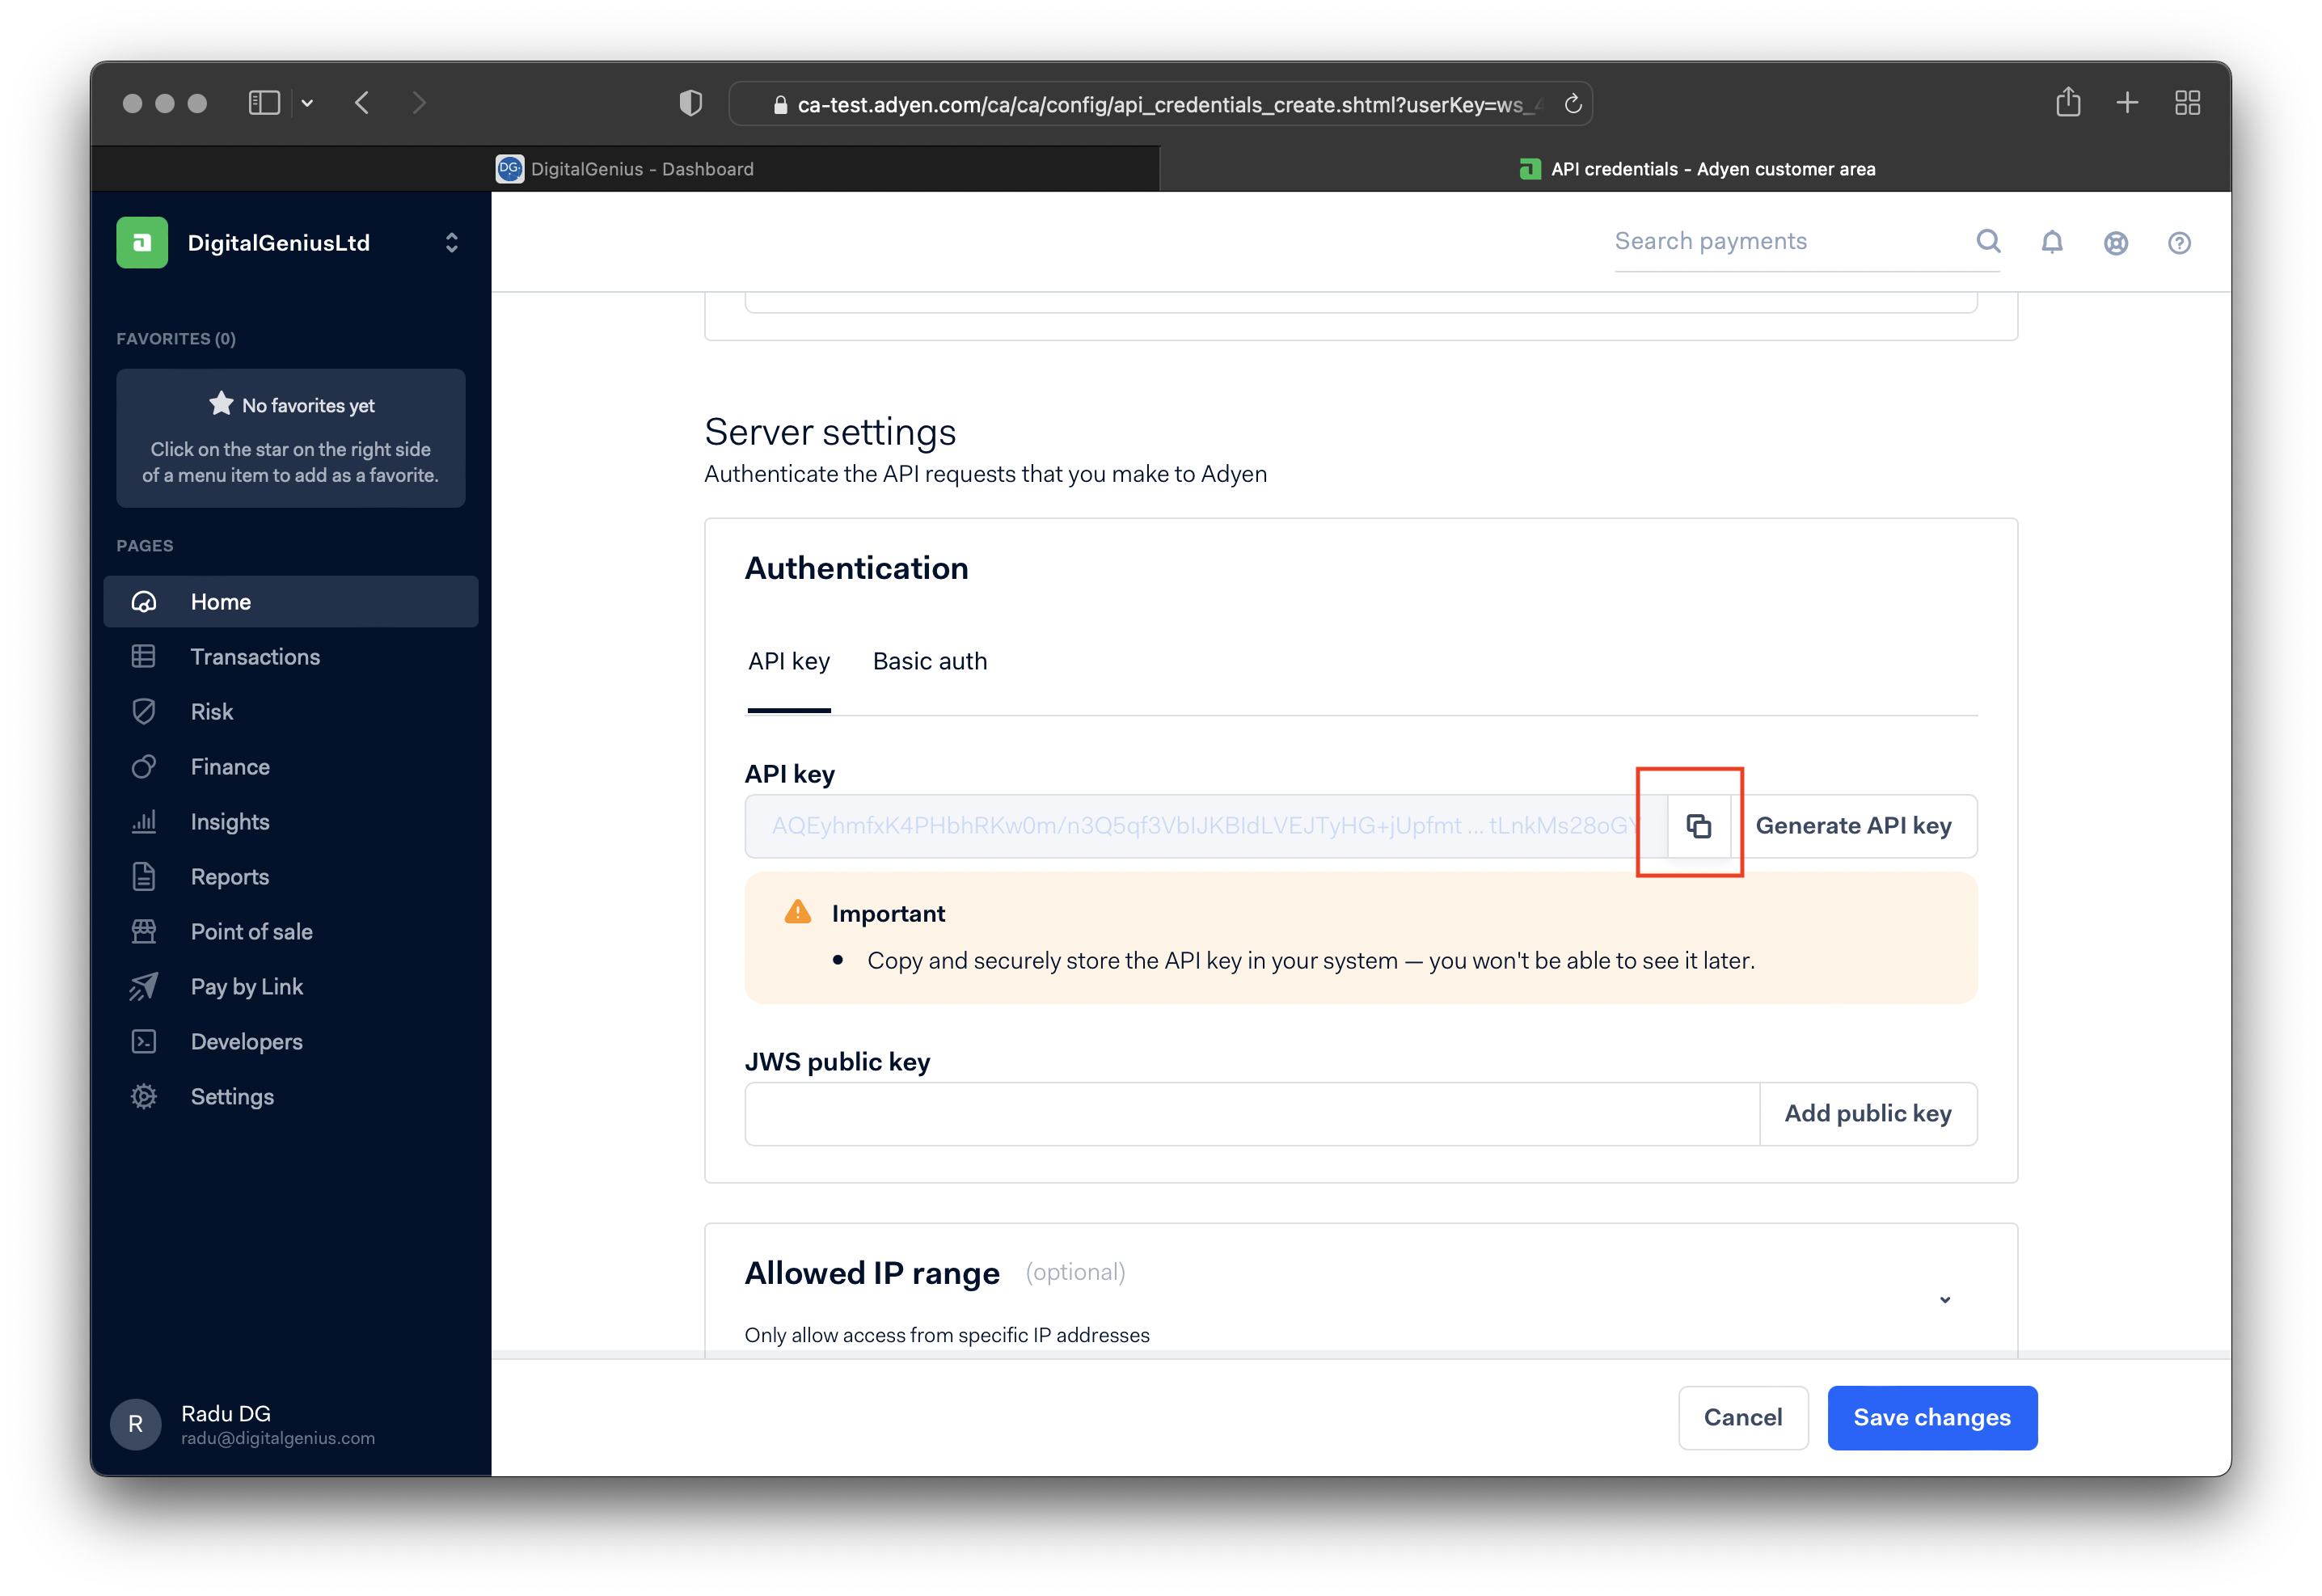
Click on `Save changes after the API key is copied.
Copy the generate API key as it's needed in the next and final step.
Step 4. Set the HMAC Key and API Key on the DigitalGenius connection
Go back to the connection created in the first step and click on Reconnect.
Paste the HMAC Key and the API Key created in the previous two steps.
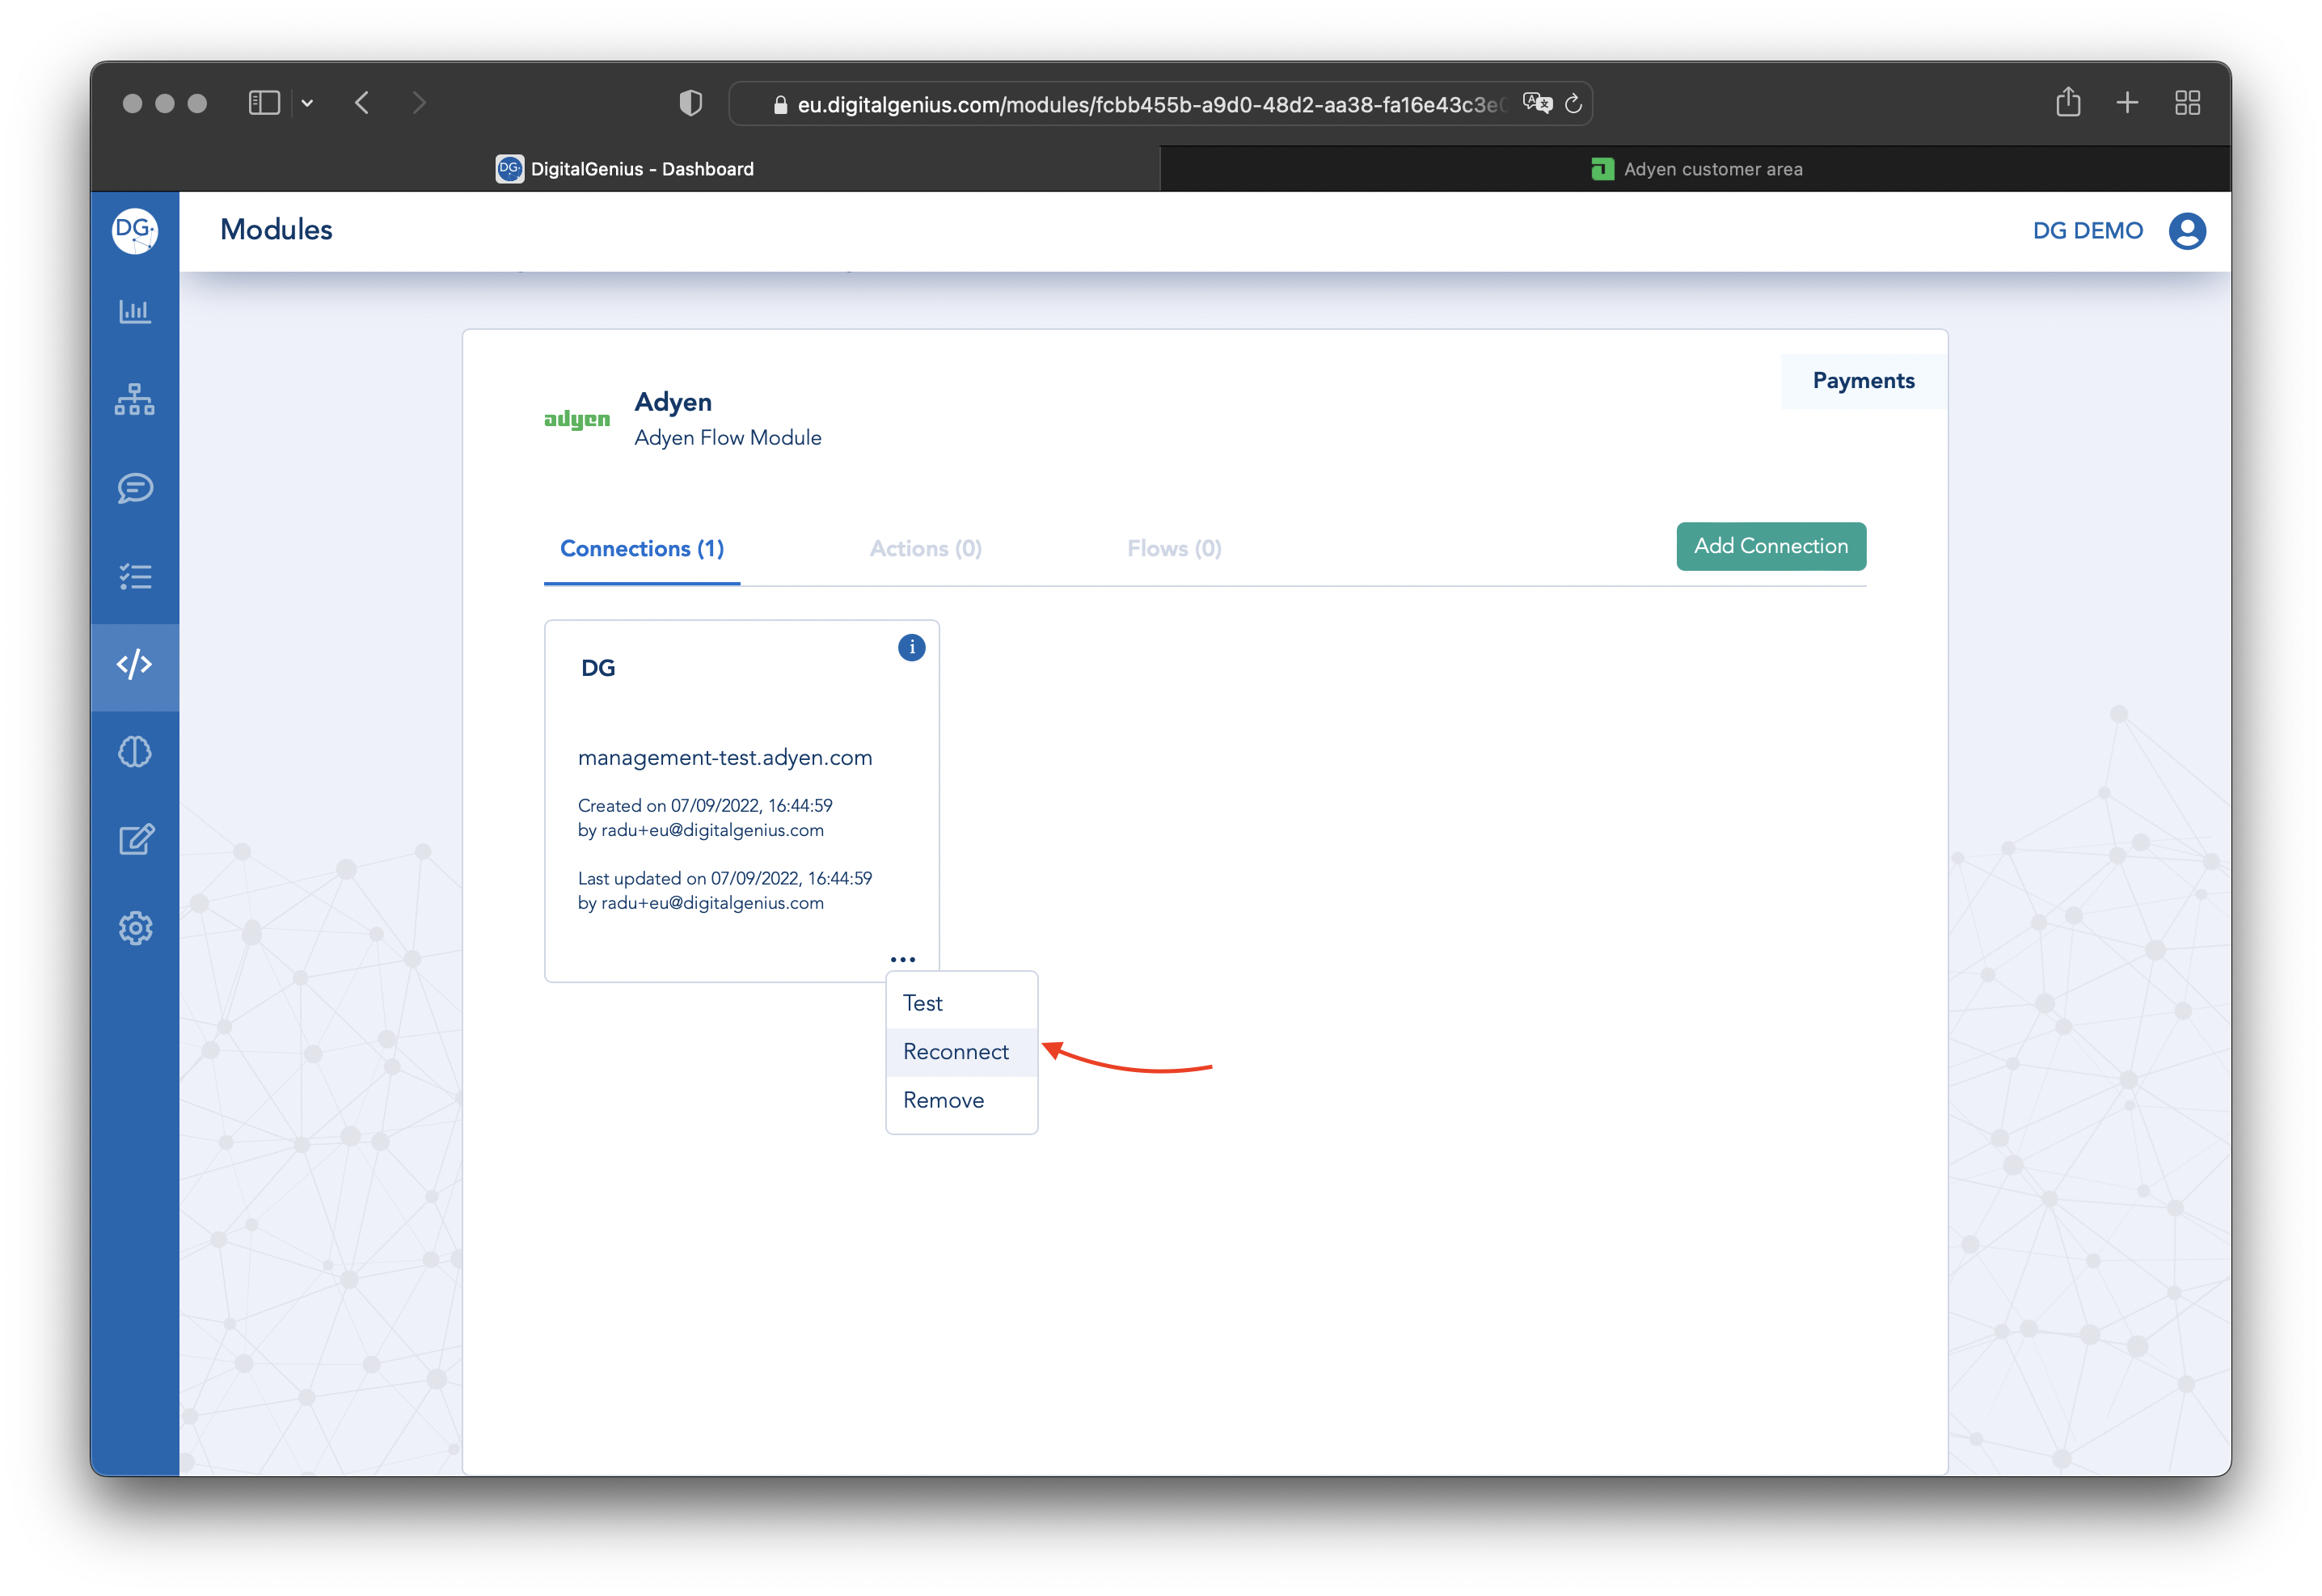
Click on Reconnect.
Save the form with the API Key and the HMAC Key set.
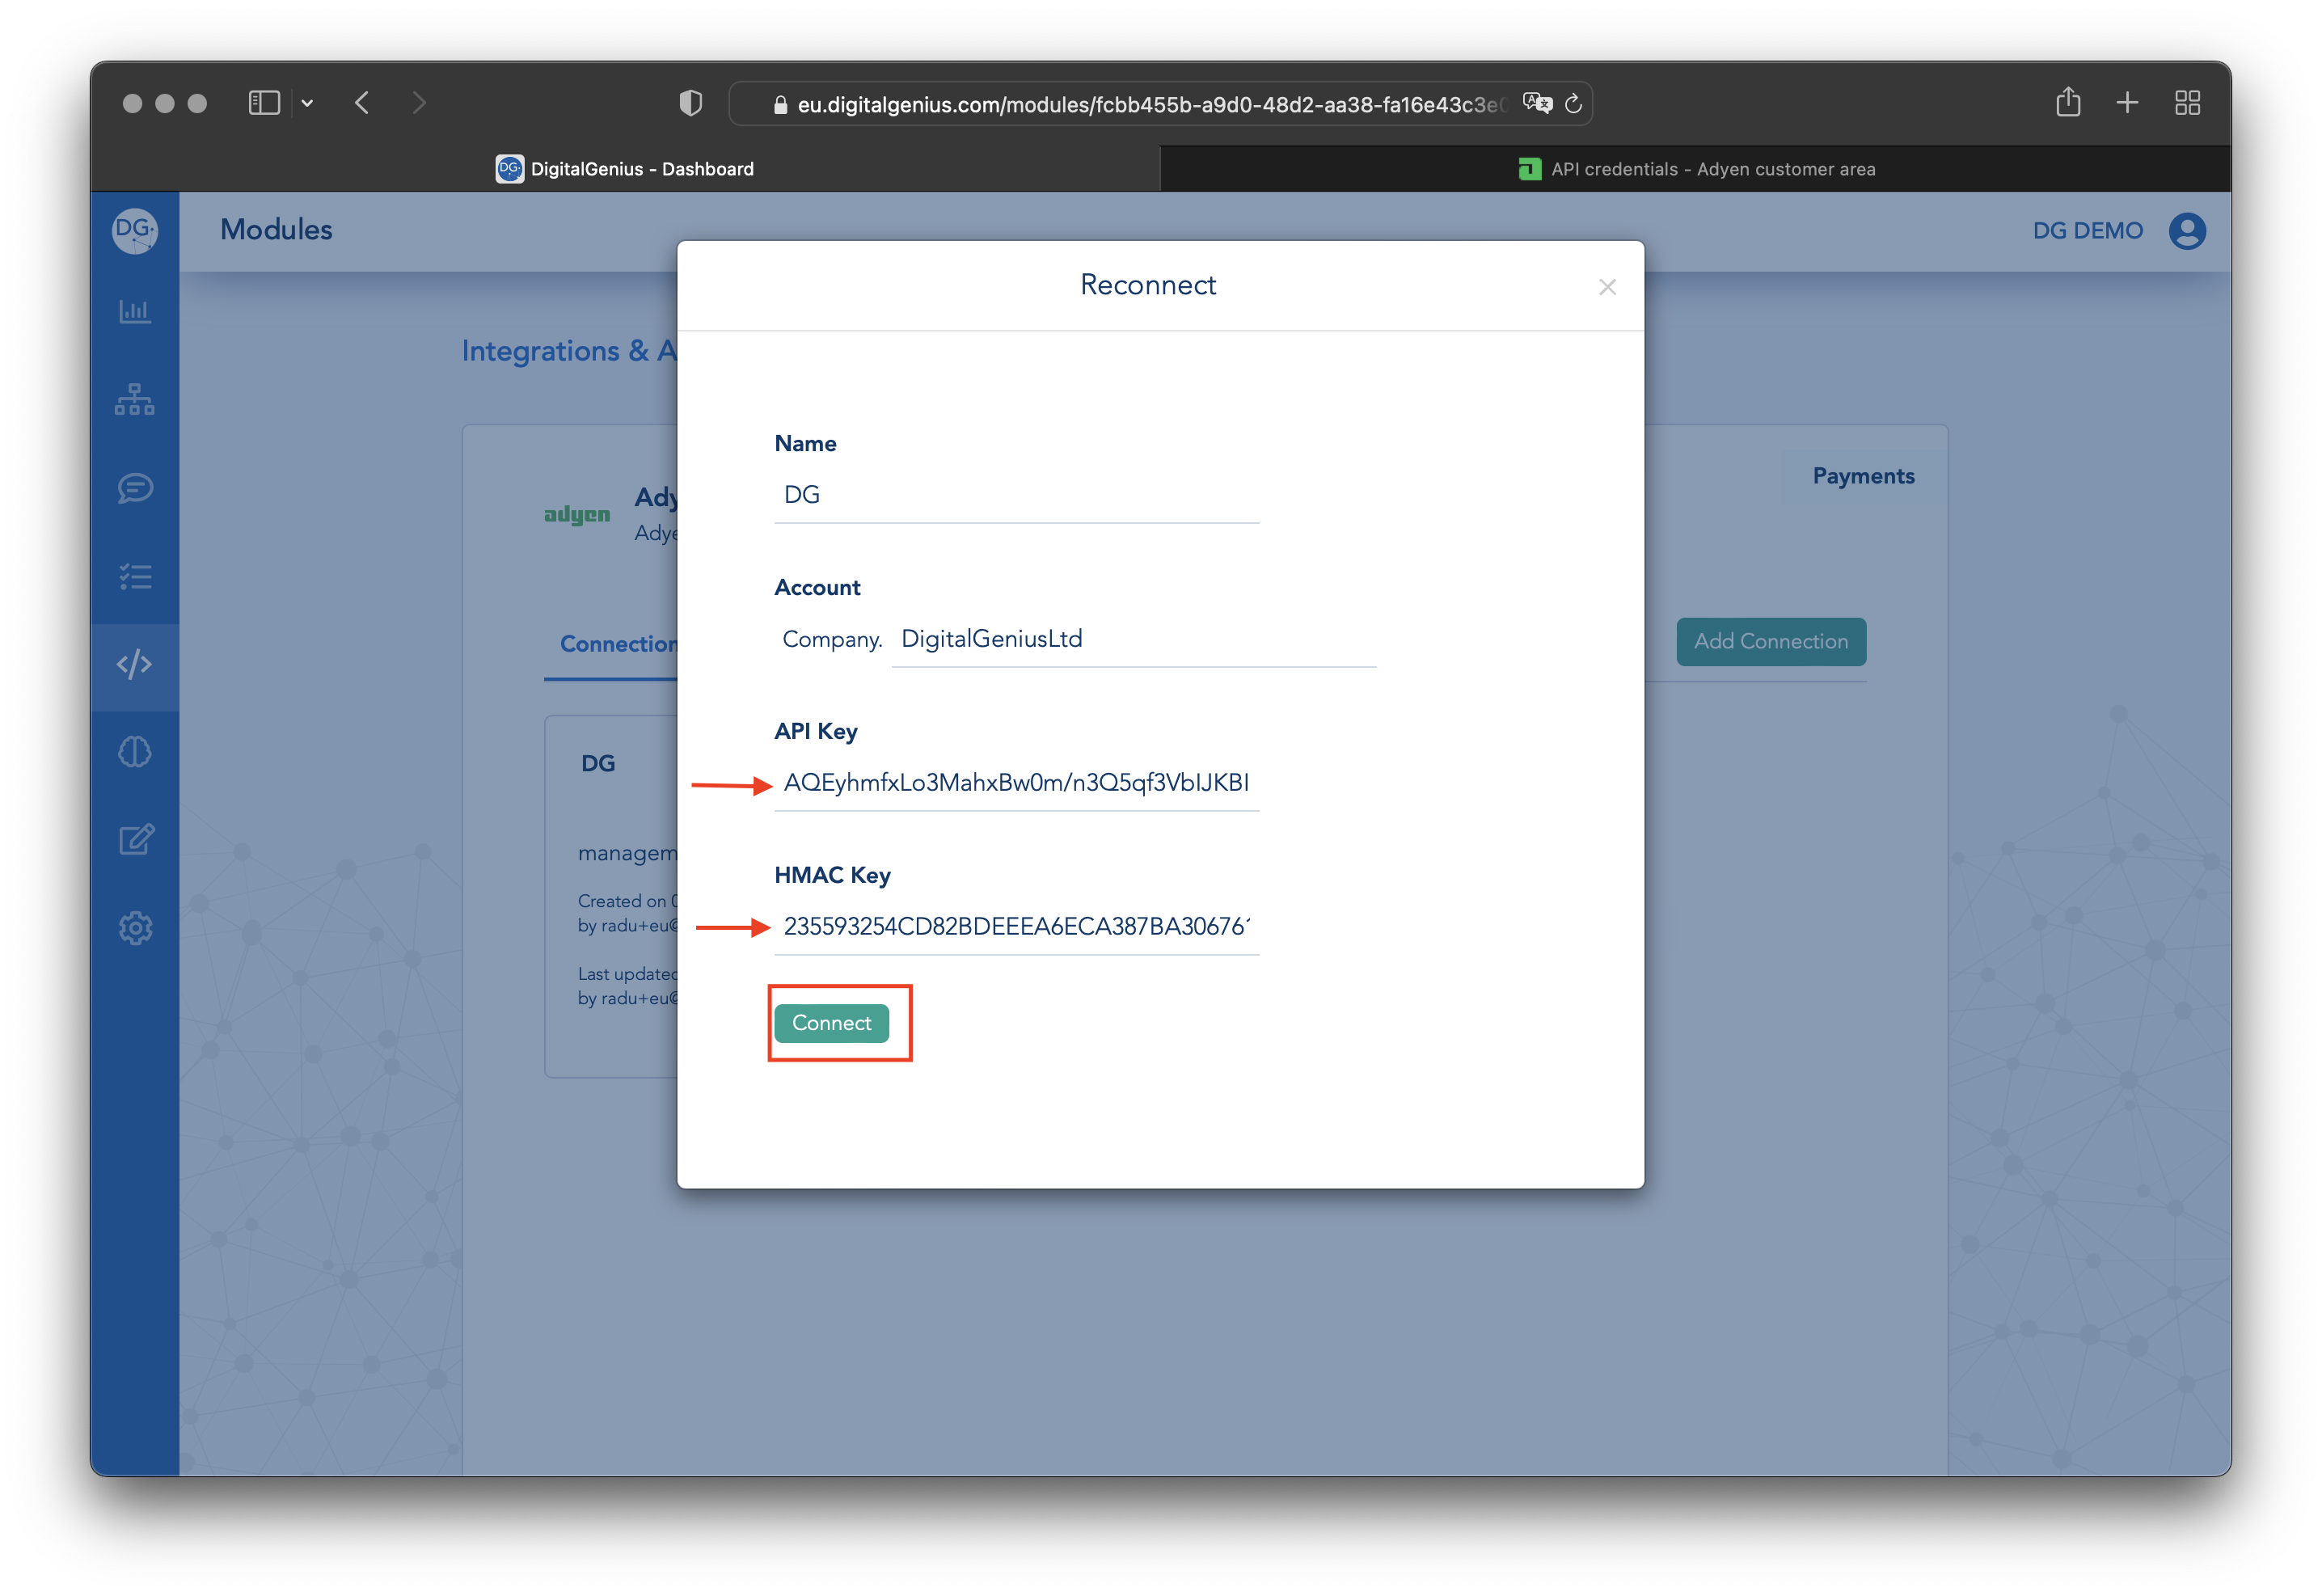
Your Adyen connection is now set up and DigitalGenius will receive Adyen payments notifications.
Test the Webhook
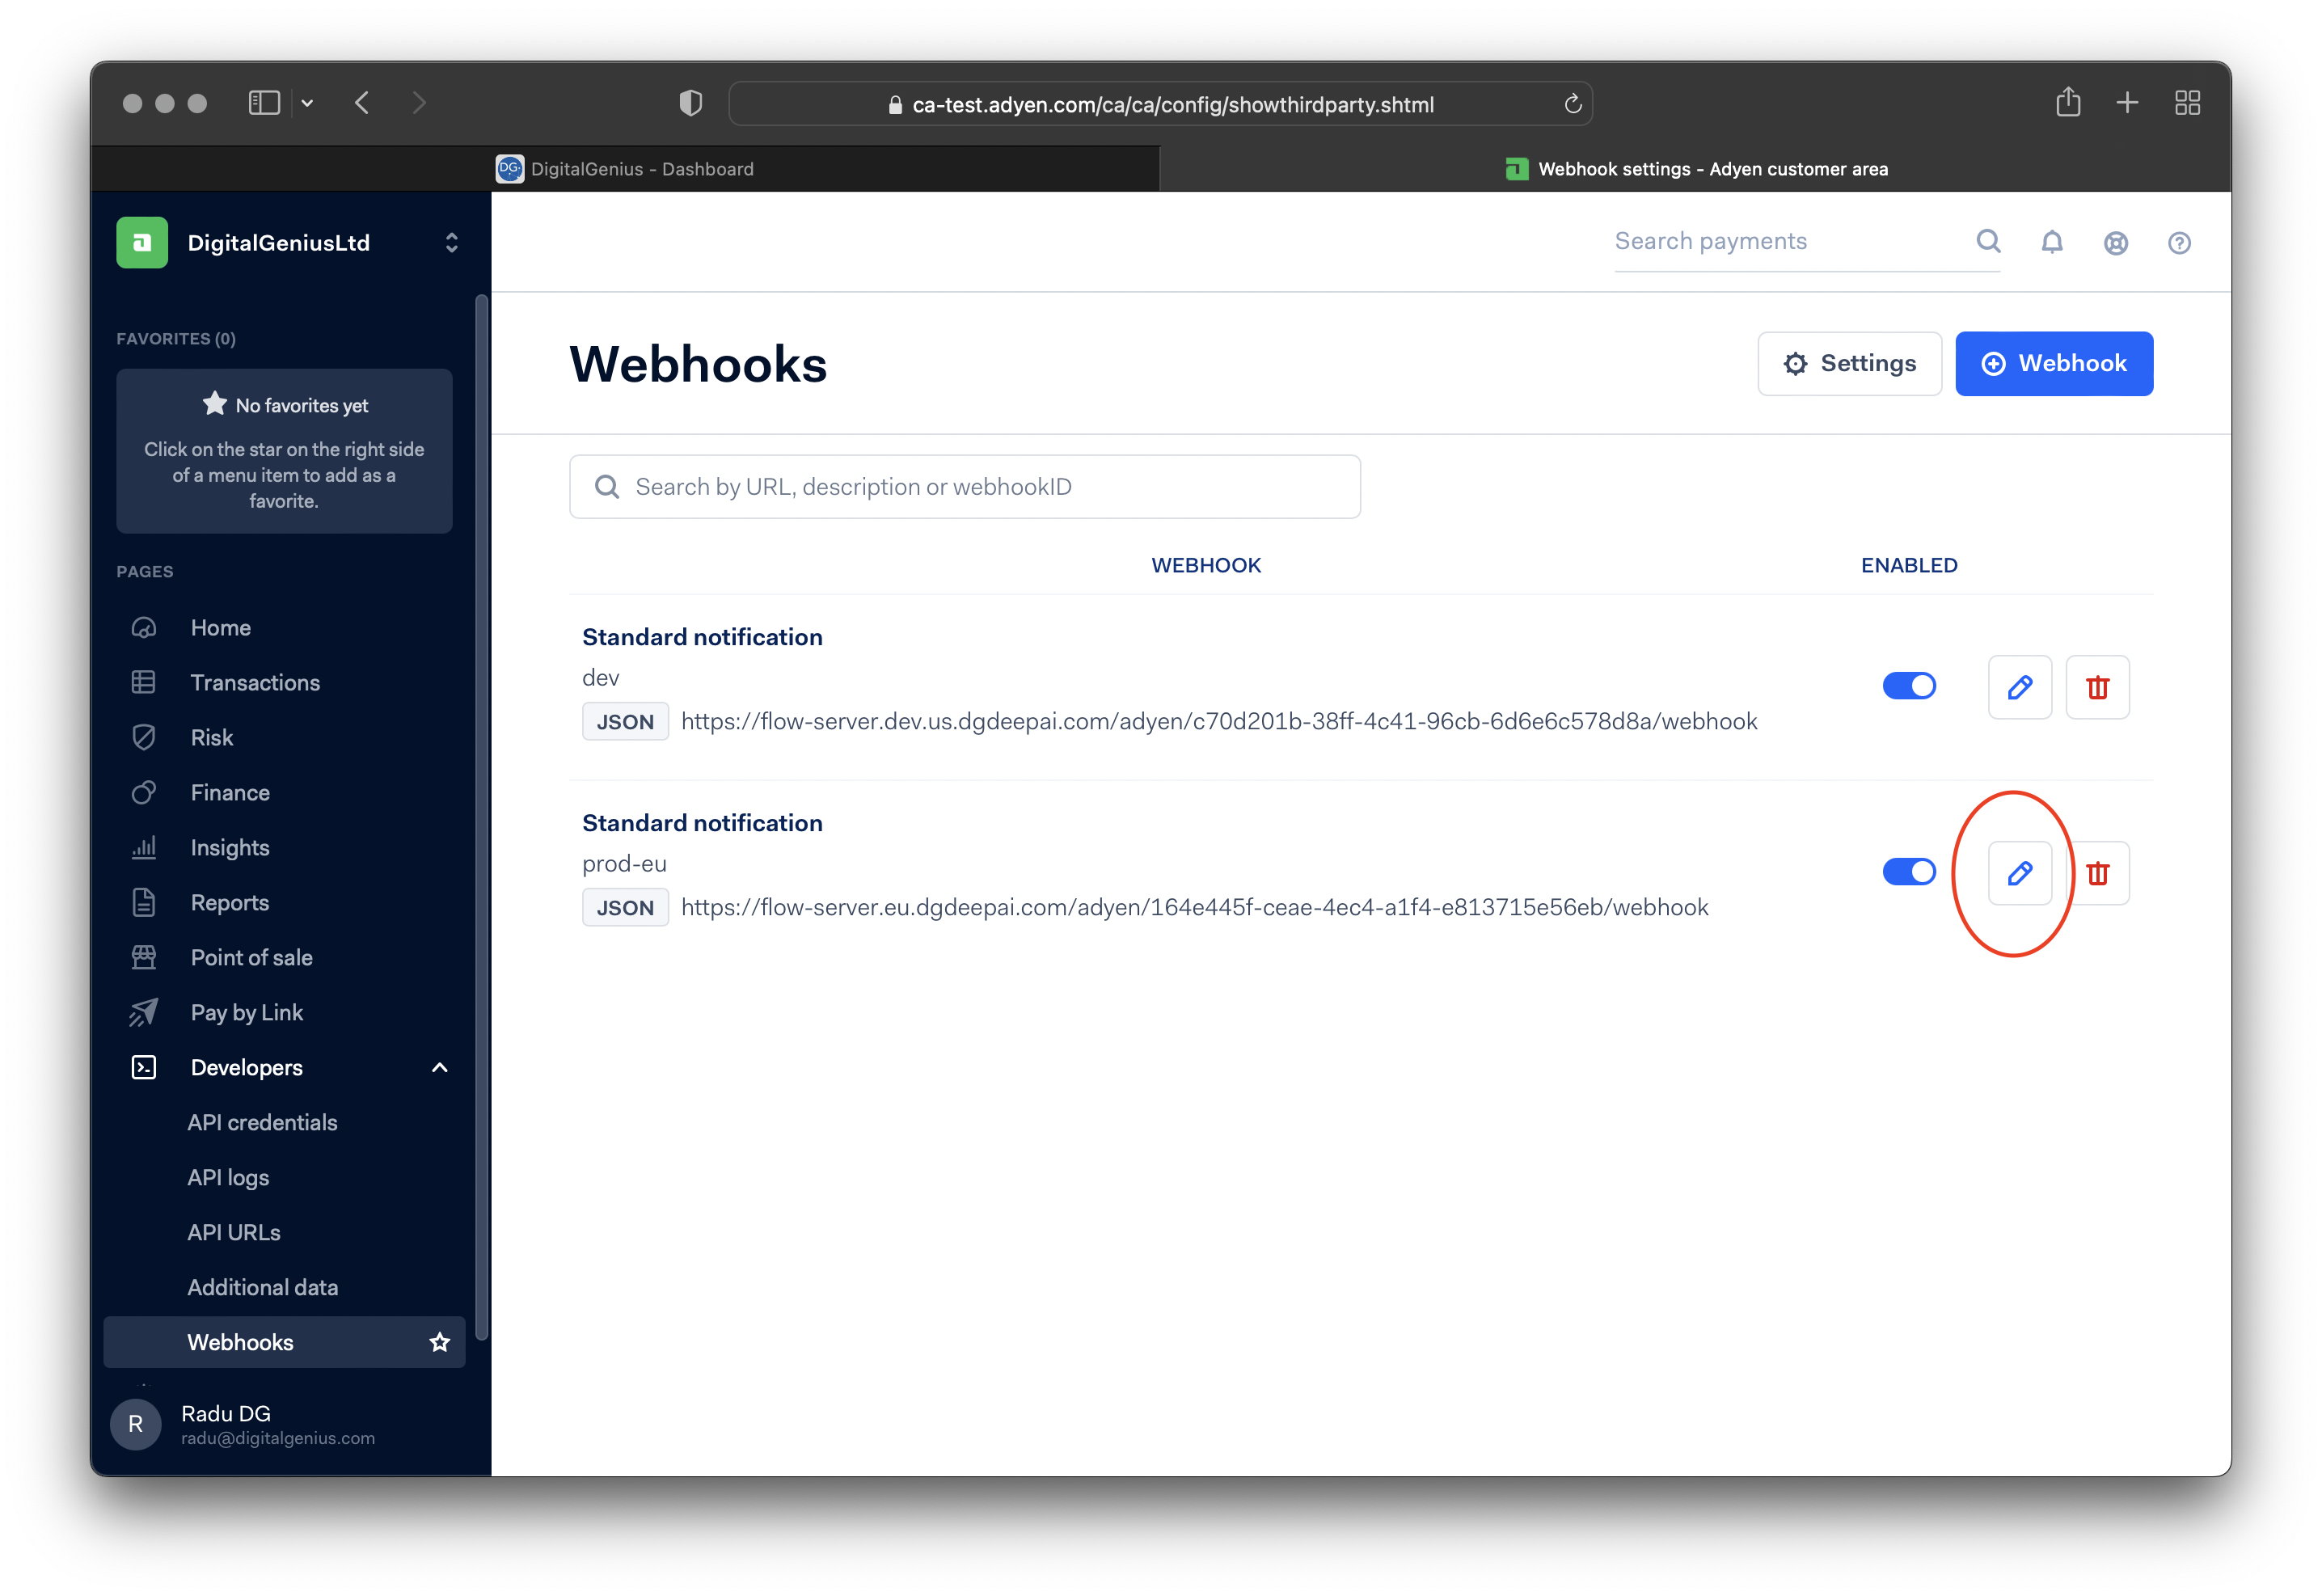
Navigate to the just created Adyen webhook and click on the Edit icon.
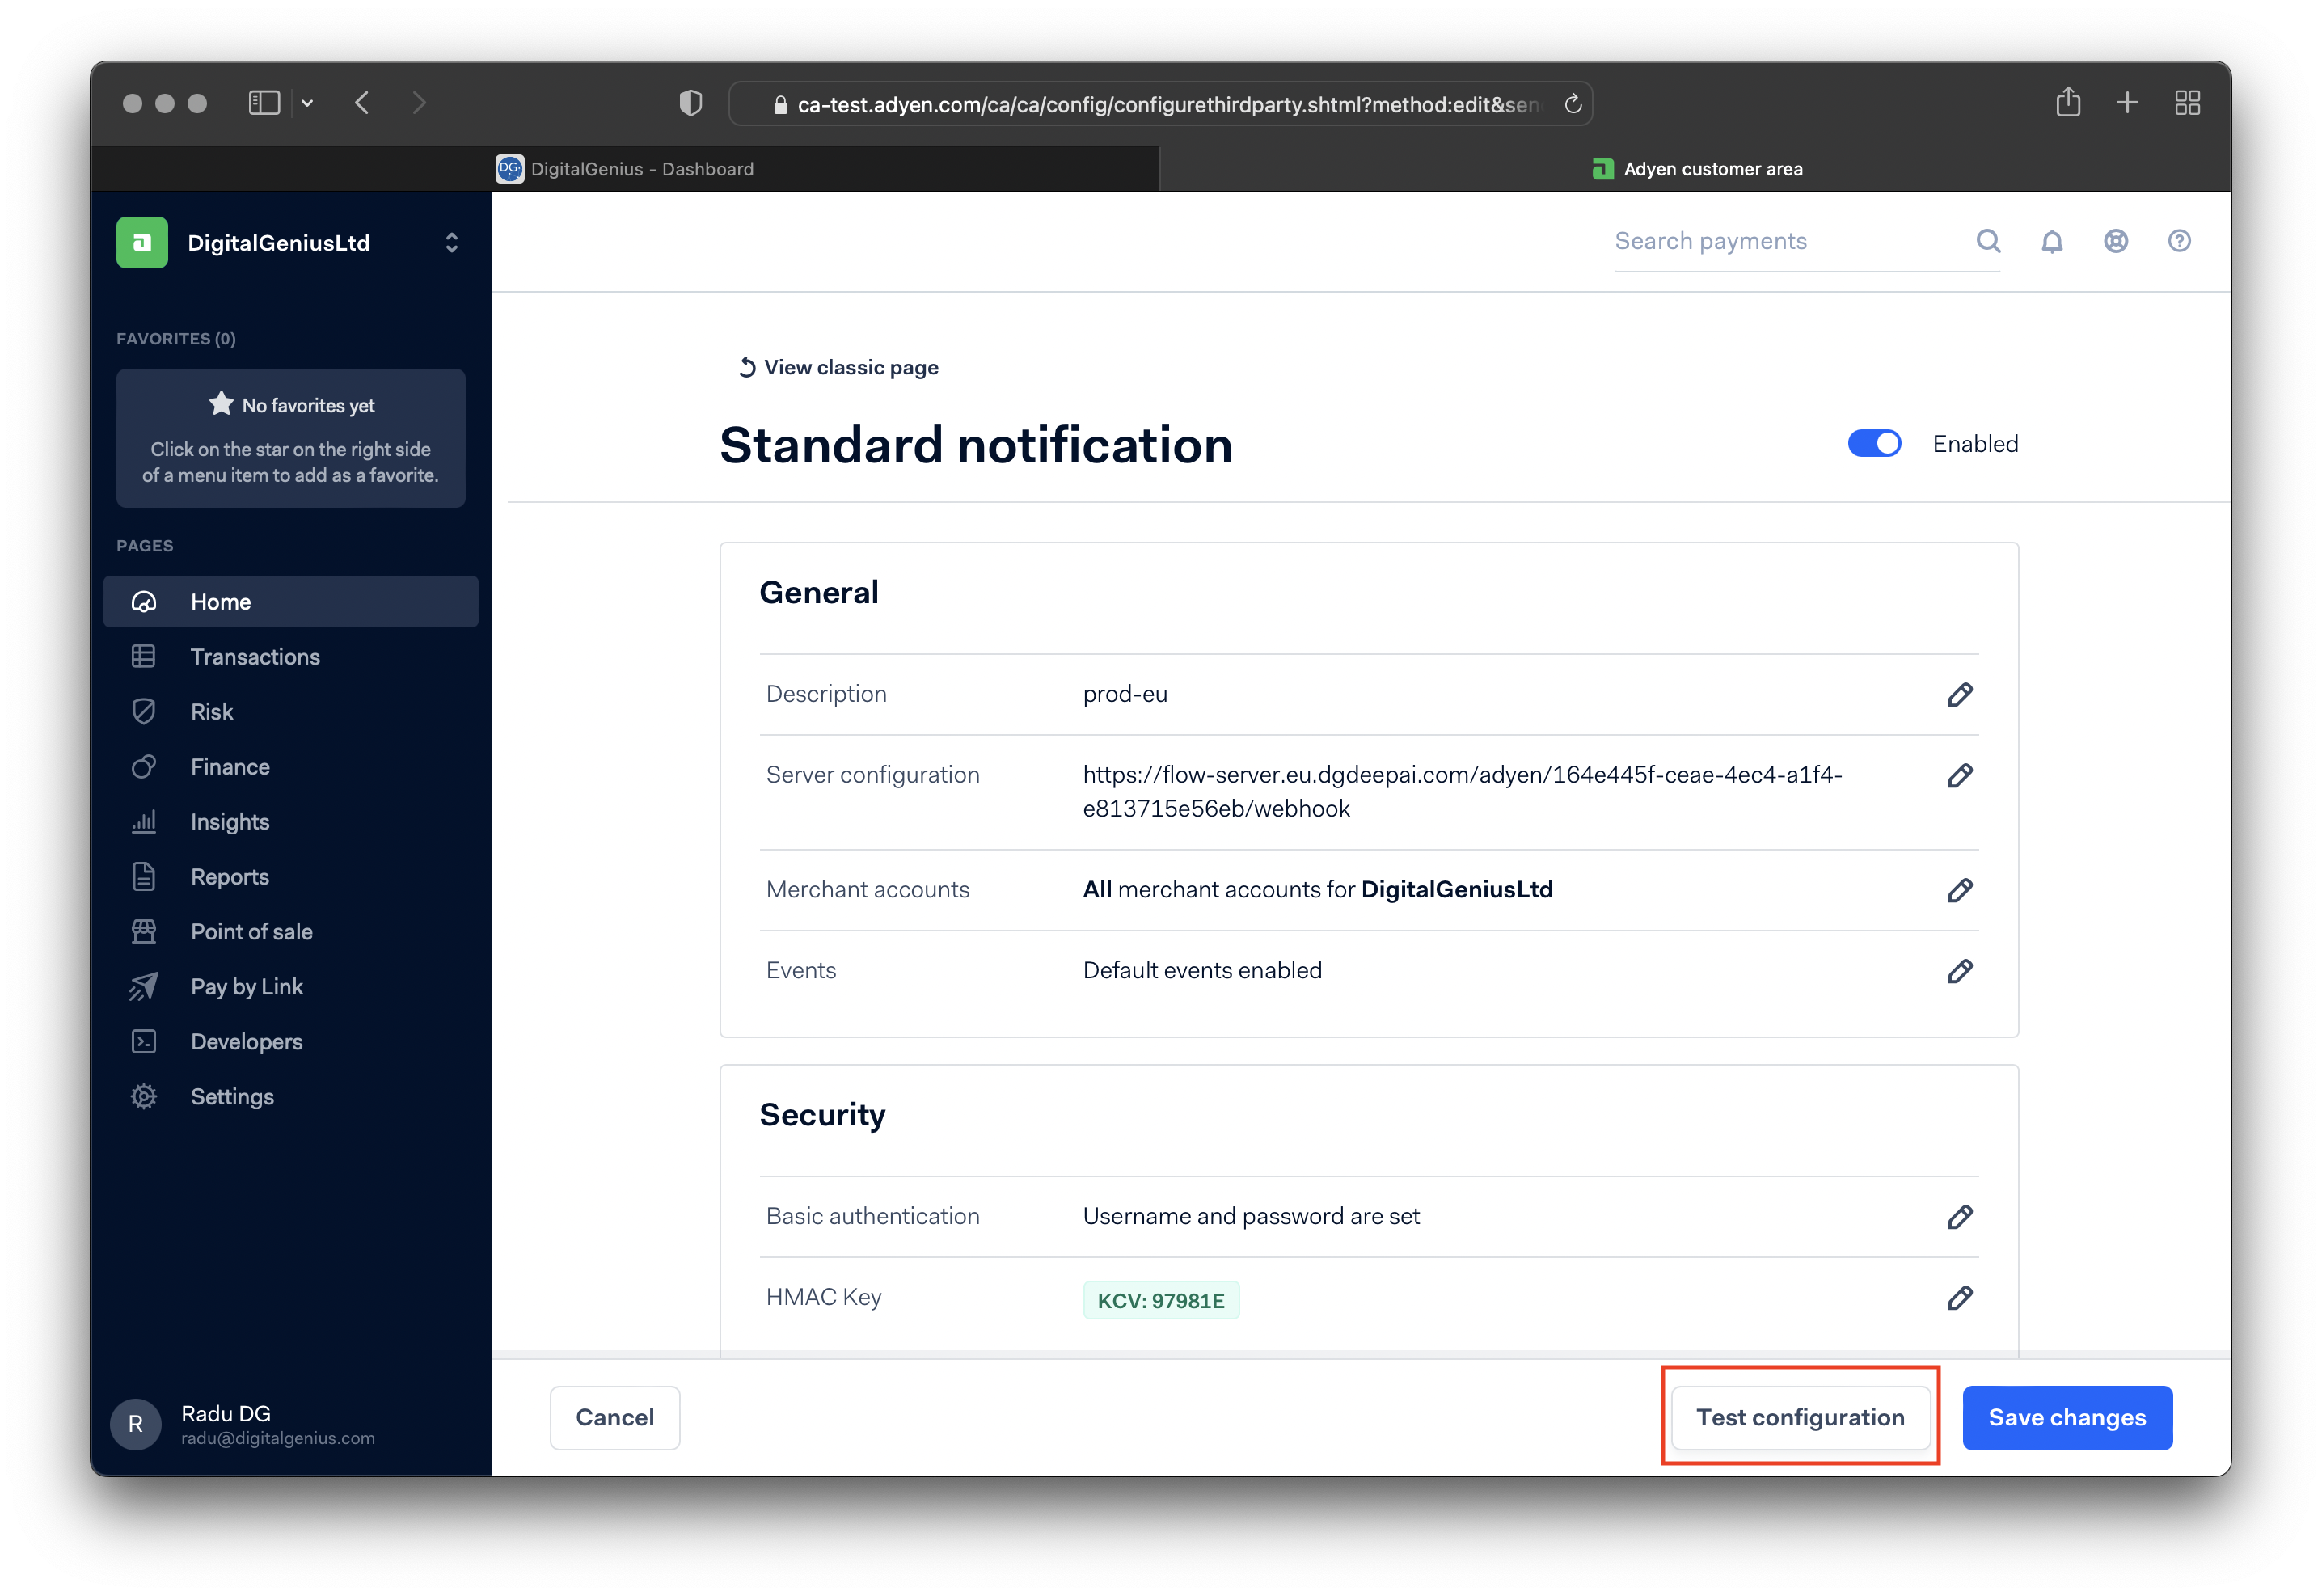
Click on Test configuration. A side window will open. Select you account and the type of event you want to test. Click Test.
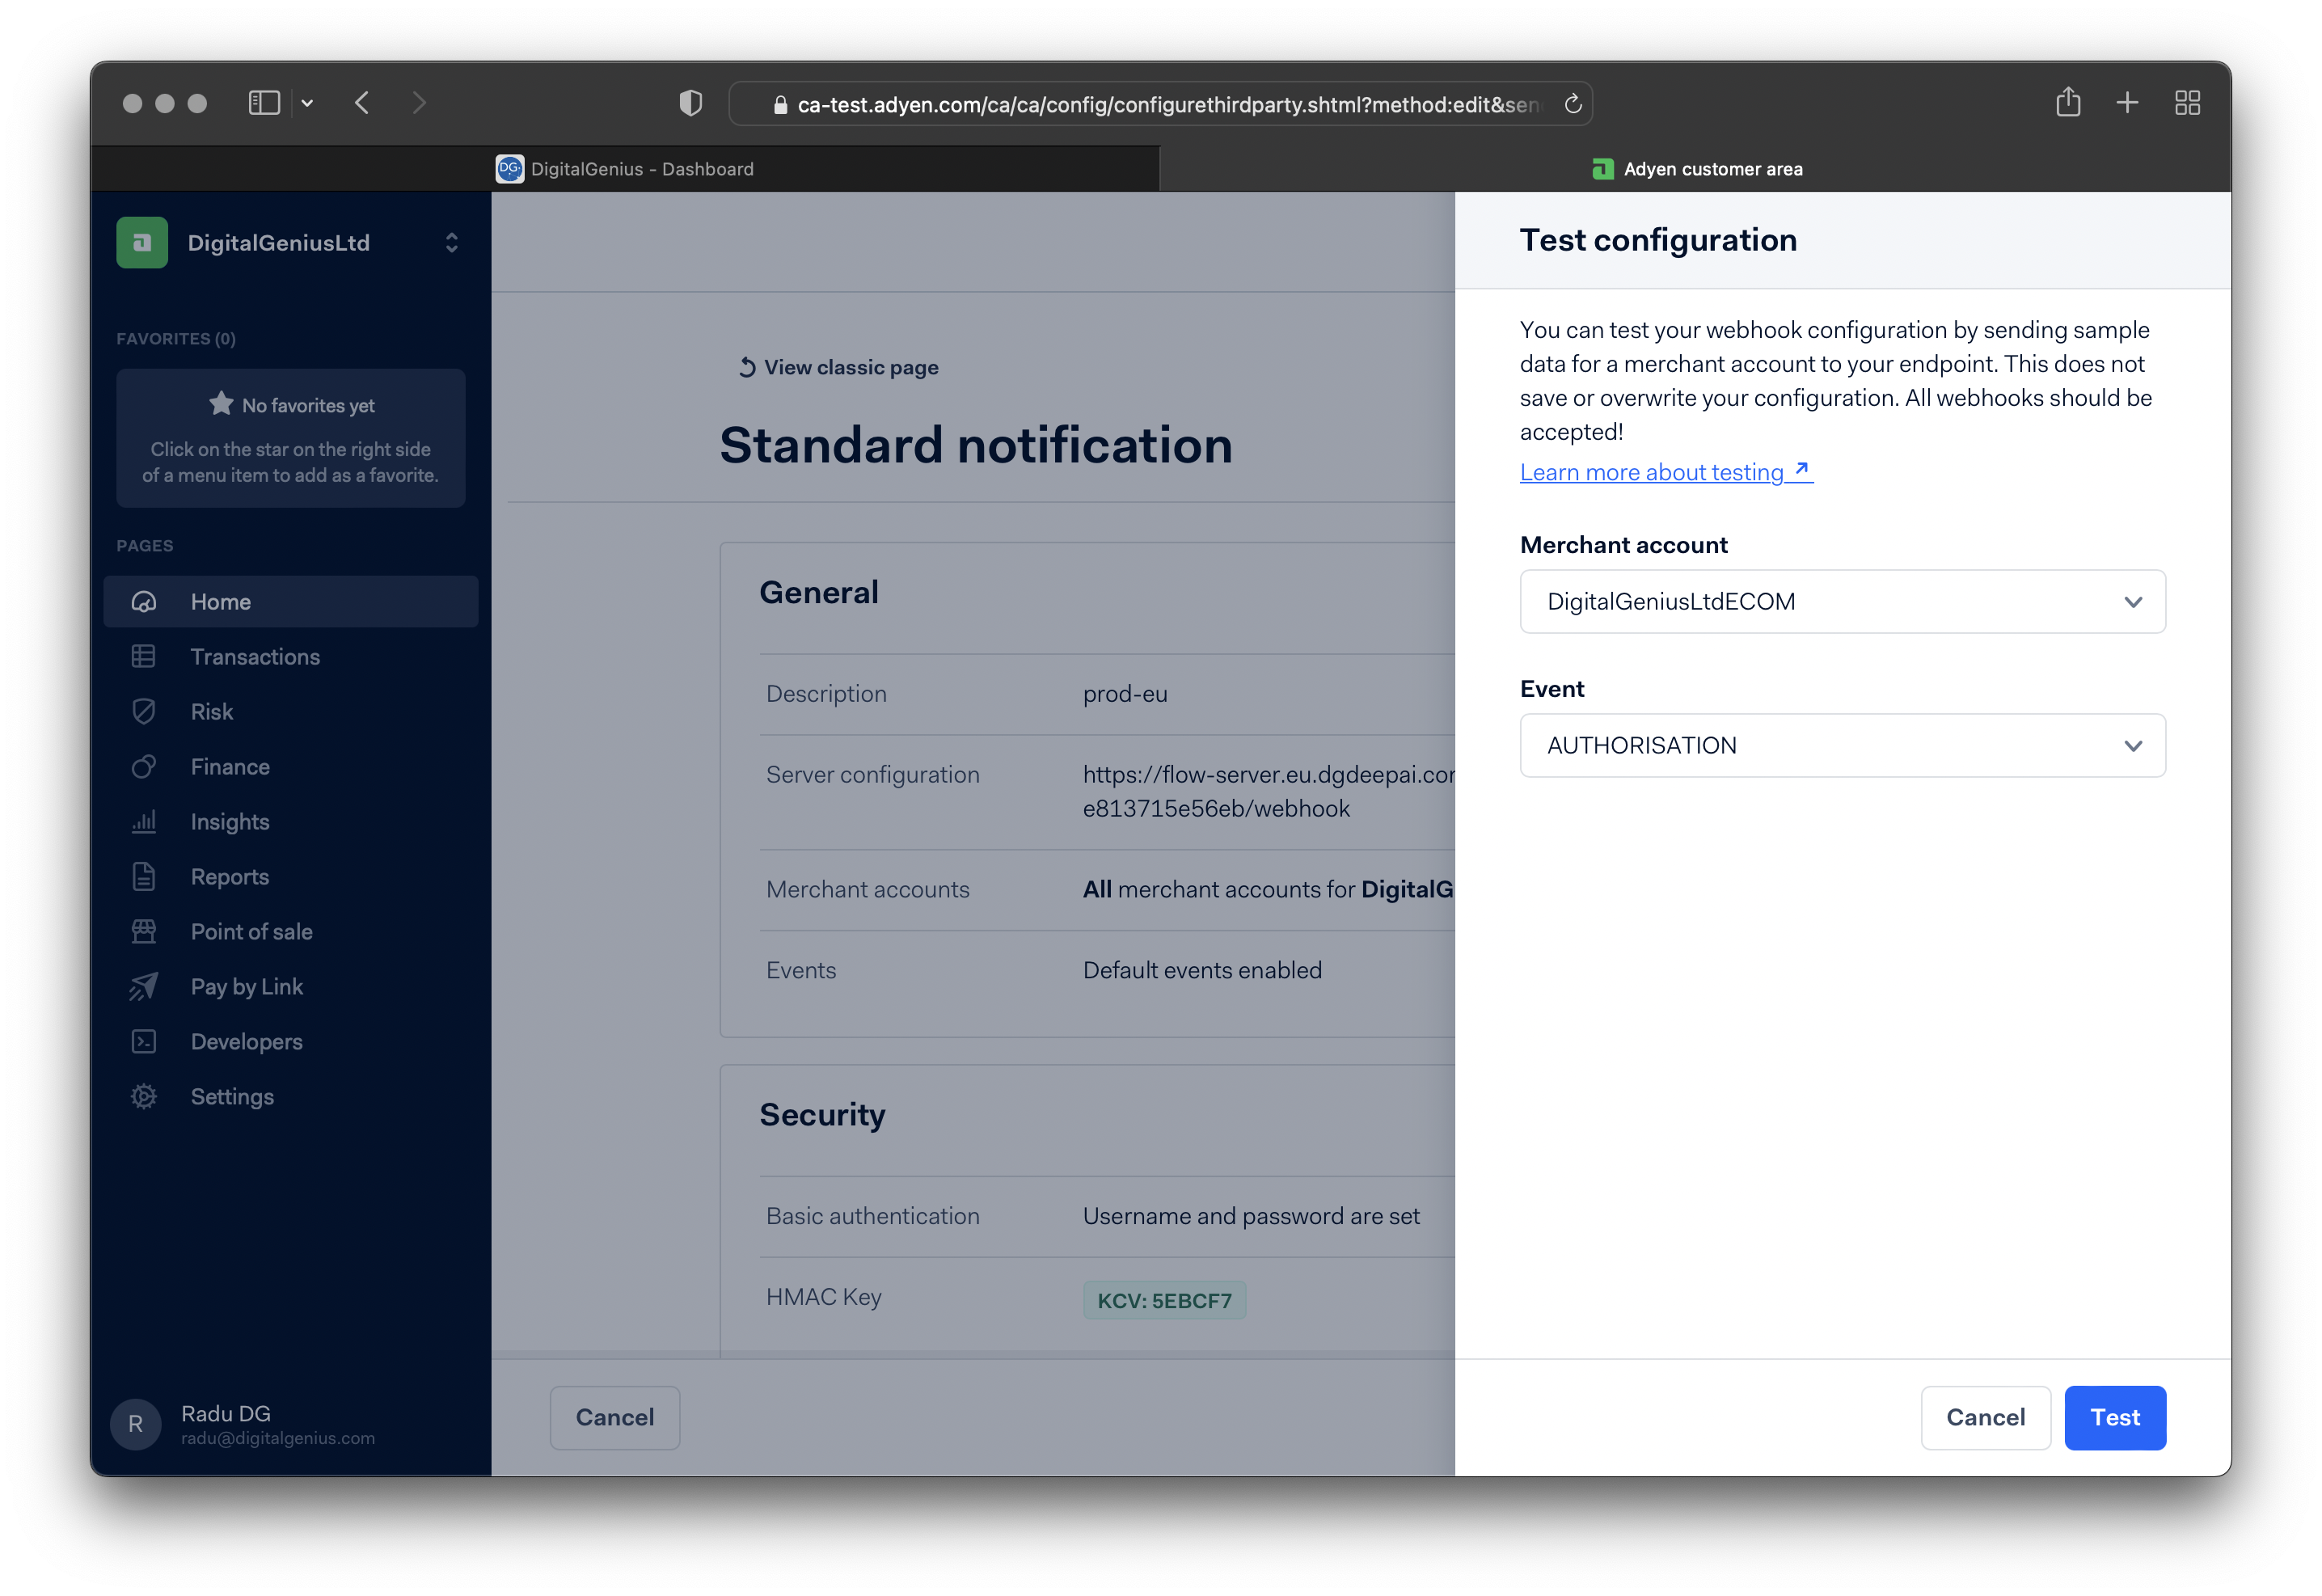
Click on the Test button.
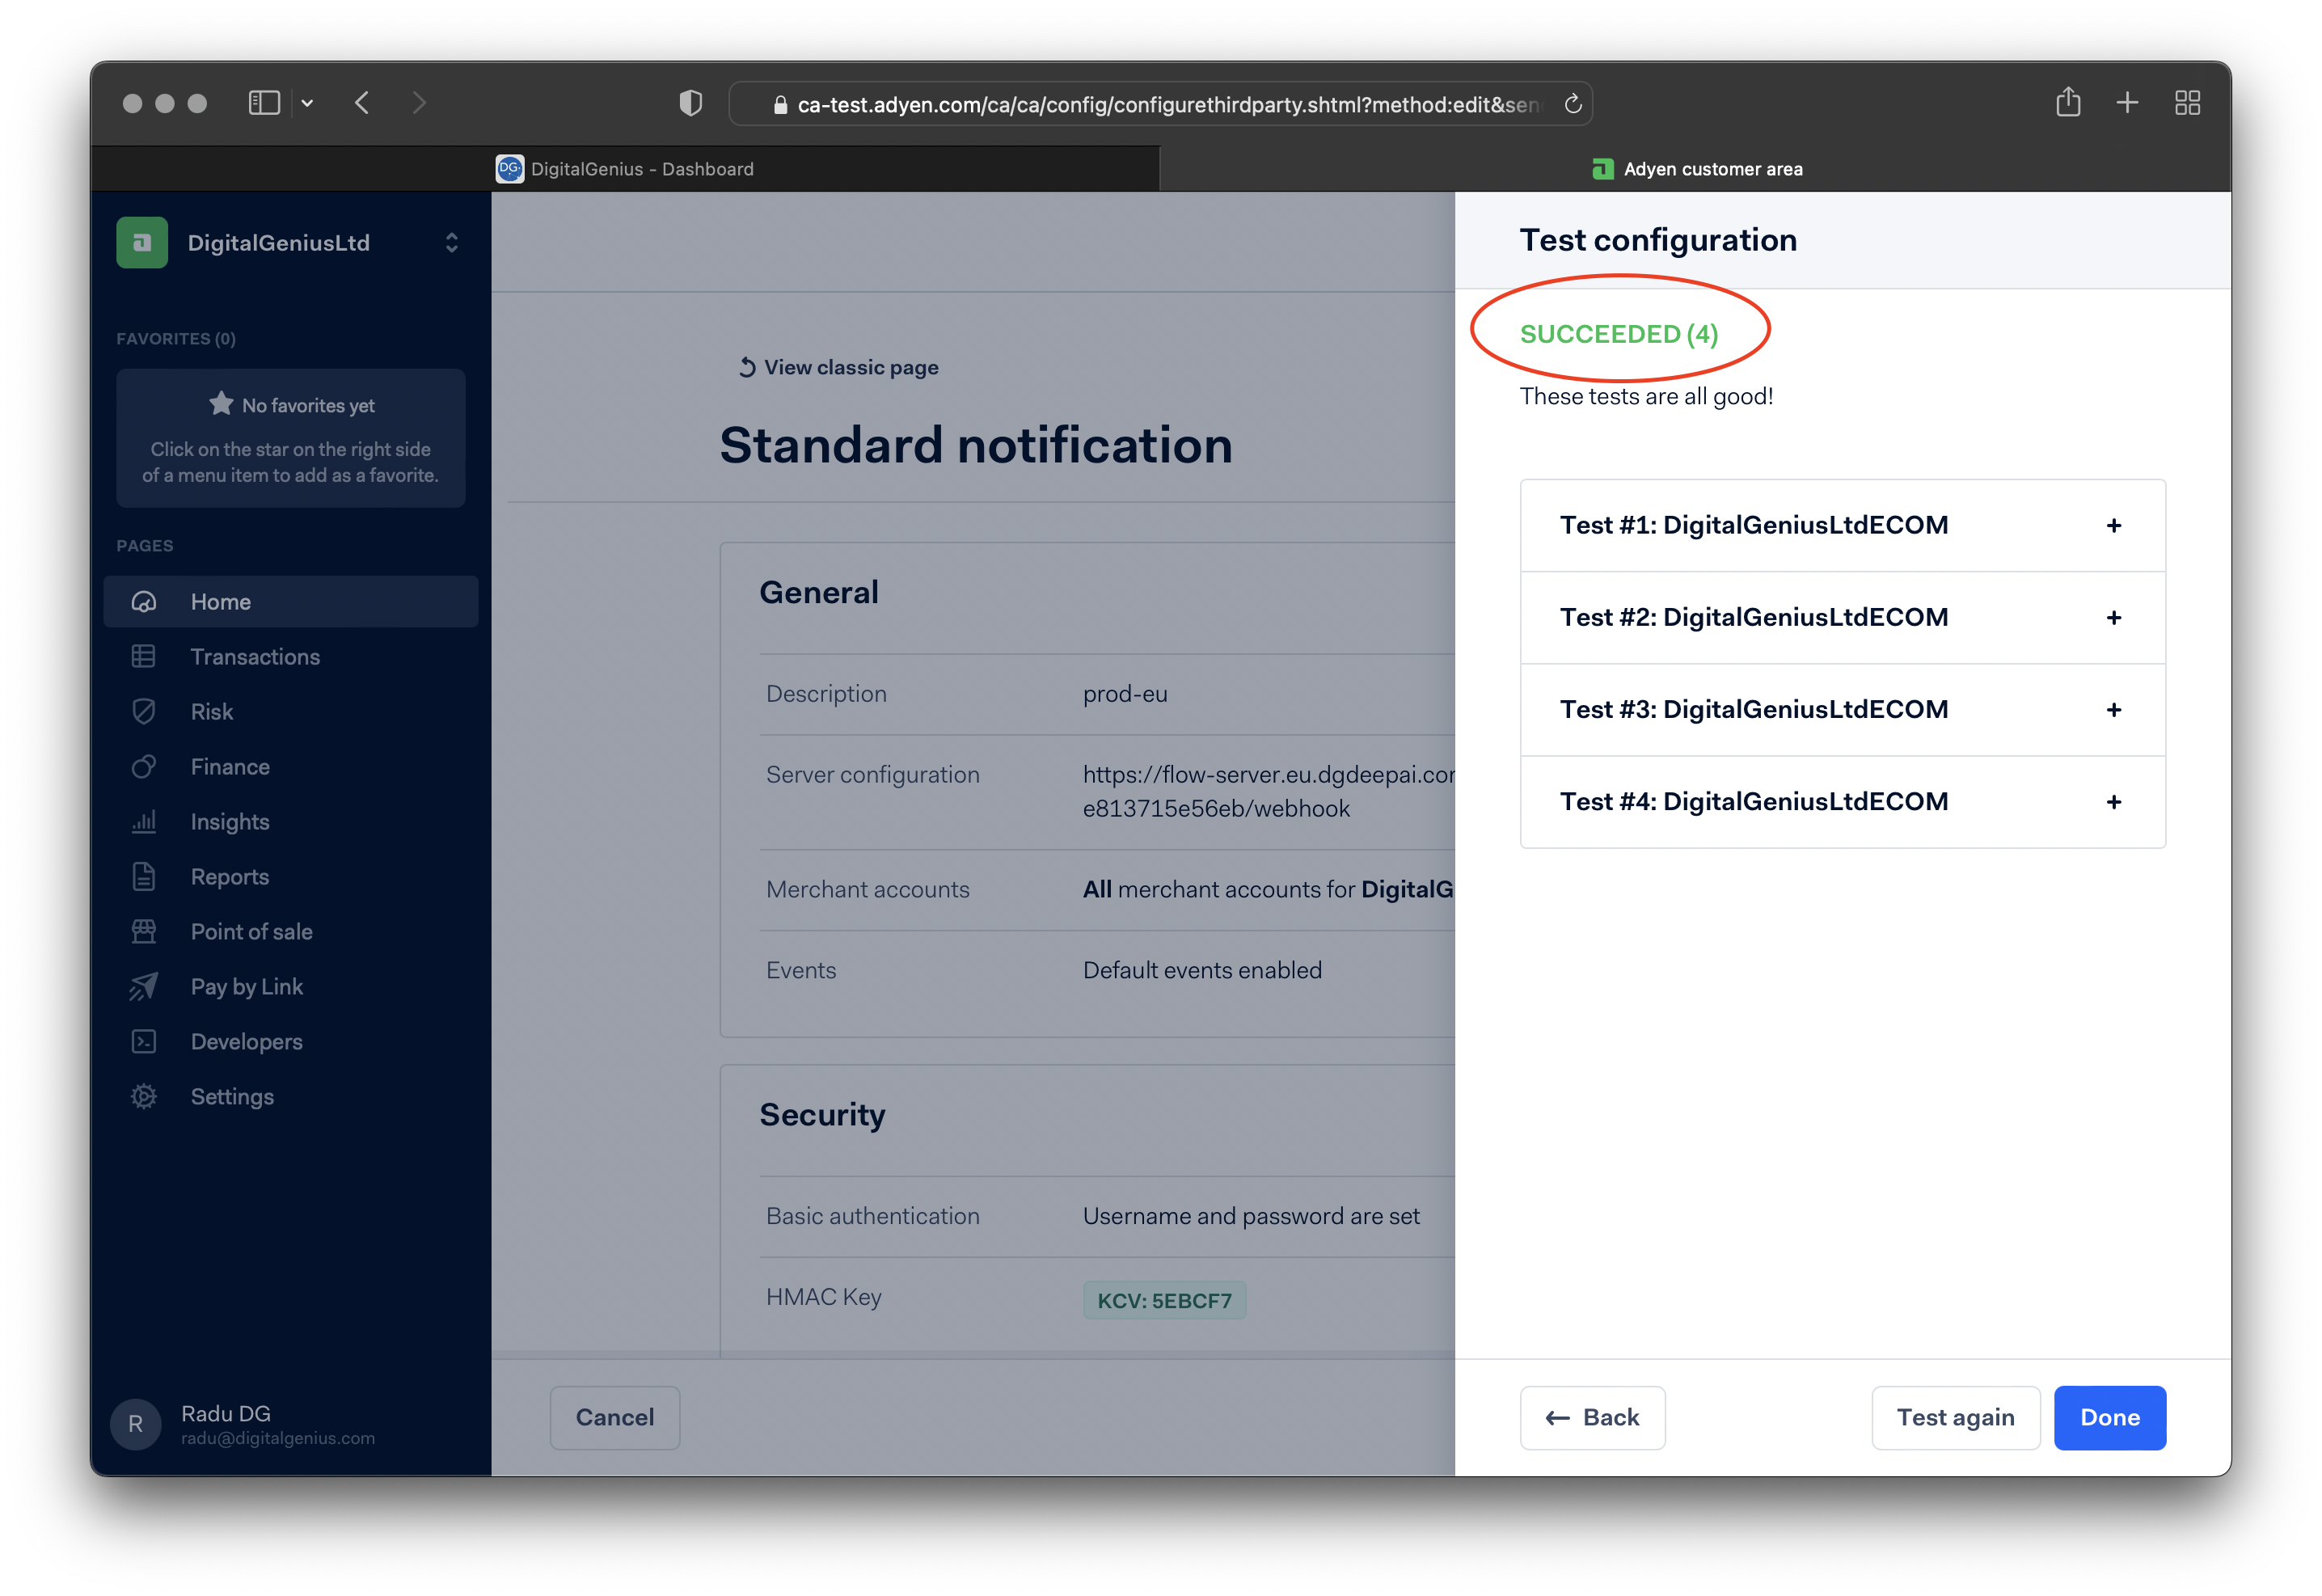
If everything was set up correctly you should see SUCCEEDED.
Updated 3 months ago