Macros
In order for DigitalGenius flows to automate ticket responses we use a combination of a macro and a custom field.
A common pattern for automation is the following:
- Flow template action will generate the text to be automated.
- Flow action/subflow will populate a custom field with the text to be automated.
- Flow action/subflow will apply a macro that references the custom field using Zendesk liquid syntax.
This pattern allows you to use the macro to send a custom response while performing other actions such as updating tags and ticket status.
In this section we will create a macro that will reference the custom field and perform some other actions.
Create Macro
On your Zendesk account go to Admin > Manage > Macros > Add macro.
Give a name to your macro depending on its purpose. If you are creating a generic macro for automation, name it something like "DigitalGenius Automation Macro" but if you are creating a macro with a specific action such setting status to pending then name it accordingly so you have a good understanding on what it's doing.
Add Macro Actions
The goal of the macro is to automate a response to the user while performing other actions on the ticket.
In order to send an automated response to the user, add the following actions:
- Comment Mode
Set this to Public if you would like to send a public reply to the end user. Otherwise set it to Private if you want to keep it as an internal note for agent review.
- Comment/description
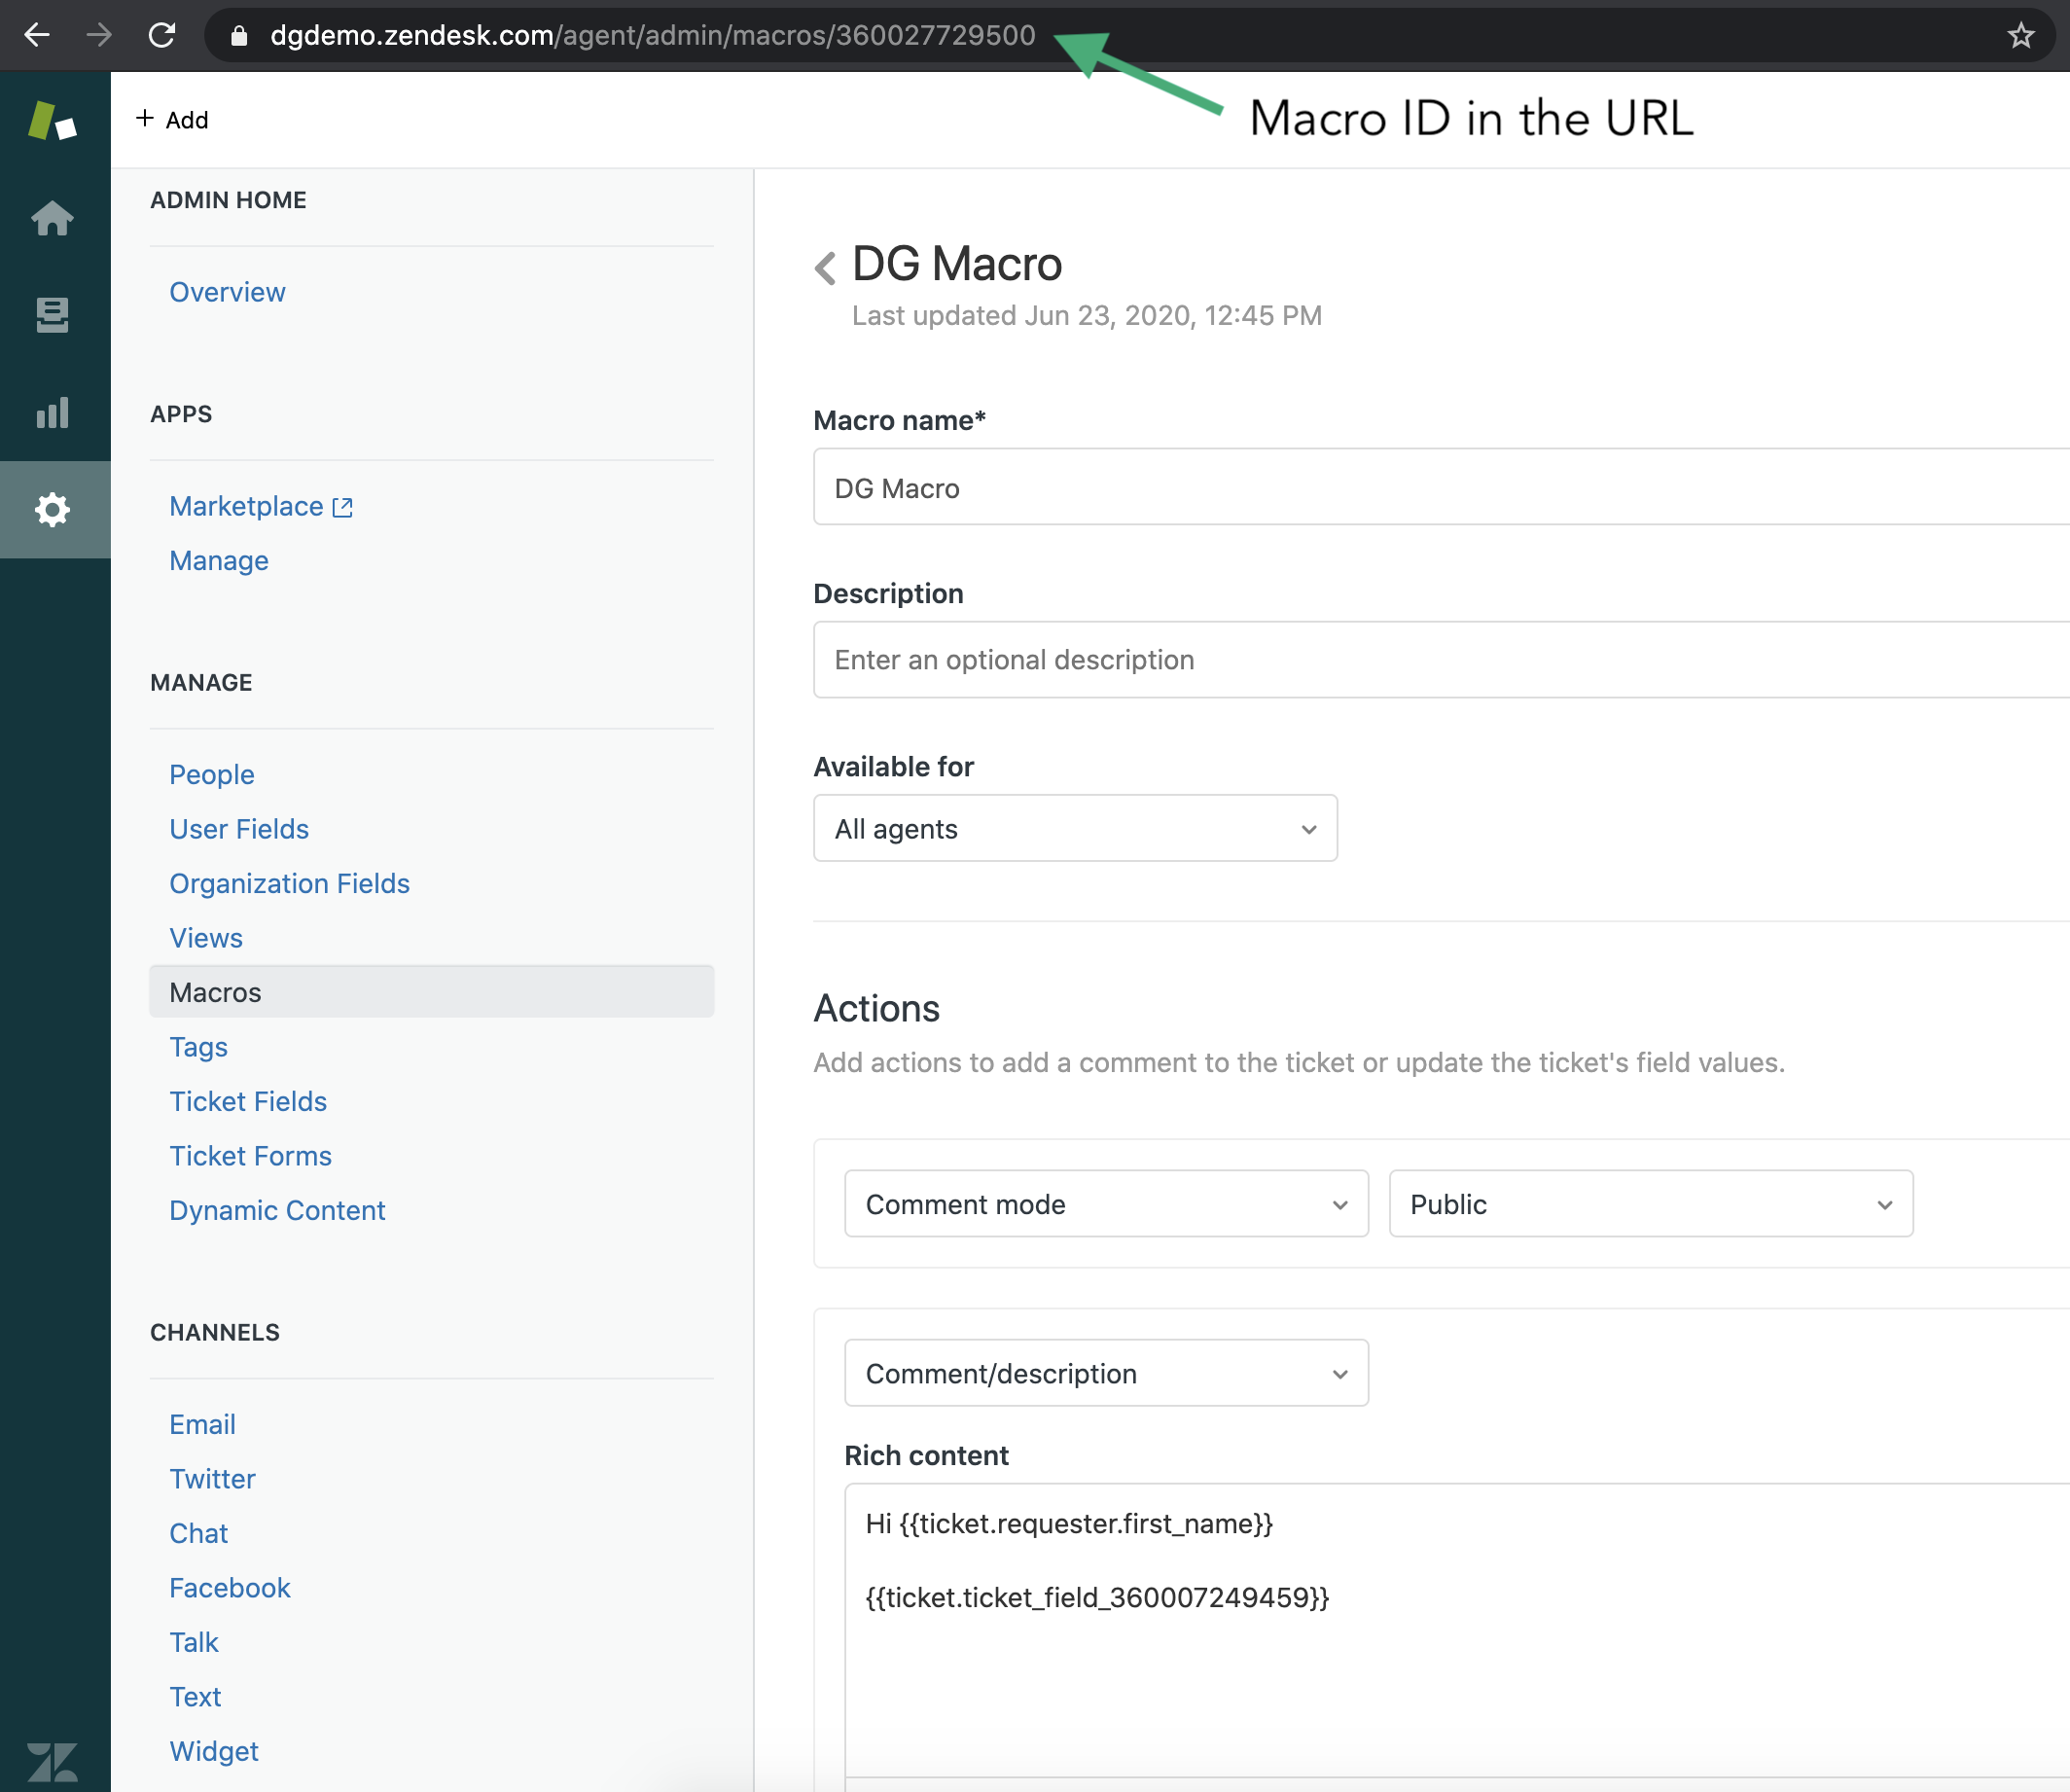
This is where you add the reference to the custom field and configure the template of the response that goes to the end user. For example you could add the following text for a simple greeting followed by automation text but replace 'REPLACE_ID' with the ID of your custom field created earlier in Field :
Hi {{ticket.requester.first_name}}

{{ticket.ticket_field_REPLACE_ID}}
When this macro is applied to the ticket, it will automatically populate the {{ticket.requester.first_name}} placeholder with the first name of the ticket requester and {{ticket.ticket_field_REPLACE_ID}} will be updated with the automate text from the custom field.
- Status
If you are doing a public response to the end user you probably also want to update the ticket status to something like Pending or Solved. Therefore, add another action to set the status.
Get the Macro ID
Once you are finished with adding the macro actions. Click Save and it will take you to the list of macros.
Next we need to get the ID of the macro we just created/updated. Open the macro again and copy the ID from the URL as per the screenshot below.

Macro ID
Update the Flow
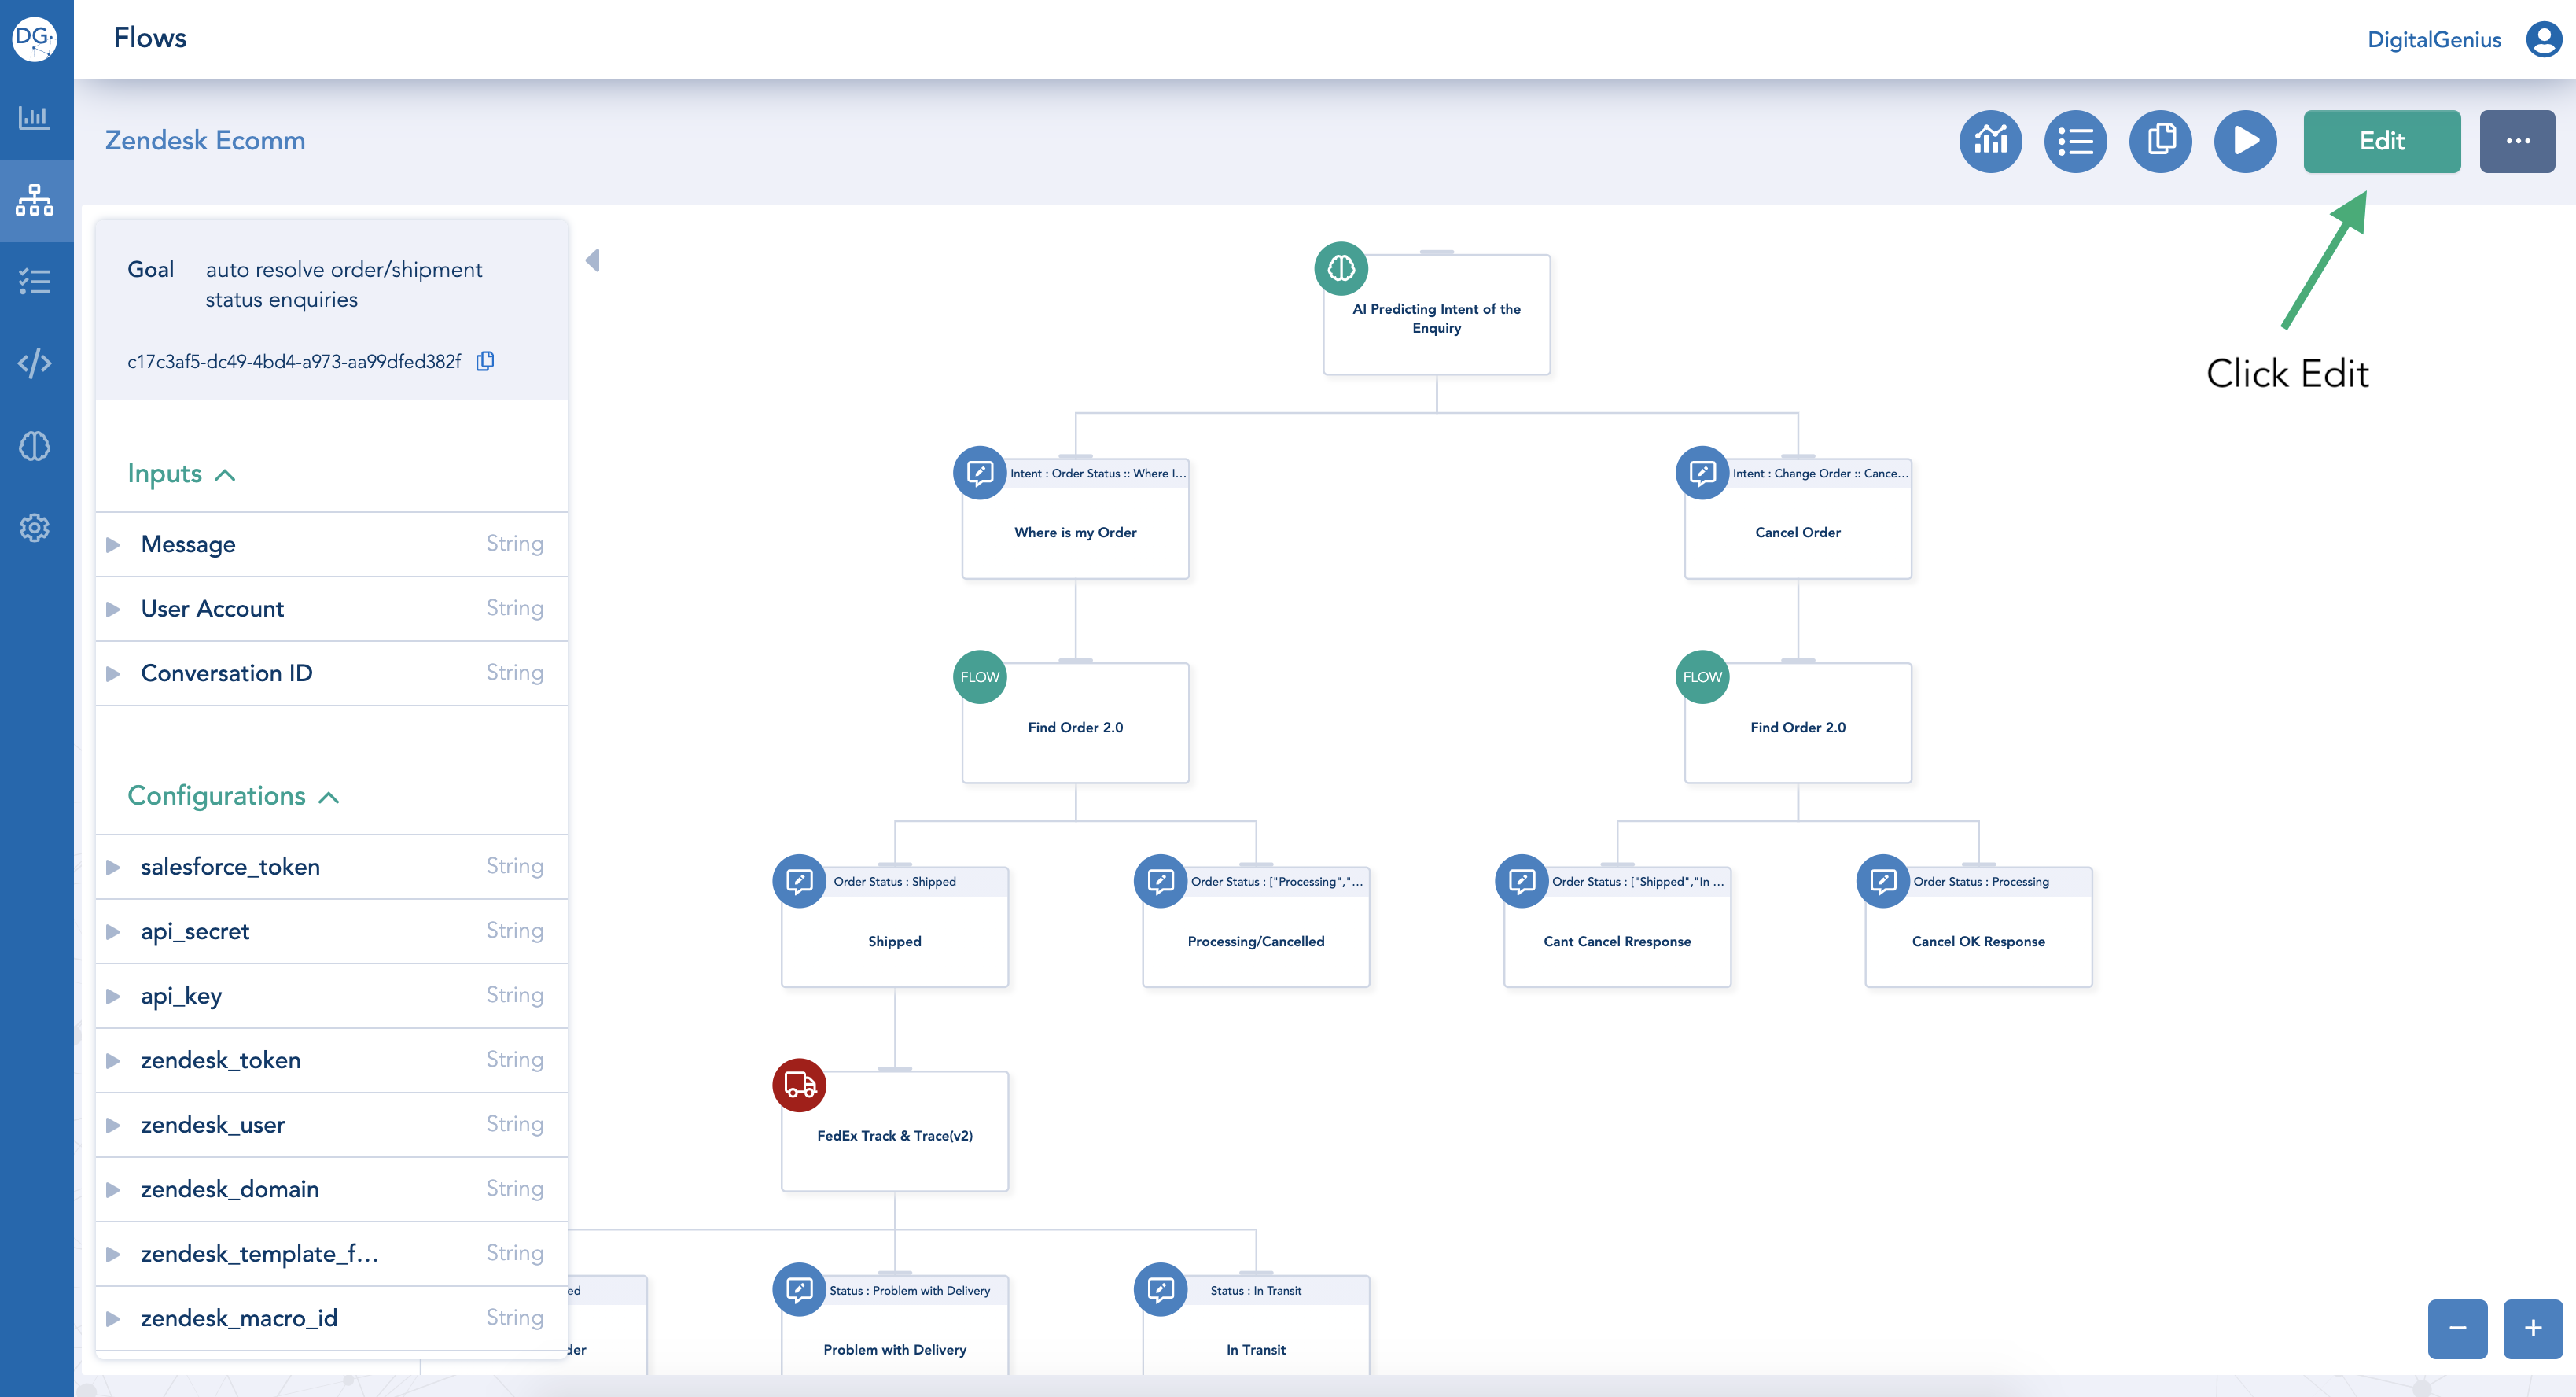
Now that we have the ID of the macro, we need to update the main flow to use it. Go to DigitalGenius dashboard and open your main flow.
Click the Edit button to start making changes to the flow.

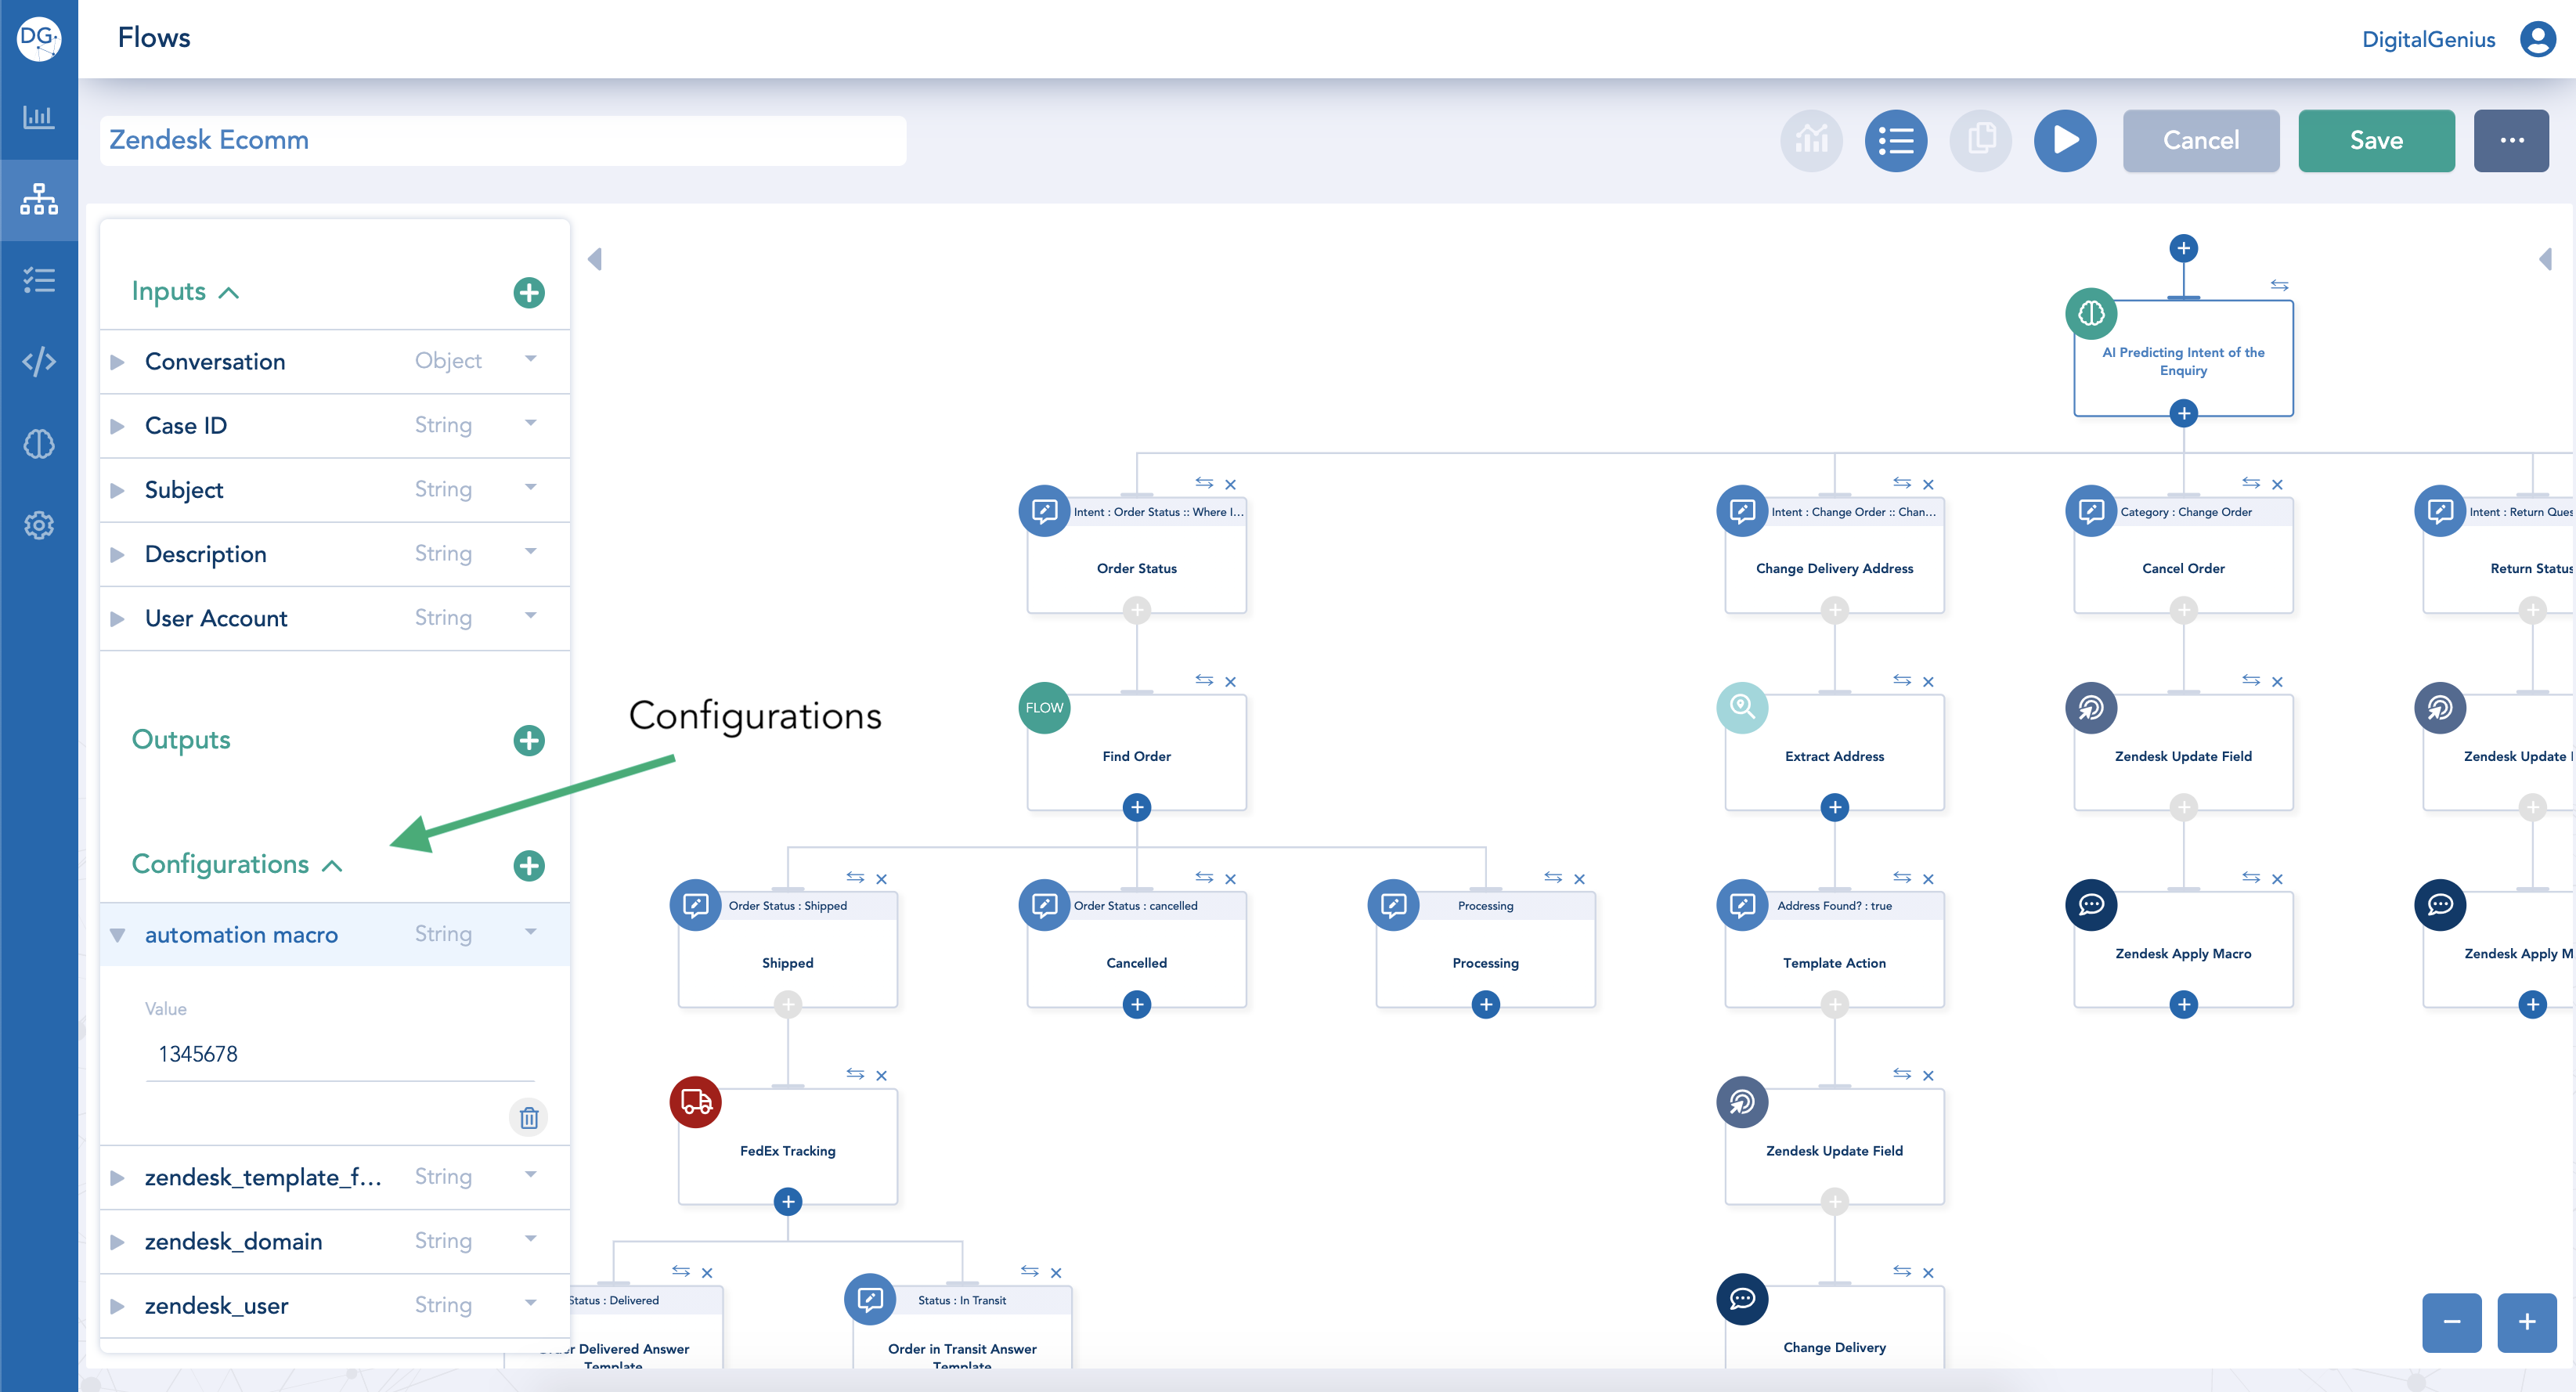
In the list of configurations find or create a configuration called automation macro and set its value to the ID of the macro you created earlier. Then Save the flow.

Configurations
Updated over 1 year ago
