Gladly Implementation Guide
Gladly Implementation Guide
To integrate gladly with DigitalGenius chat, you will need a Gladly account with the following permissions:
- Administrator
- API User
Step 1 - Create Gladly App
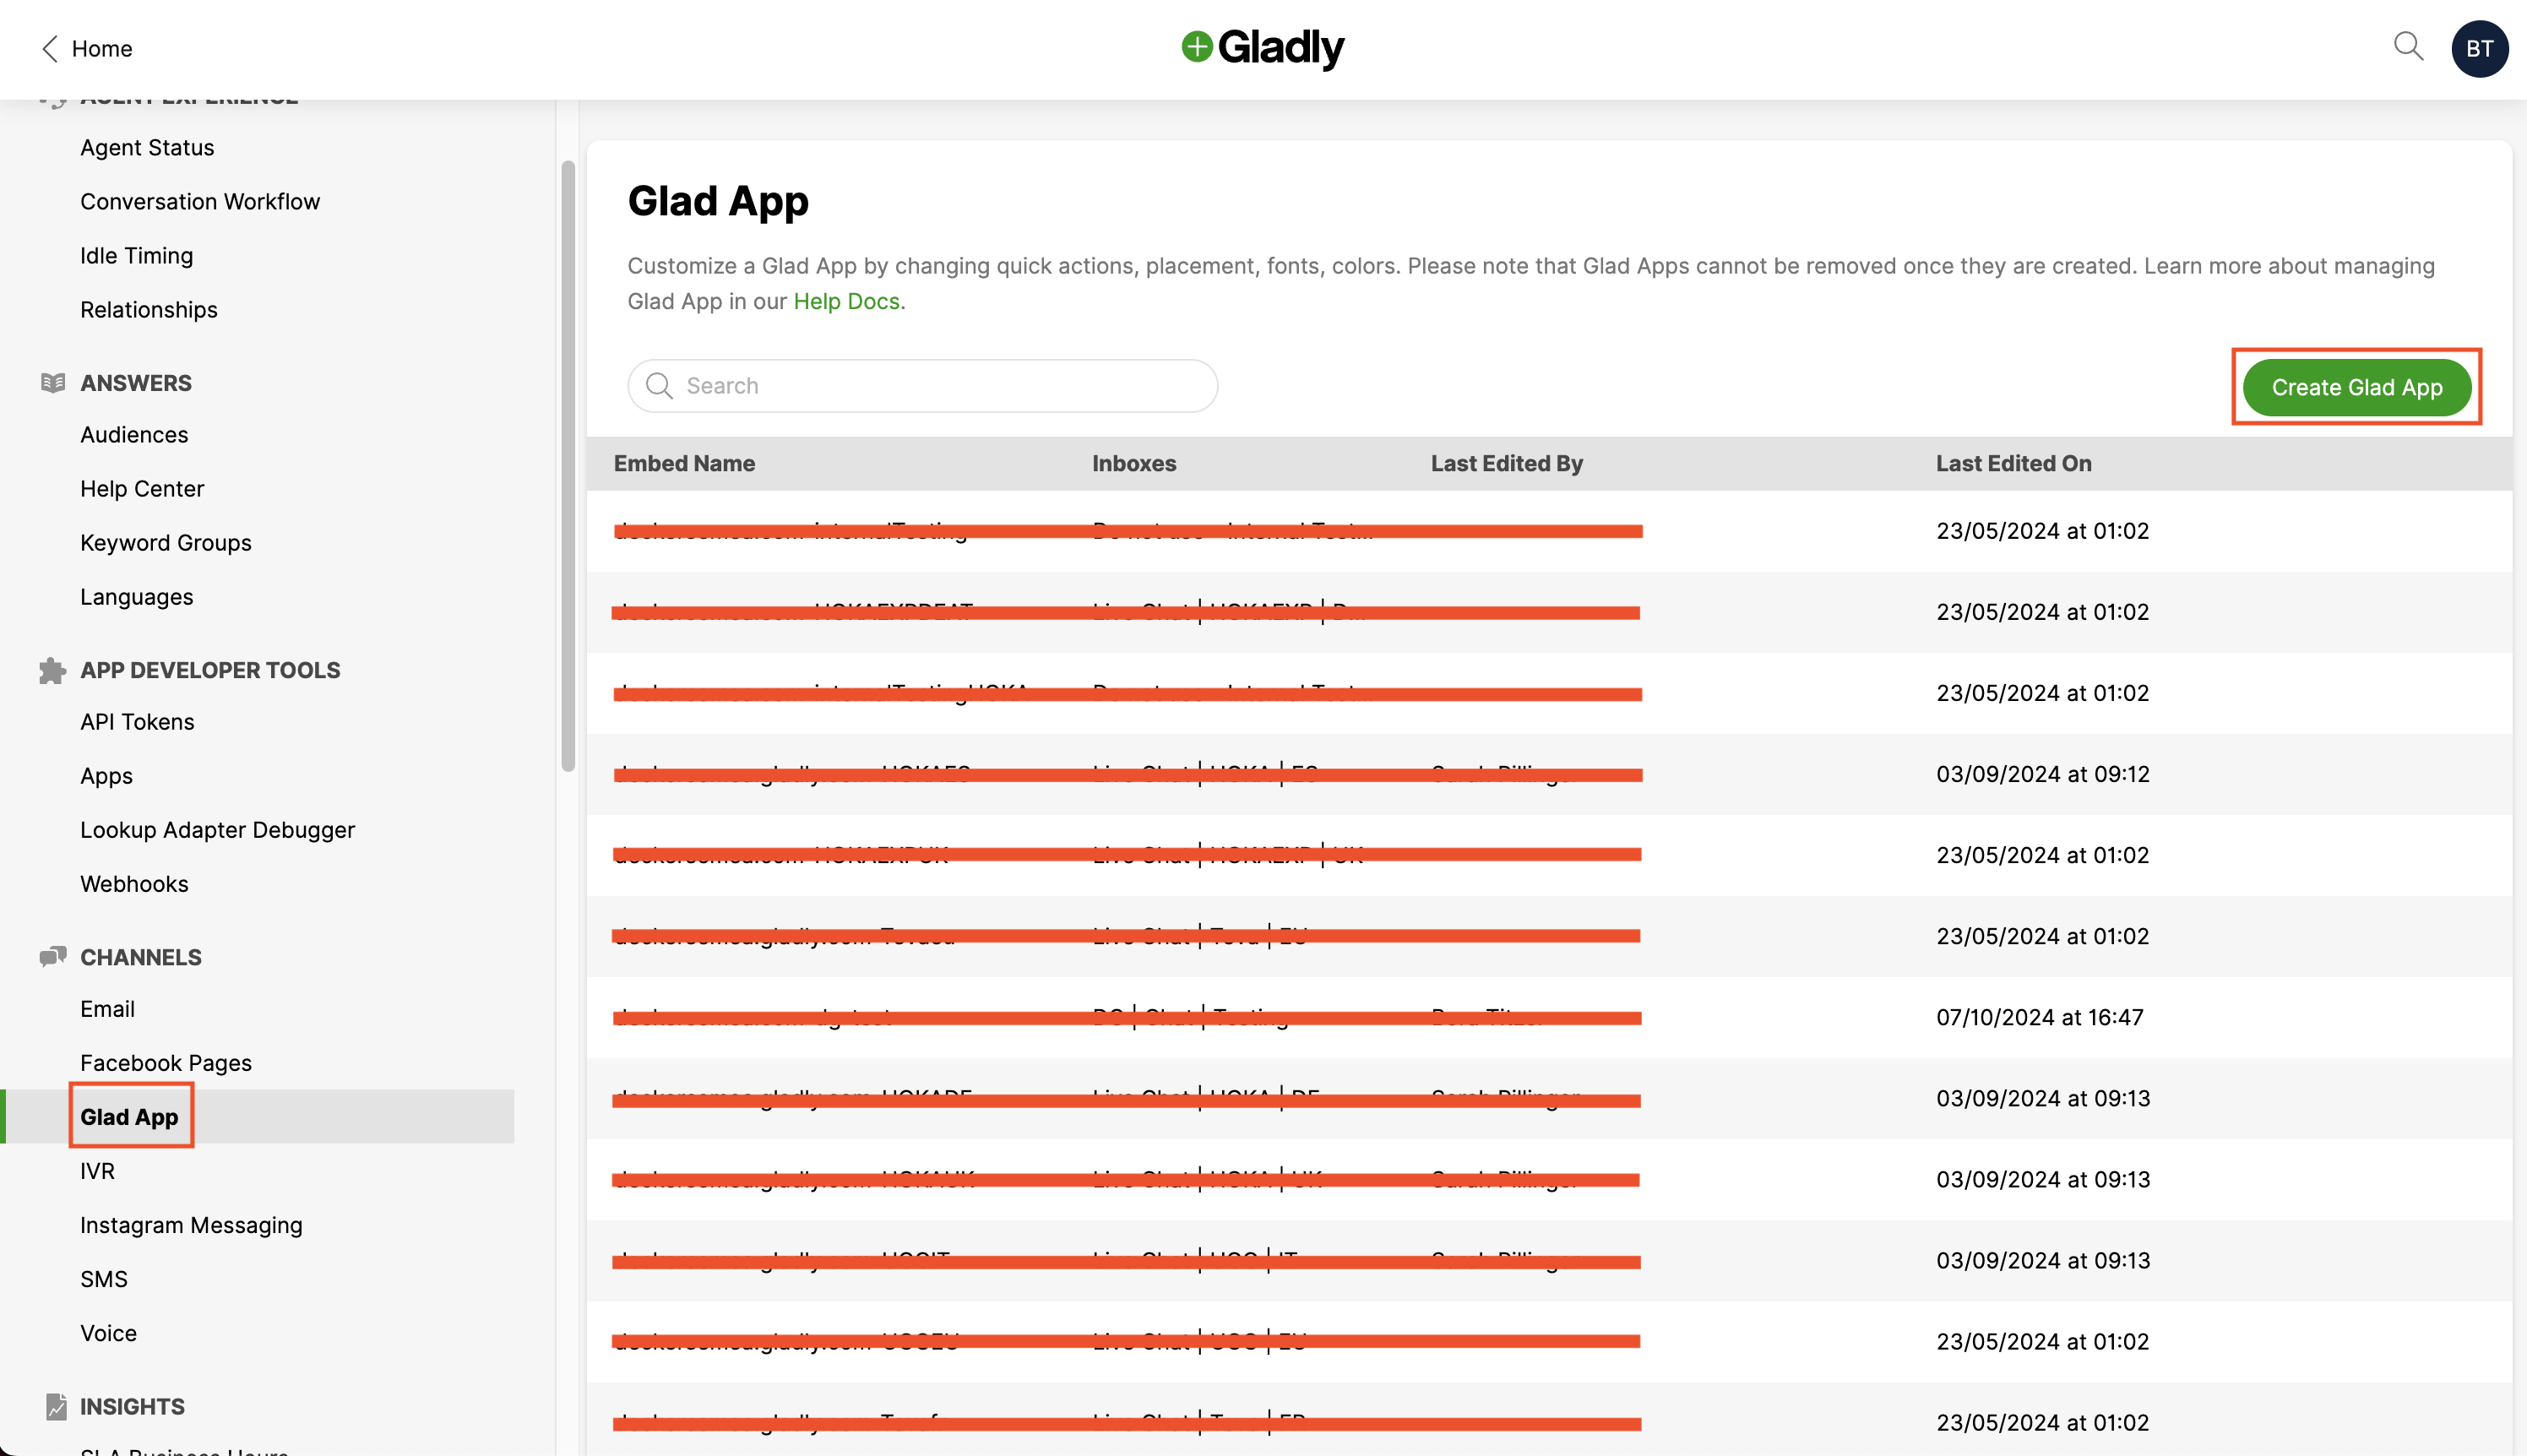
Login to Gladly and navigate to Settings.
Select Glad App under the CHANNELS category.
Select Create Glad App

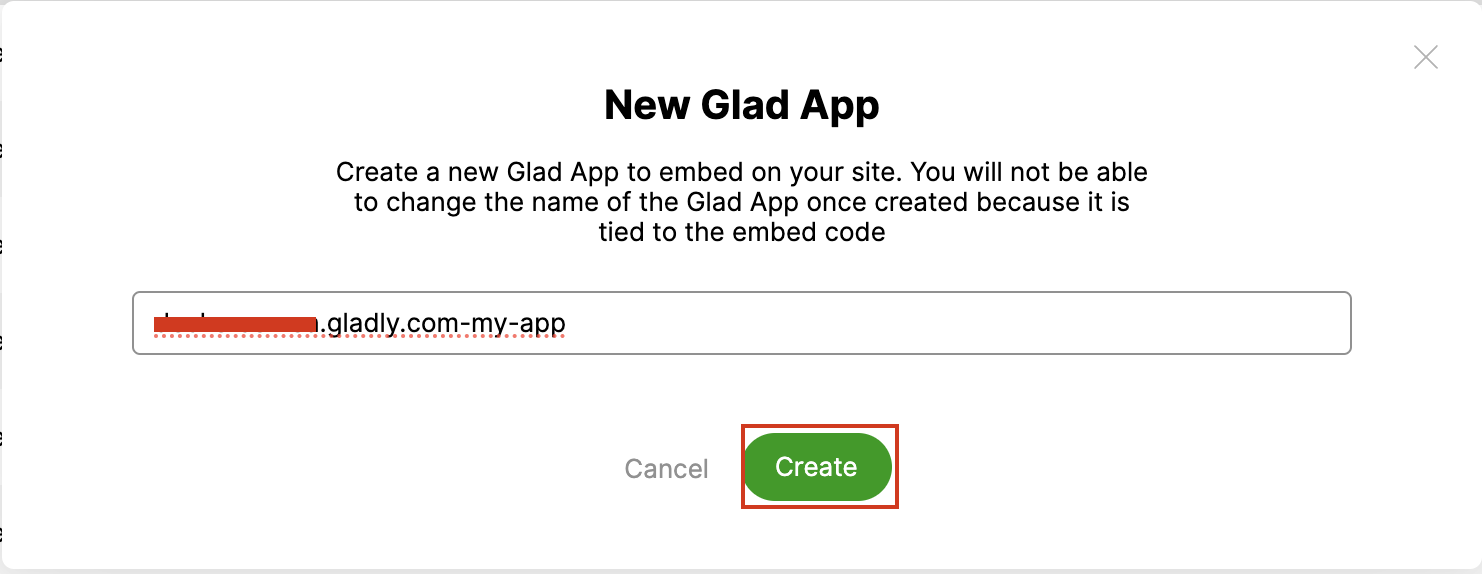
Give the app a suitable name, we'll need this name at a later stage.
Select Create.

Step 2 - Configure Gladly App
Next we need to configure the gladly app:
- Deselect Enable Search and Quick Actions
- Deselect Powered by Gladly
- Deselect Onboarding
The remaining settings can be configured to your customers needs.
DigitalGenius automatically style the Gladly widget to align as closely as possible with the DG widget.
Select Save
Step 3 - Create API Token
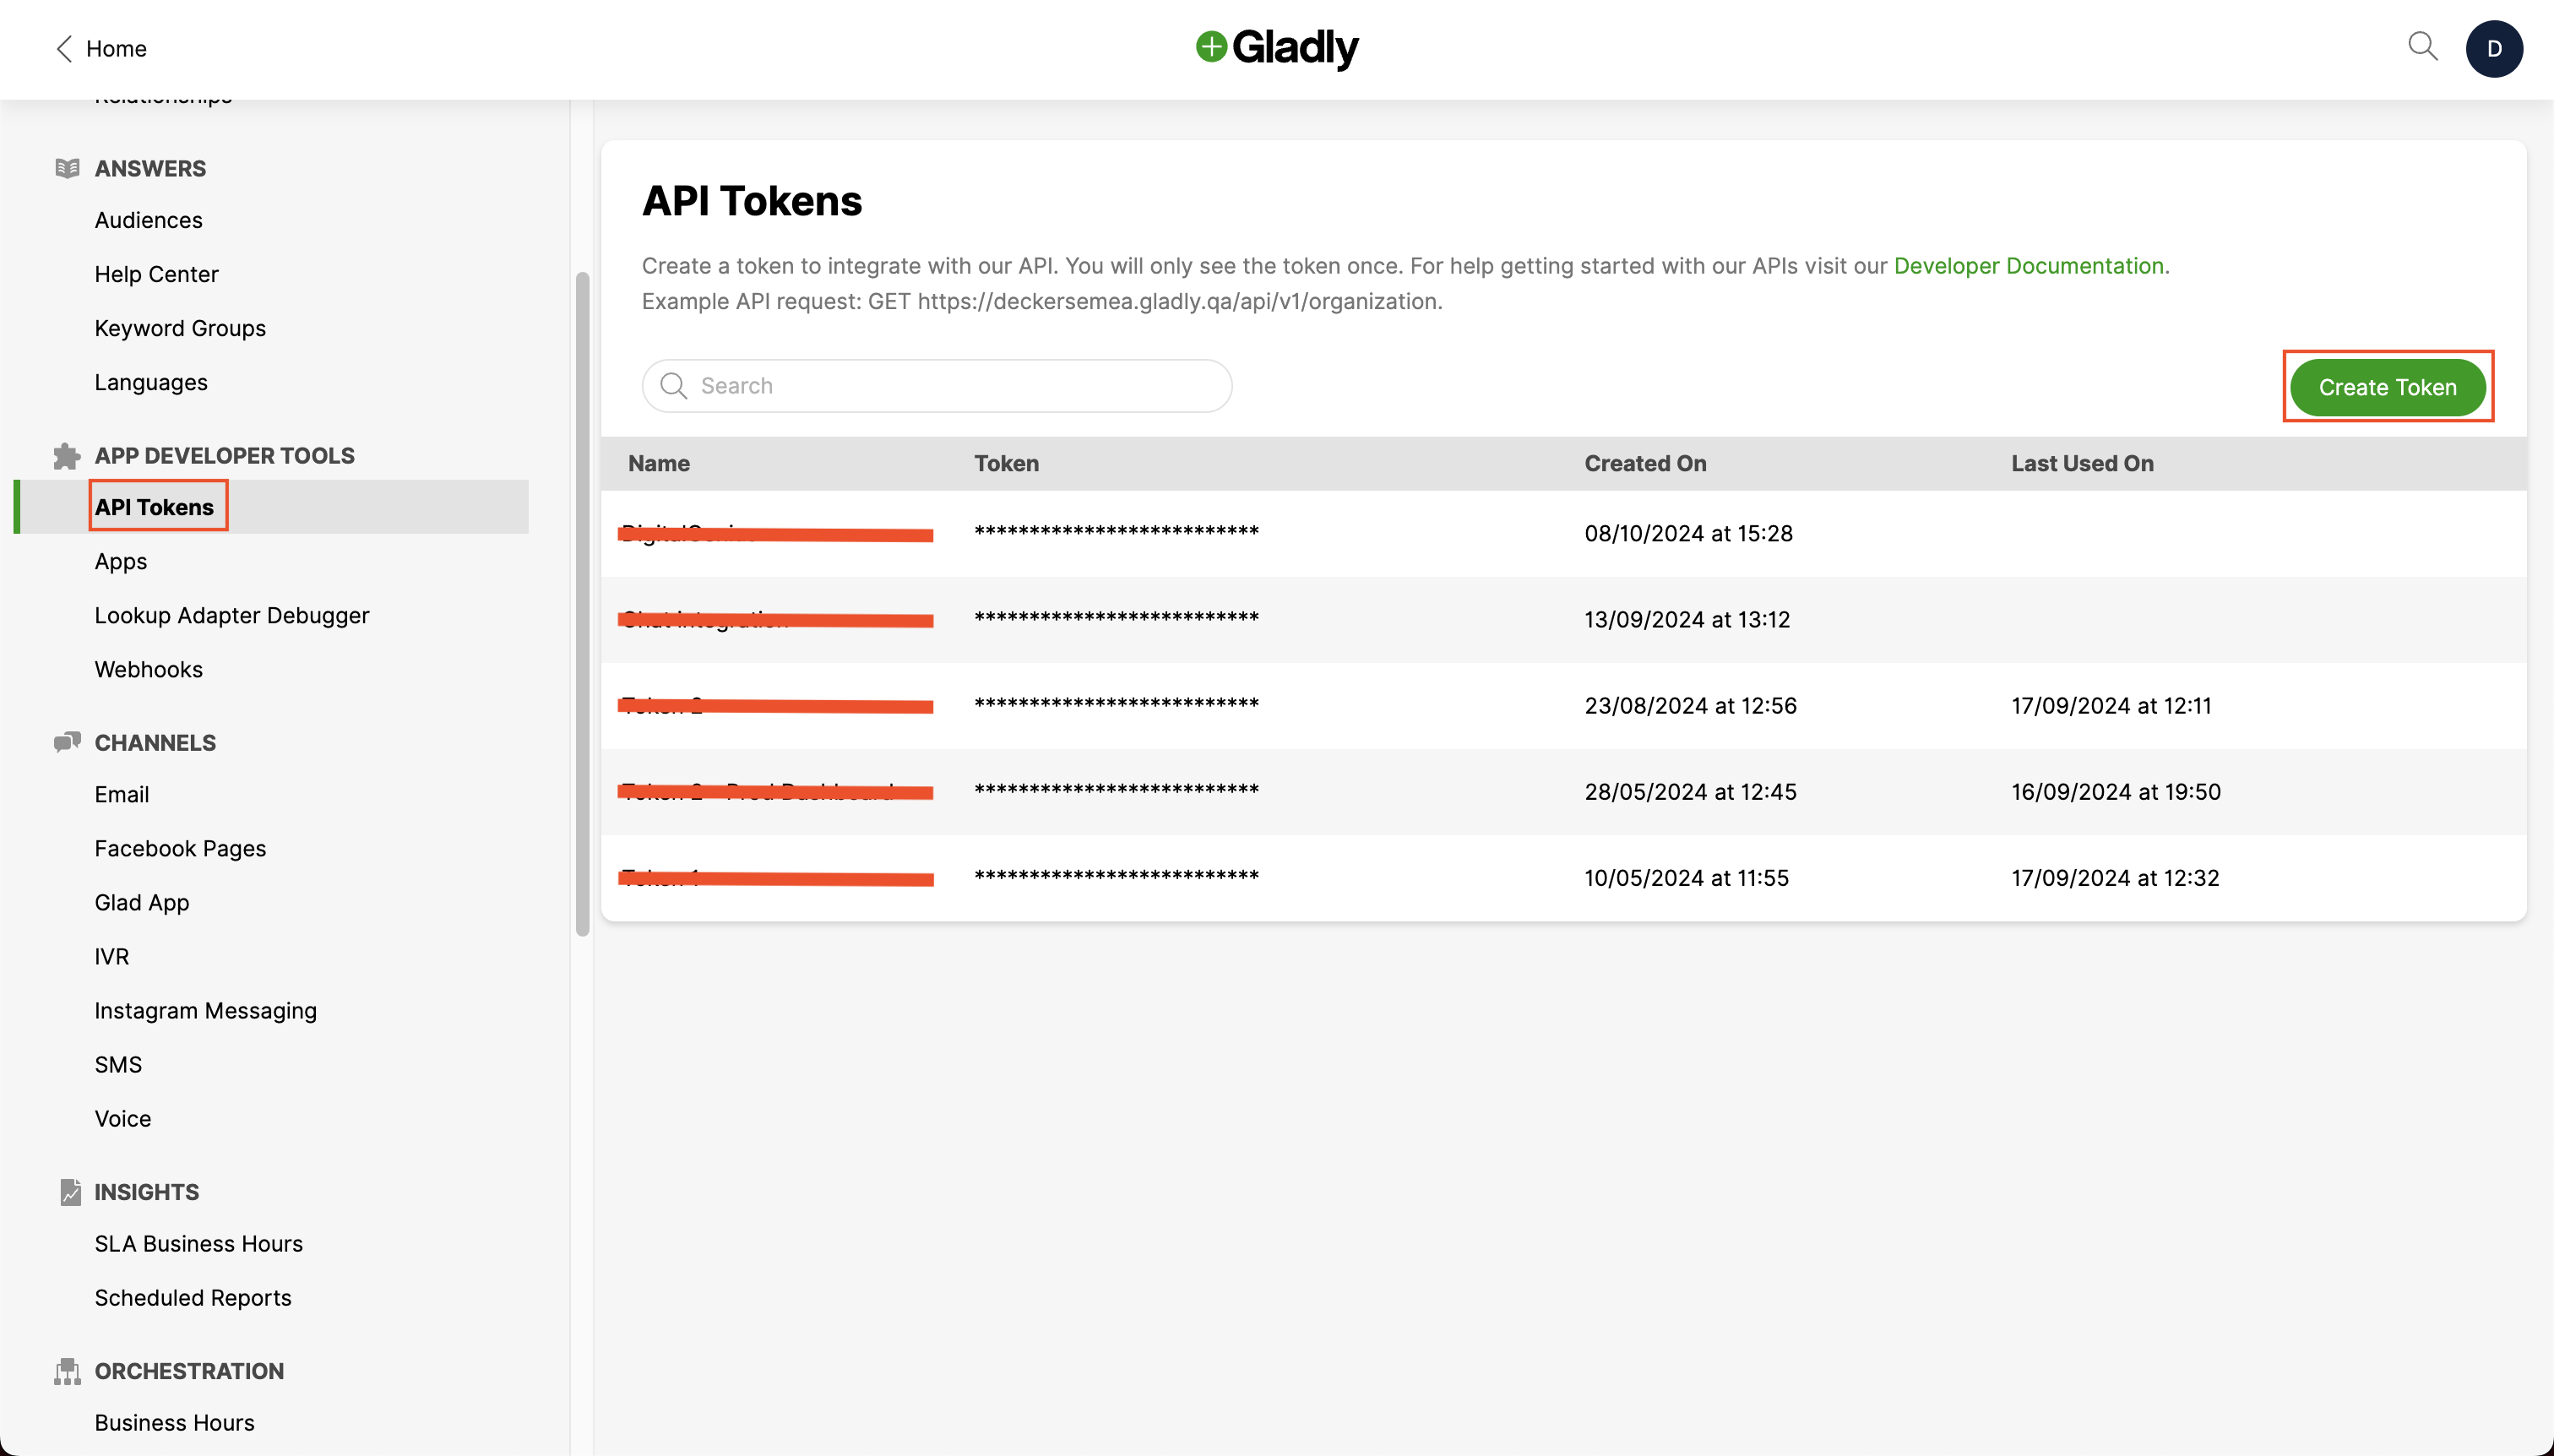
Navigate to API Tokens under the APP DEVELOPER TOOLS category.
Click Create Token.
Give the token an appropiate name and save it somewhere safe.

Step 4 - Configure Handover Object
In Flow, ensure the Agent Handover activity JSON object has the following properties:
{
  "crmPlatform": "gladlySDK",
  "appId": "<account>.gladly.com-<app-name>",
  "apiToken": "********",
  "apiUserEmail": "[email protected]",
  "accountDomain": "somedomain.gladly.com",
  "topics": [{ "key": "DG_CHAT", "value": "dg-chat-online-handover" }]
}- crmPlatform - Must be
gladly - appId - The id of the Glad App created in step 1 e.g
digitalgenius.gladly.com-my-app - apiToken - The api token created in step 3
- apiUserEmail - The email of the user you created the api token with in step 3.
- accountDomain - The customers gladly domain e.g.
digitalgenius.gladly.com
Sandbox AccountsIf you're testing the integration on a sandbox account, it's important to ensure
accountDomainends in.qarather than.com. Otherwise the DigitalGenius transcript will not be passed to the Gladly conversation.
Step 5 - Update Chat Widget Config
  window.DG_CHAT_WIDGET_CONFIG = {
    crmSDKPlatform: 'gladly', // Required
  }
Certain Gladly events will add a system message to the DigitalGenius conversation, which can be optionally configured via lang:
{
  "agent": {
    "agentEndedChat": "Agent left the chat",
    "switchedDevice": "Chat has been transferred to another device",
    "timedOut": "Chat has ended due to timing out",
    "connectError": "Failed to connect to an agent, please try again",
    "outsideBusinessHours": "Live chat is unavailable as it's currently outside of our business hours",
    "highDemand": "Live chat is unavailable due to high demand, please try again later"
  }
}- agentEndedChat - Added when the agent ends the conversation
- switchedDevice - Added when the user continues the conversation on a different device
- timedOut - Added when the gladly conversation times out
- connectError - Added if an error occurs during Gladly initialisation
- outsideBusinessHours - Added if Gladly is unavailable due to business hours
- highDemand - Added if Gladly is unavailable due to high demand
Step 5 (Optional) - Create Freeform Topic
If you need to pass topics to the created ticket, you first must create a free form topic in the Gladly UI.
You can do this in Settings > Orchestration > Freeform Topics.
From here, create a Freeform Topic with a suitable Display Name such as DigitalGenius (this is visible to agents).
Also define a Key, this will be the key of any topics you have defined in the flow handover object.
e.g. "topics": [{ "key": "DG_CHAT", "value": "dg-chat-online-handover" }]
Updated 12 days ago
